

 Introducing the new AI-powered tool “Mr. Wizard Public” #

- A new additional tool for Mr. Wizard called “Public Mr. Wizard” has been implemented, which allows you to incorporate all the benefits of Mr. Wizard into your website. This means it is no longer just a tool that helps your operation’s agents, but will also directly help your customers by providing an advanced chat integrated anywhere on your website.

Mr. Wizard Public training will be the same as the one Mr. Wizard uses for agents.
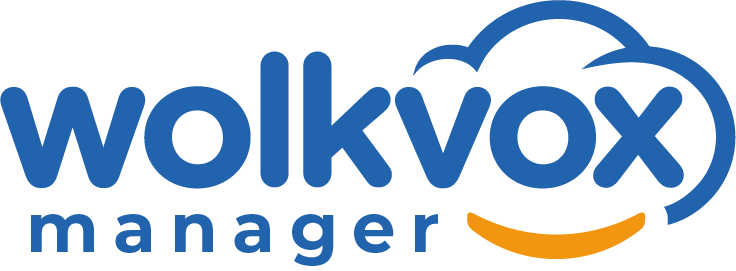
- Go to the wolkvox Manager settings.
- Go to the “Mr. Wizard” tab.
- Go to the “Training” tab.
- Go to the “Training Files” tab.
- Upload each PDF file.
- All PDF files used for training will be listed in the main table.
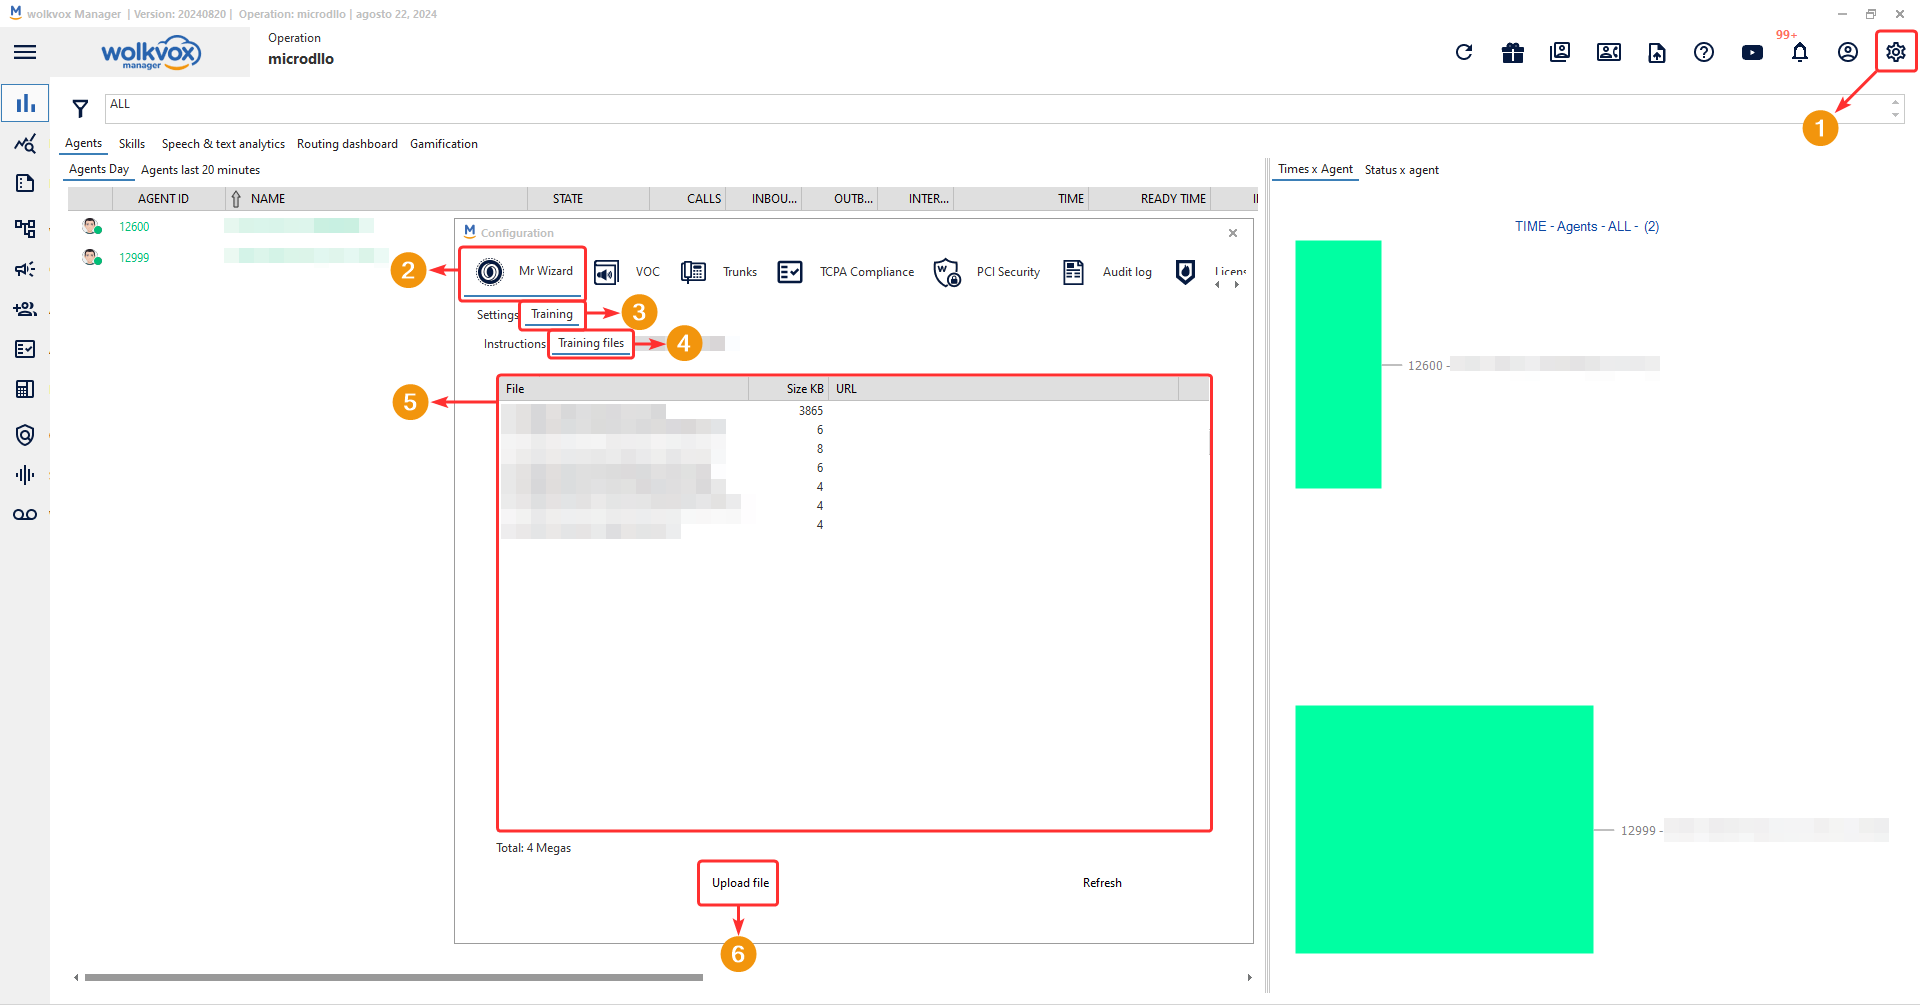
- This checkbox enables or disables Mr. Wizard Public.
- The toggle allows you to enable or disable the space for a logo in the upper left part of the component.
- If the previous toggle is enabled, you can add a logo from your computer files, either in JPG or PNG format with a recommended dimension of 100px wide and 35px high.
- This field configures the initial text of the space where the client asks questions to Mr. Wizard Public.
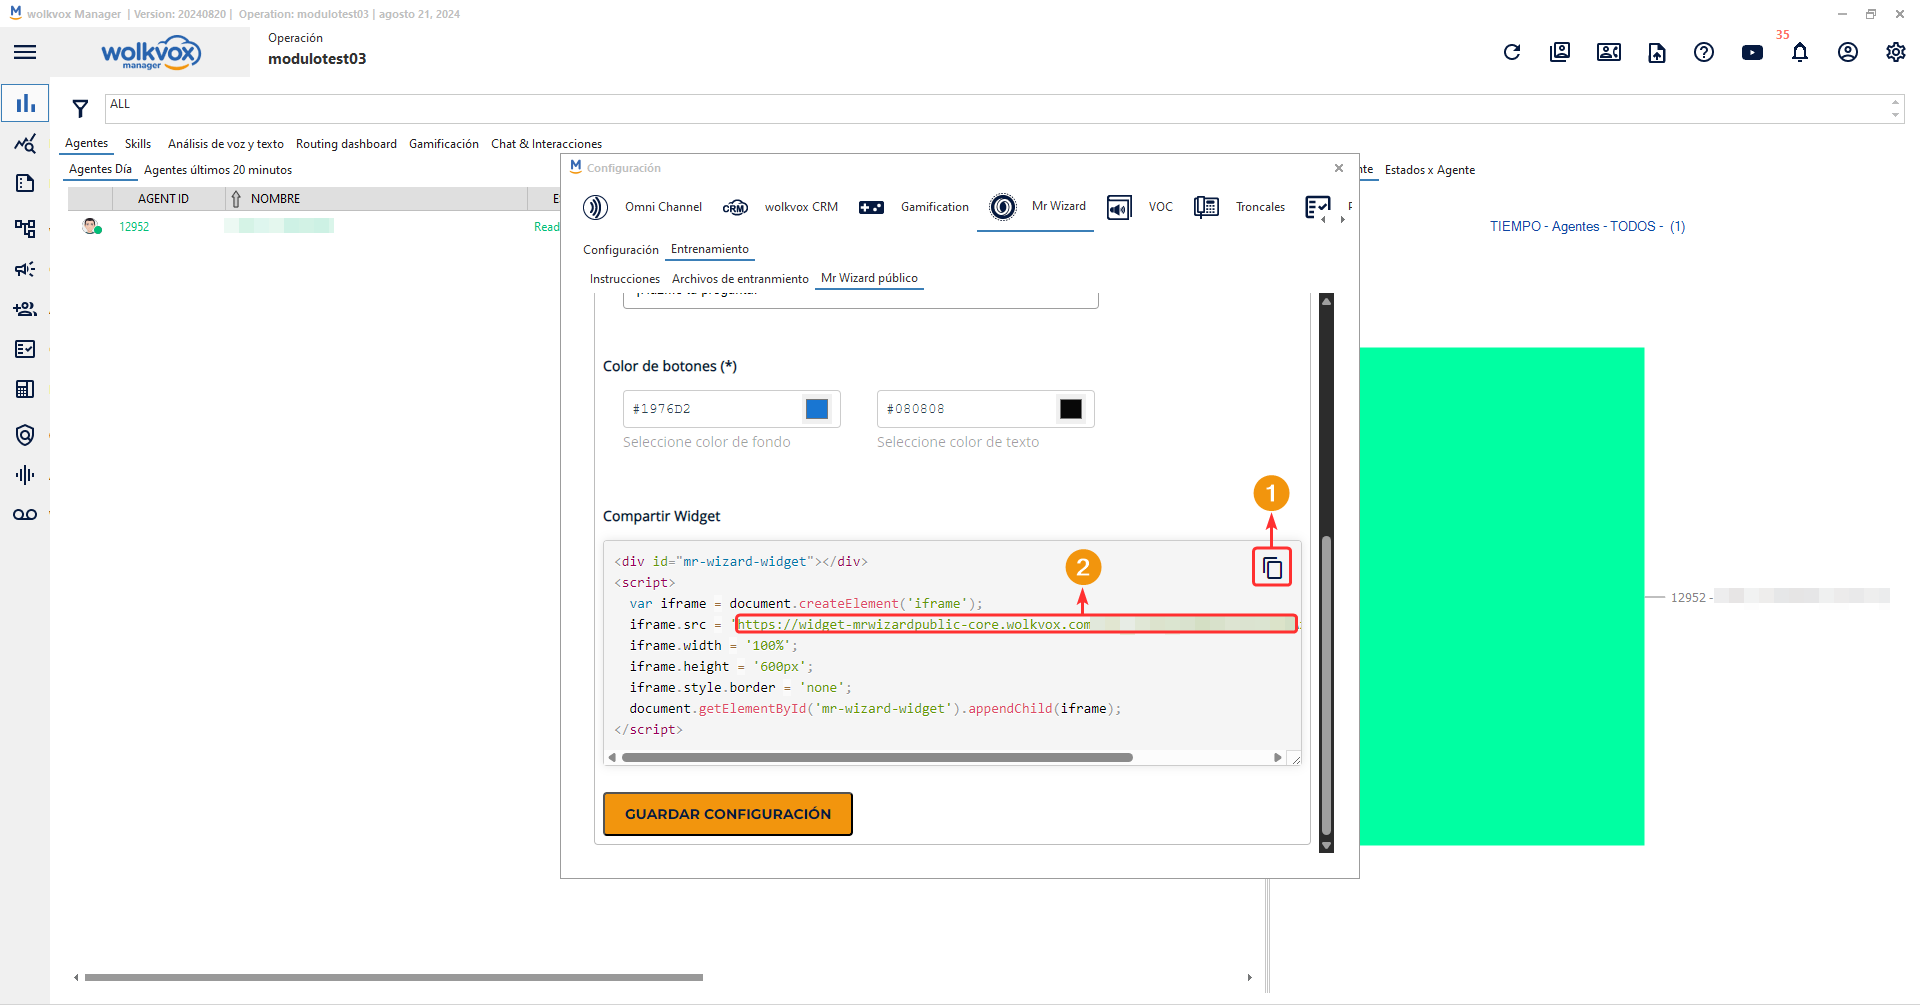
- The background color modifies the color of the message send button and the text color modifies the header text.
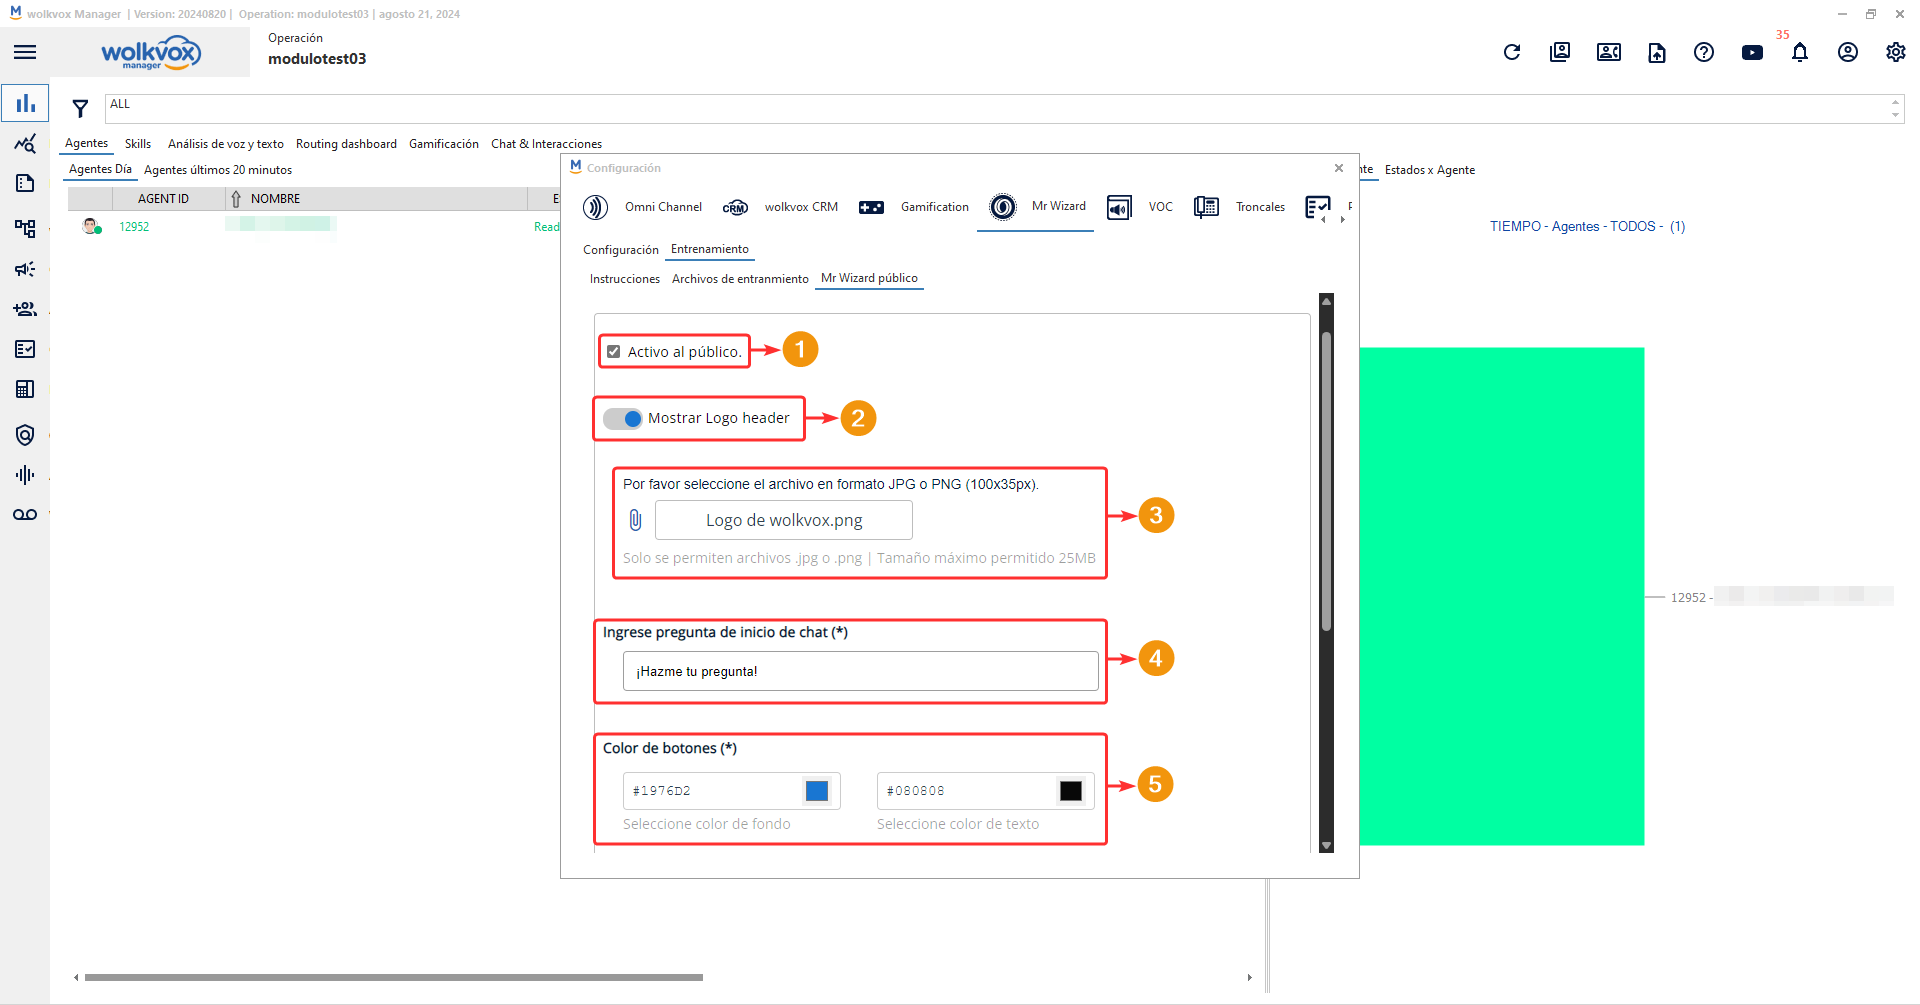
Whenever you make changes, you must click the “Save settings” button.
To incorporate the tool you have two options:
- This button allows you to copy all the iframe code.
- You can also go directly to the link found in the source (src) of the iframe.
New option for the campaign creation API #
- Starting with this version, you can use the “amd” field in the body of the “4. Campaign Creation” API to specify the desired AMD (Answering Machine Detection) configuration in predictive campaigns.
- Thanks to this new feature, you will not have to open the Wolkvox Manager application to edit the AMD option after creating each campaign, optimizing campaign management times.
- To access the official API documentation, click here.
- You can also access the public collection in Postman Collections, click here to go.
New field in the real-time chat reporting API #
- Now, when consuming the “8. Real-time Chat Report” API, the customer’s phone number will be displayed in the “customer_phone” field.
- Thanks to this new feature, you get easier customer identification, improving real-time chat attention and management.
- To go to the official API documentation, click here.
- You can also access the public collection in Postman Collections, click here to go.
