This component allows adding an Artificial Intelligence bot that will answer the questions posed by the customer or can also receive an order, process it, and provide an effective result. In other words, this component enables adding an AI bot that will respond to customer inquiries or can receive an instruction, process it, and give an effective outcome. The component comes pre-trained with general knowledge. It is necessary to train it with a context to respond to questions according to that context given to the bot.
With wolkvox NLP, you can personalize your bots to create increasingly human-like virtual agents.
It is located within the component group called “Cognitives” and is available in all routing types (Voice, Interaction, Chat, and CRM + Webhook).
Configuration #
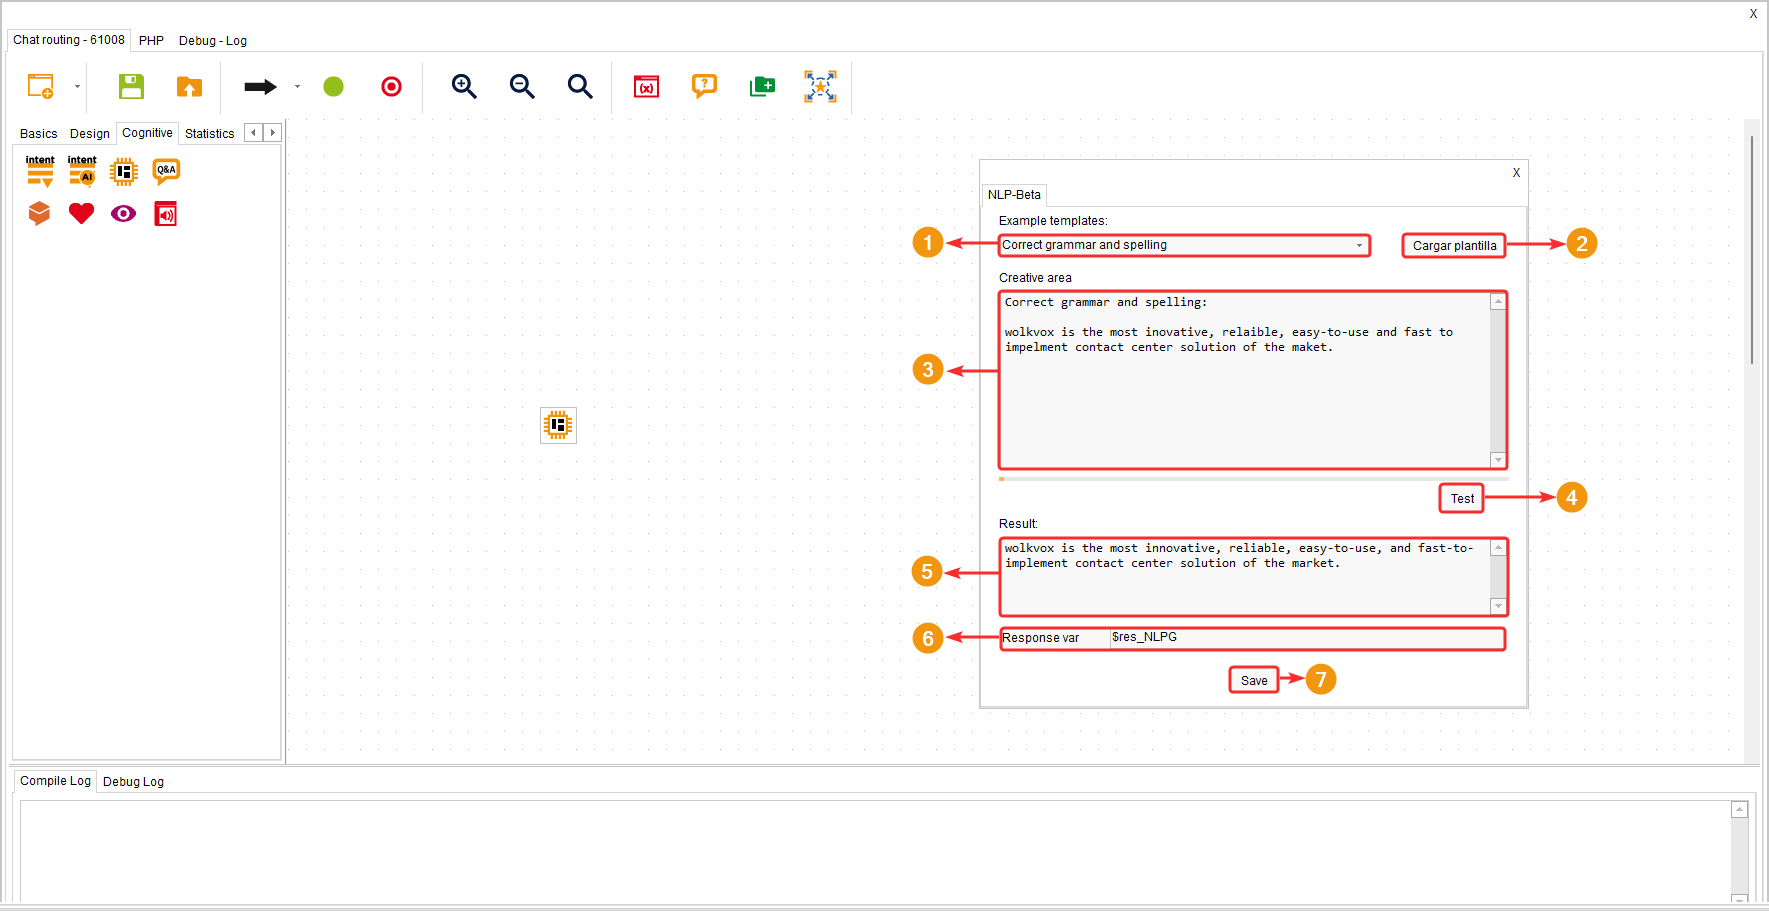
- Select a template or write the name of a new one.
- Click on “Load template” to load the selected template or create a new one with the name written in the previous field.
- In “Creative area,” write the context that the bot should consider to respond to the questions asked by the client.
- With the “Test” button, you can test the bot and verify that it responds according to its requirements.
- In “Result,” you can see what the bot would answer based on the context and instructions you provided.
- In “Response variable,” write the name of the variable where you want to save the obtained result.
- Click “Save” to apply the changes.