This component allows you to add an AI-powered bot that will answer the questions asked by the customer. It is mandatory to train the bot with the topics you want the bot to have knowledge about.
Configure questions and answers on essential topics for your operation.
It is located within the component group called “Cognitives” and is available in all types of routing (Voice, Interaction, Chat, and CRM + Webhook).
Configuration #
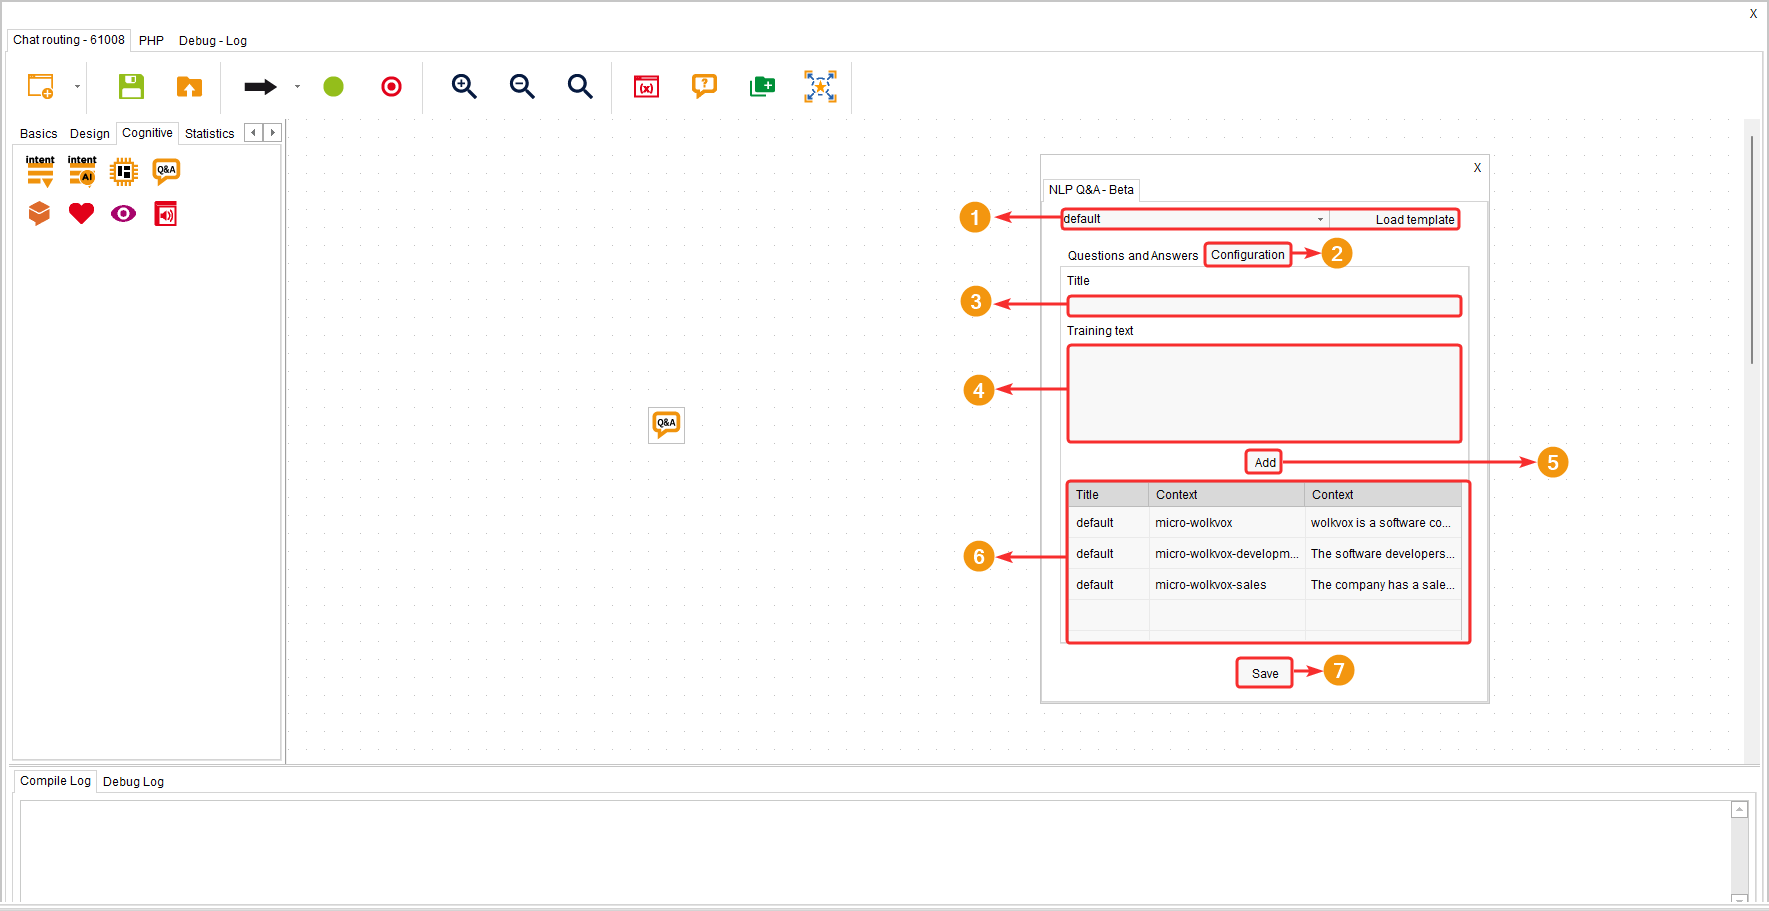
- Load a template.
- Enter the “Configuration” tab.
- In the “Title” field, write a title for the training topic you will give to the bot.
- In the “Training Text” field, write all the context you want the bot to learn.
- Click the “Add” button to save the training.
- The table lists all the trainings you have added to the bot. If you right-click on an item, you can edit or delete it. When editing, you should change its information and click “Add” to add the item with the changes made.
- Click “Save” to apply the changes.
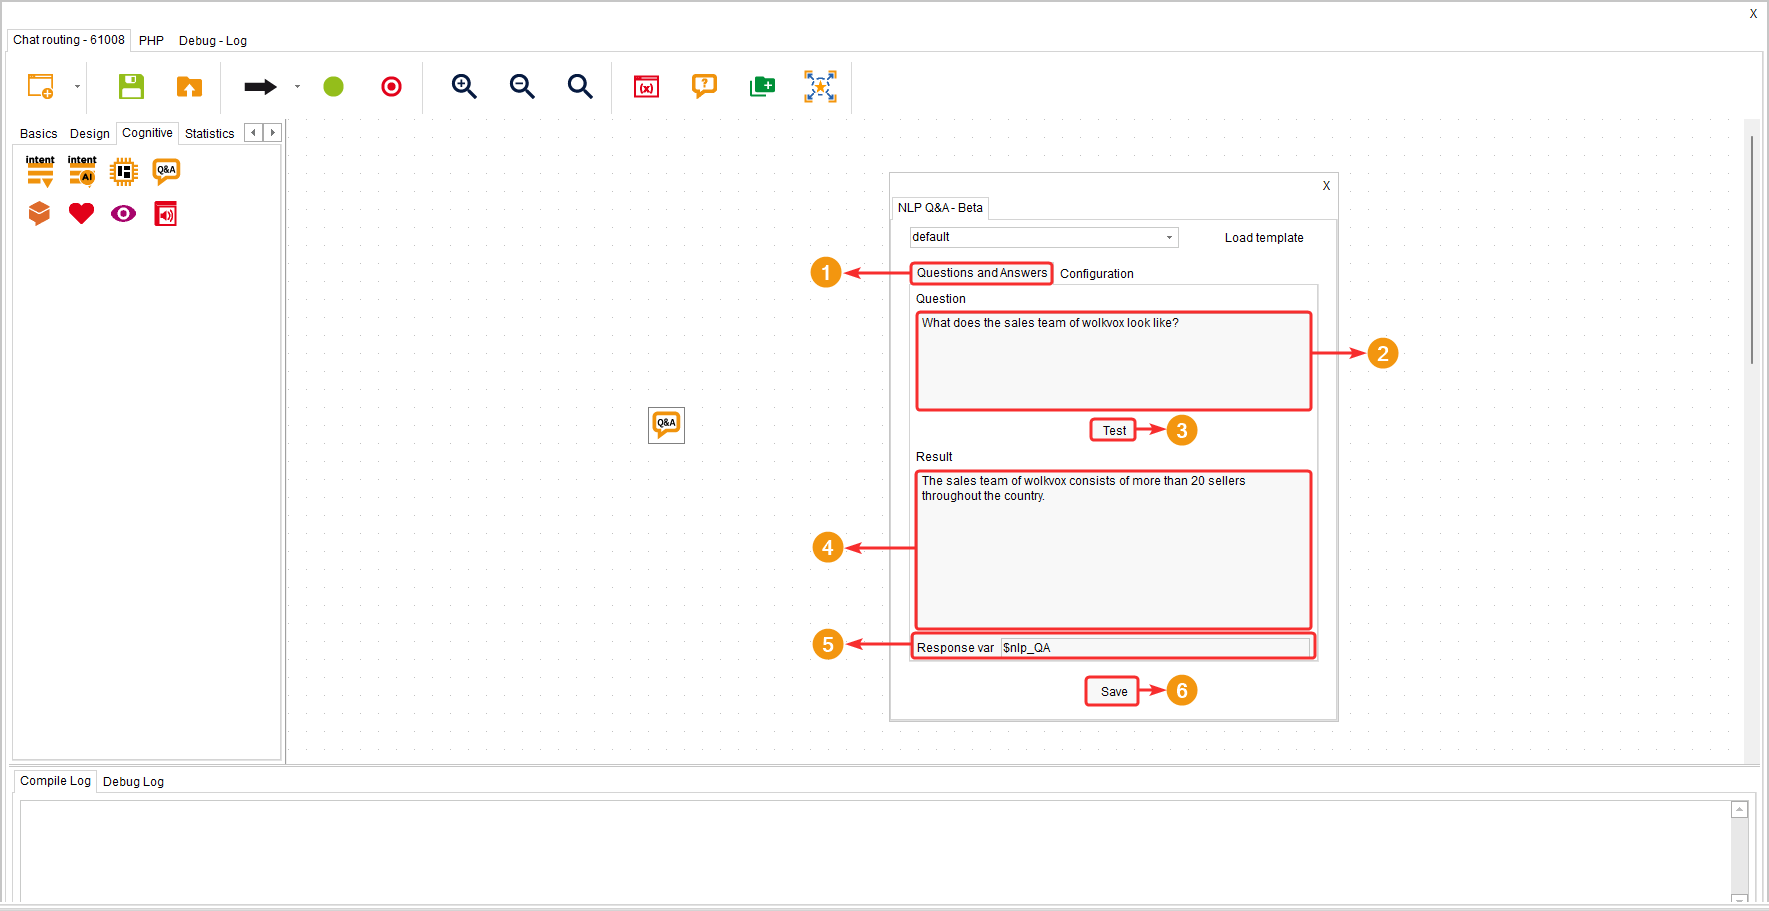
- Enter the “Questions and Answers” tab. Here you can test the bot.
- In “Question,” write the question you want to ask the bot.
- Click on “Test” to try out the configured training.
- In “Result,” you can preview the response obtained from the bot.
- The result will be saved in the variable defined in “Response Variable.”
- Click “Save” to apply the changes.