This component allows you to send messages to your customers’ WhatsApp, whether it’s for mass campaigns or sending important information during a call.
It is located within the group of components called “Basics” and is available for all types of routing (voice, Interaction, Chat, CRM + Webhook) and Agent Scripting.
Configuration #
The configuration of this component depends on the type of connector. There are two types of connectors: Mobile (Unofficial) and Official.
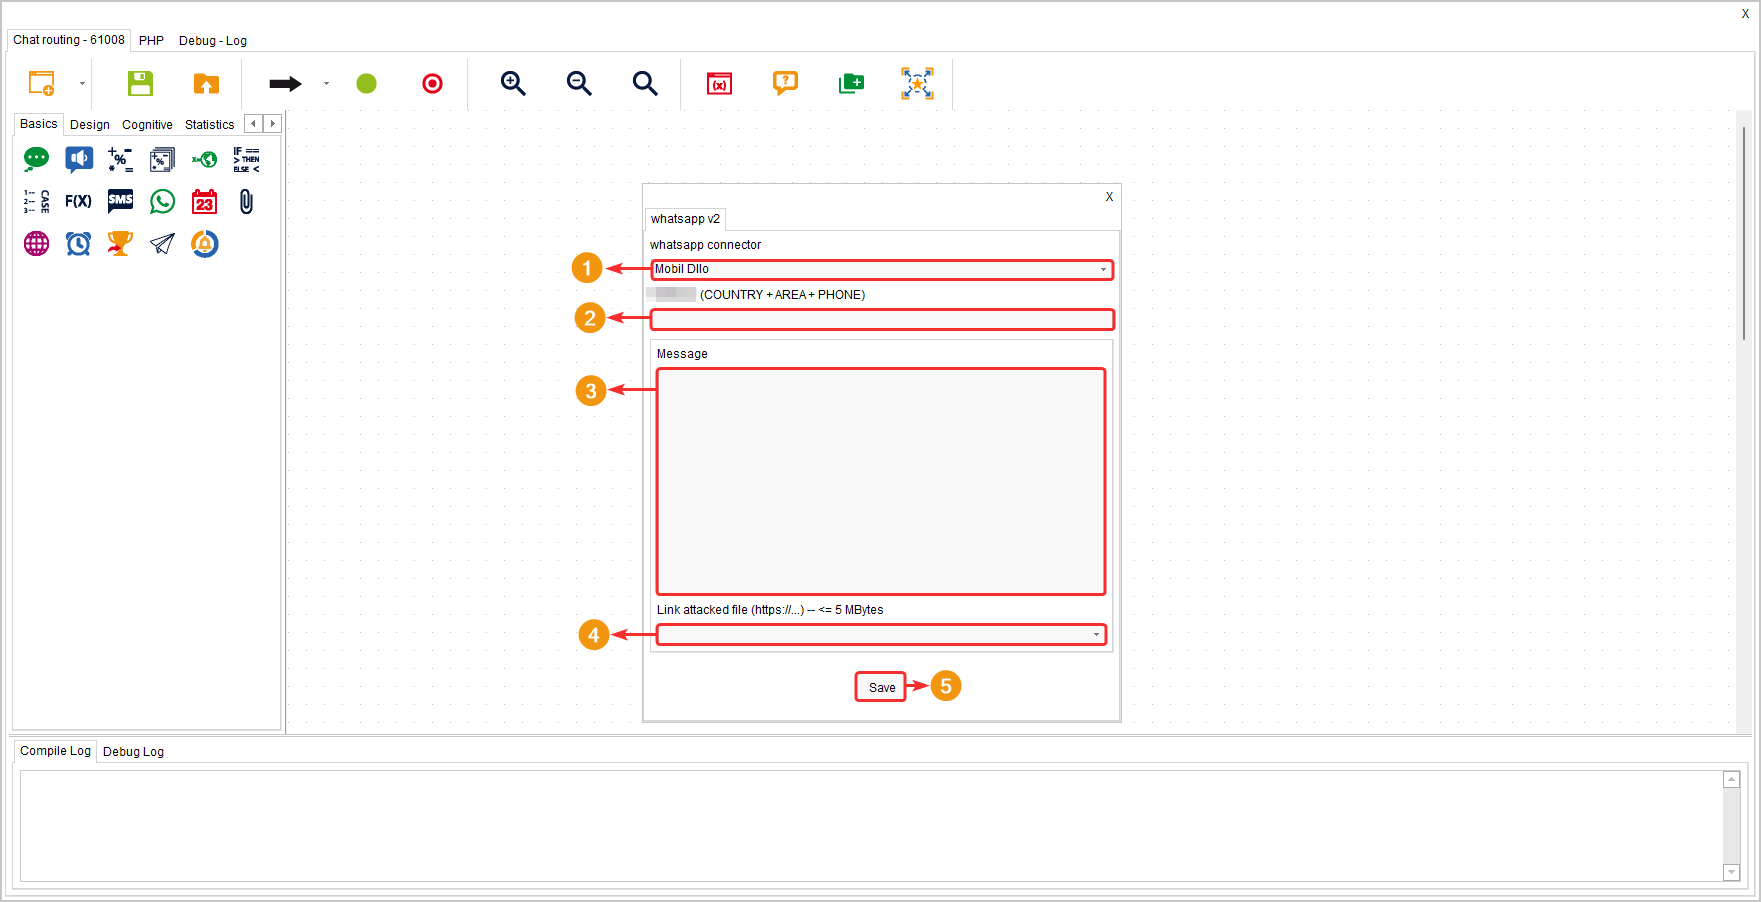
Mobile connector: #
- Select the WhatsApp connector you want to use for sending the message (you can have multiple connected lines in your operation). In this case, you are viewing the “Mobile” connector type.
- In the “Phone” field, you can manually enter a phone number or enter a variable that contains the mobile phone number of each client. The phone number should include the country code, area code (in some cases), and the mobile phone number.
- Write the message you want to send. You can include variables to personalize the message or you can also include emojis. On the Windows operating system, you can open the emoji menu by pressing the Windows key + “.” and selecting the emoji you want.
- In the “Link” field, you can include the URL of an image or document hosted on a public URL, meaning anyone who accesses the link can view it.
- Click the “Save” button to apply the configuration made in the component.
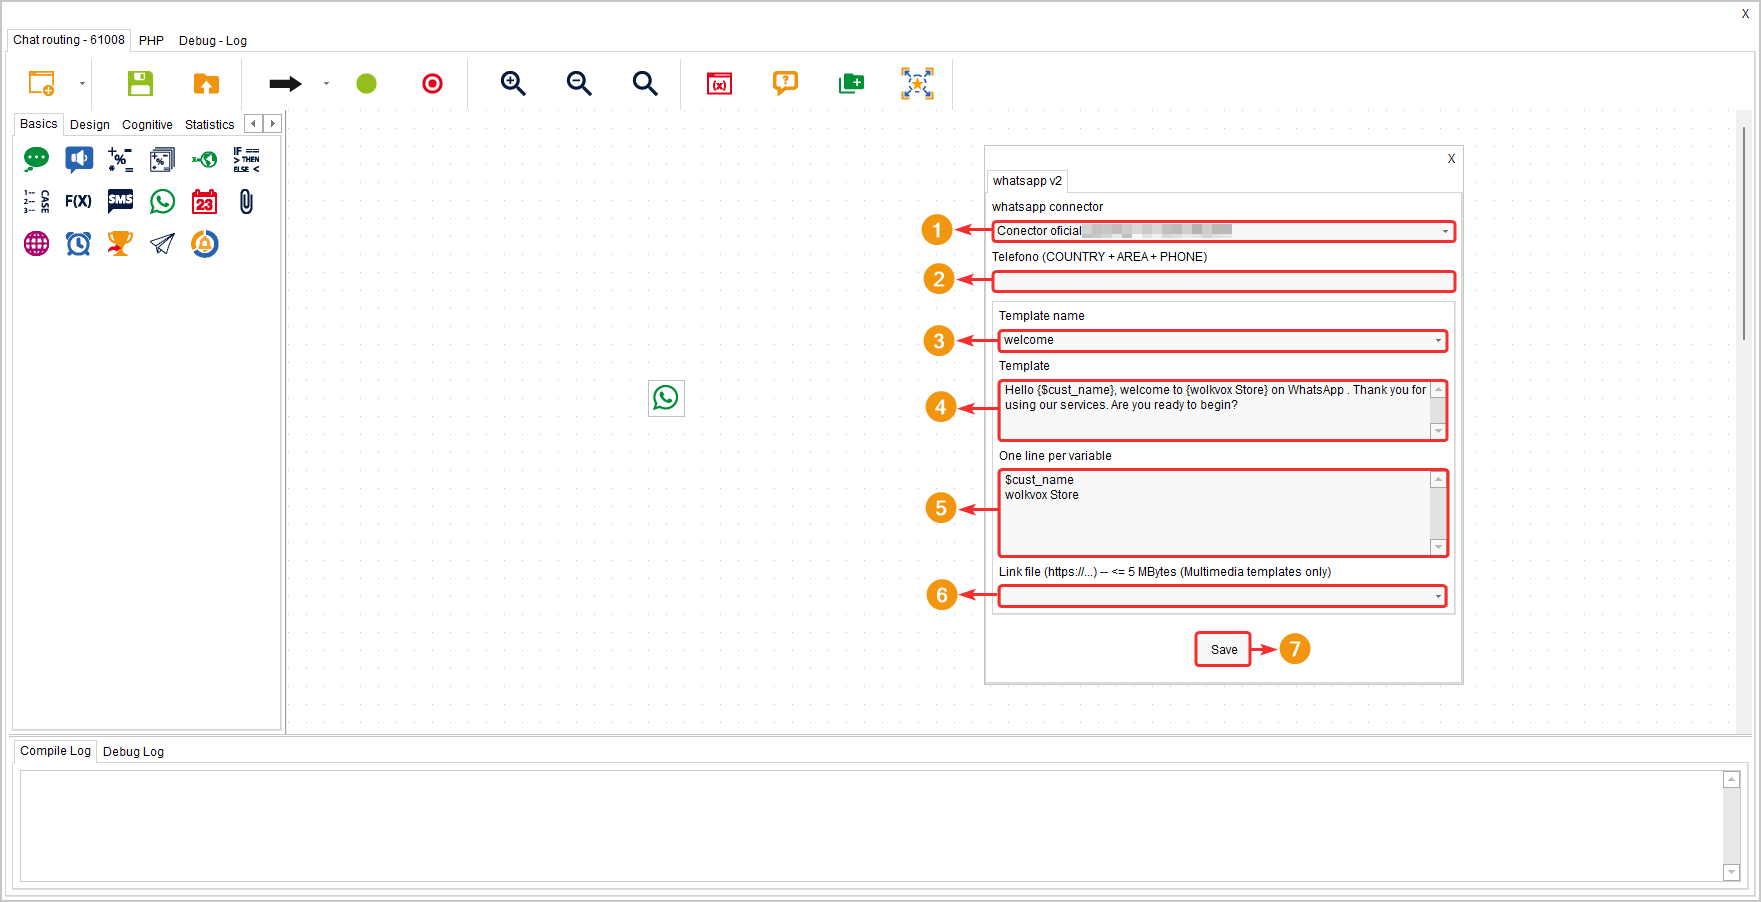
Conector Oficial #
- Select the WhatsApp connector you want to use for sending the message (you can have multiple connected lines in your operation). In this case, you are viewing the “Official” connector type.
- In the “Phone” field, you can manually enter a phone number or enter a variable that contains the mobile phone number of each client. The phone number should include the country code, area code (in some cases), and the mobile phone number.
- Select the desired template.
- In the “Template” field, you can preview the message that will be sent.
- In the “One line per variable” field, you should enter the data that will replace the text enclosed in curly braces {}. For each data to be replaced, you should add a line break.
- If allowed by the template, you can add an attached file link.
- Click the “Save” button to apply the changes.