

 New “Free Law 2300” API #

- Starting from this version, you will be able to use a new API called “Free Law 2300”.
- This API allows you to release customers from consumer protection granted by Law 2300.
- You can release customers by phone or identification number.
- This simplifies compliance with legislation and allows users to adapt their contact strategies more agilely and flexibly. By freeing specific customers from the restrictions of Law 2300, users can maximize contact opportunities and improve the effectiveness of their call and contact center operations.
- To access the official API documentation, click here.
New variables for routing points in the “CRM + Webhook + Cron + AutoQAi + Mr Wizard” type #
- Two new variables have been added to design flows more precisely and obtain more interactivity. The two new variables are:
- $codact2_analytics;
- This variable allows routing points to perform specific actions based on the interaction’s categorization using the second activity code. For example, this variable can be used in routing processes to direct interactions to different service queues or departments based on the assigned categorization.
- $qamonthagent_analytics;
- This variable allows routing points to make decisions or take actions based on the number of quality assessments received by the agent who handled the interaction during the current month. For example, it can be useful for adjusting interaction routing, activating coaching or training processes, or making decisions about assigning additional tasks or responsibilities to the agent.
- $codact2_analytics;
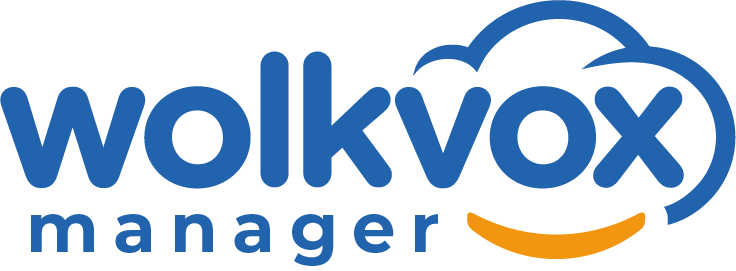
Change in the way of adding Cloud API type WhatsApp connectors #
- The process of adding Cloud API type WhatsApp connectors has been optimized, allowing for the reduction of extensive procedures and ensuring a quick integration of your WhatsApp channel into your operation.
- Below is the documented process:
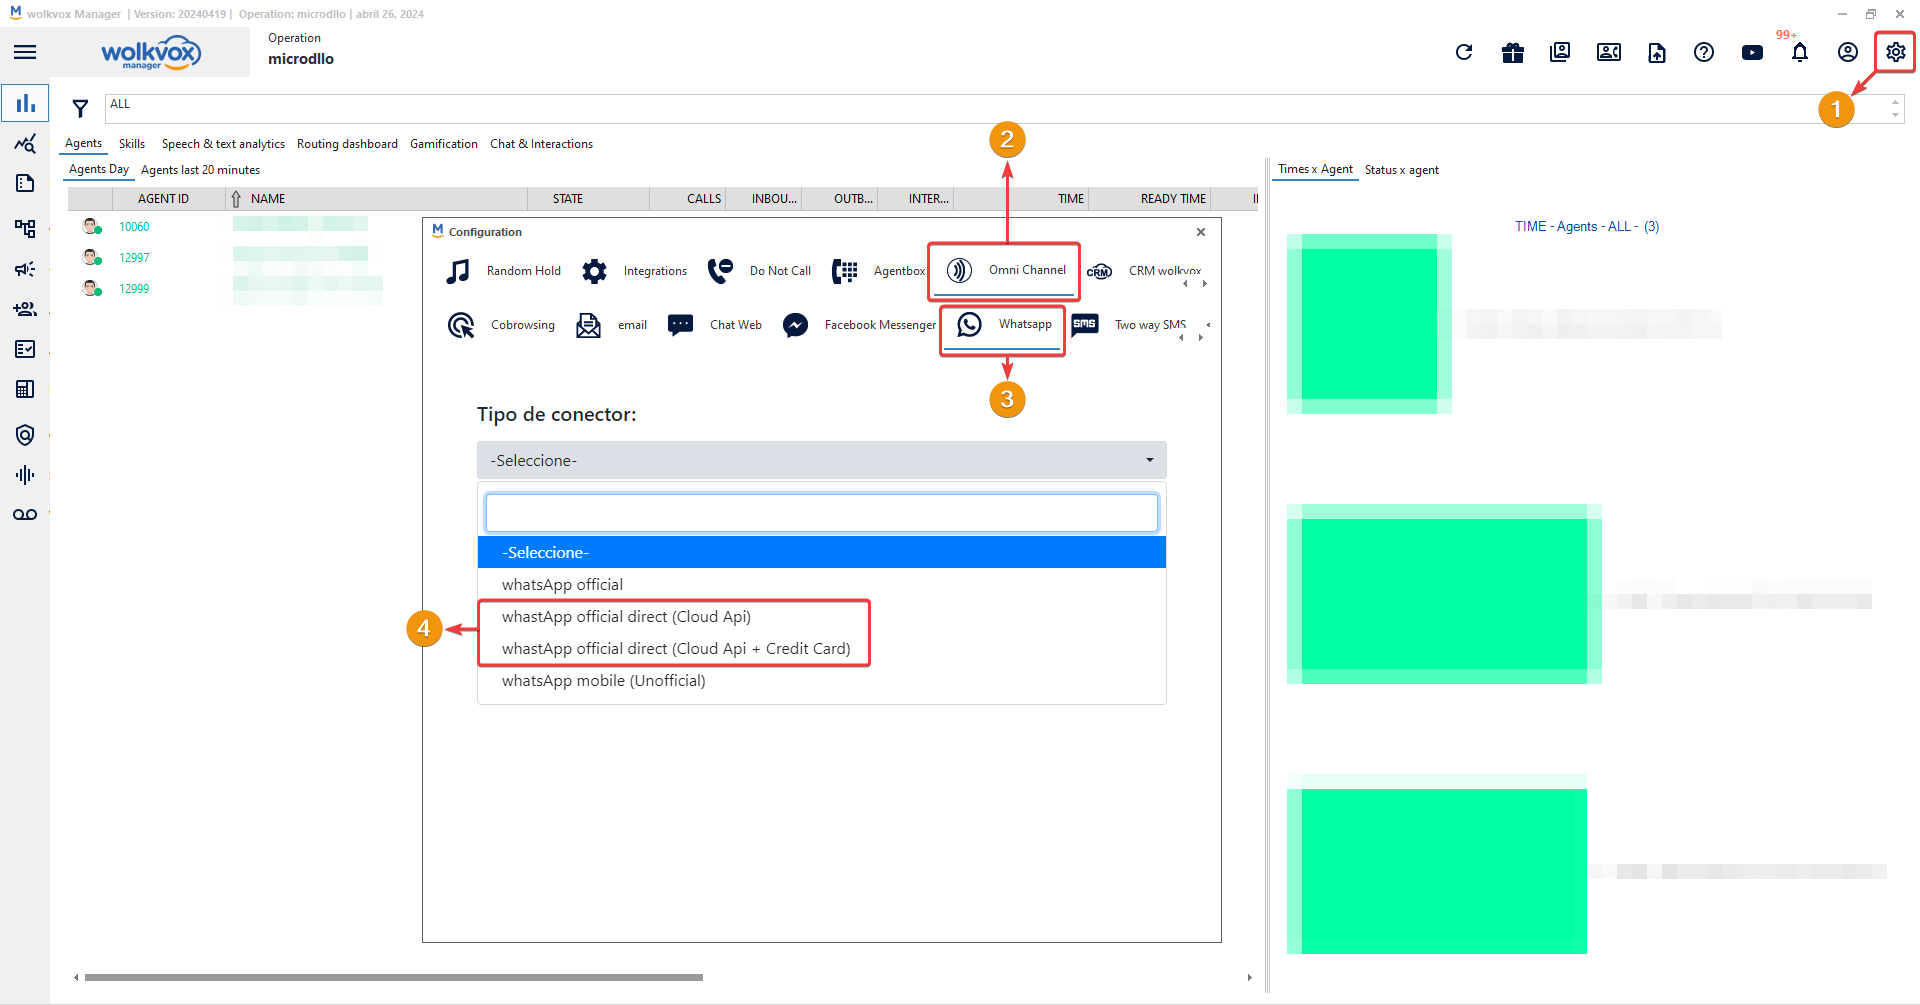
Integrate WhatsApp Cloud API into wolkvox Manager #
A WhatsApp Official (Cloud API) connector is a software that allows businesses to integrate wolkvox Manager with the official WhatsApp platform. This integration enables businesses to receive and respond to WhatsApp messages from the wolkvox system.
The WhatsApp Official (Cloud API) connector uses the WhatsApp Cloud API to send and receive WhatsApp messages. The WhatsApp Cloud API is a RESTful API that provides a set of functions for interacting with the WhatsApp platform.
A message will appear informing that the account validation was successful.
You should proceed with logging in with the Meta account that contains the WhatsApp profile you want to link.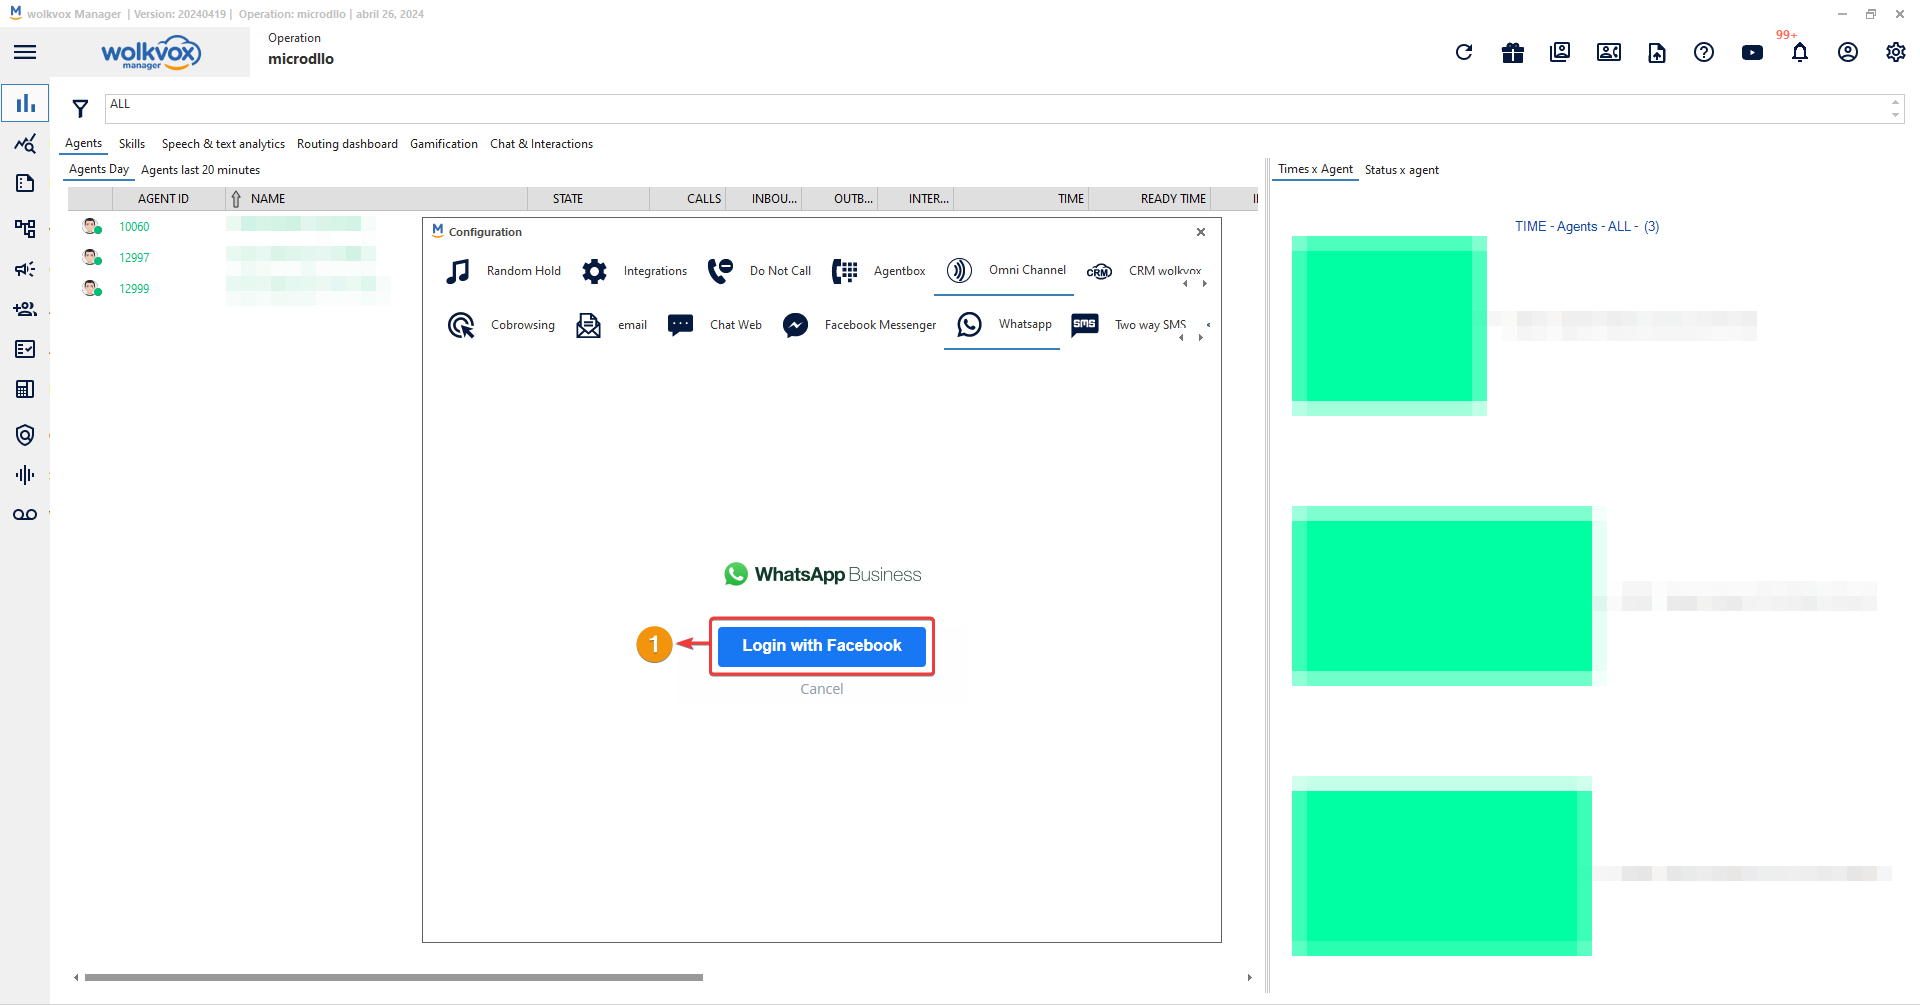
Access your Meta account using your email and password credentials.
If two-factor authentication is enabled on your Meta account, you will be prompted for a confirmation code sent via text message to your registered phone number on your account.
In the following view, you will be informed about the permissions that need to be shared with wolkvox for the integration to work correctly.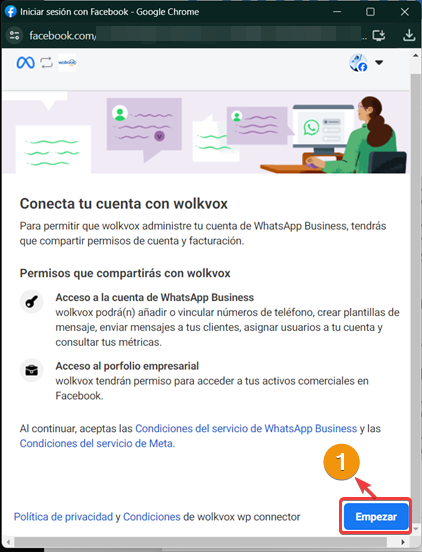
Now you will be asked to complete a series of step-by-step instructions. The first step is defining your company’s information.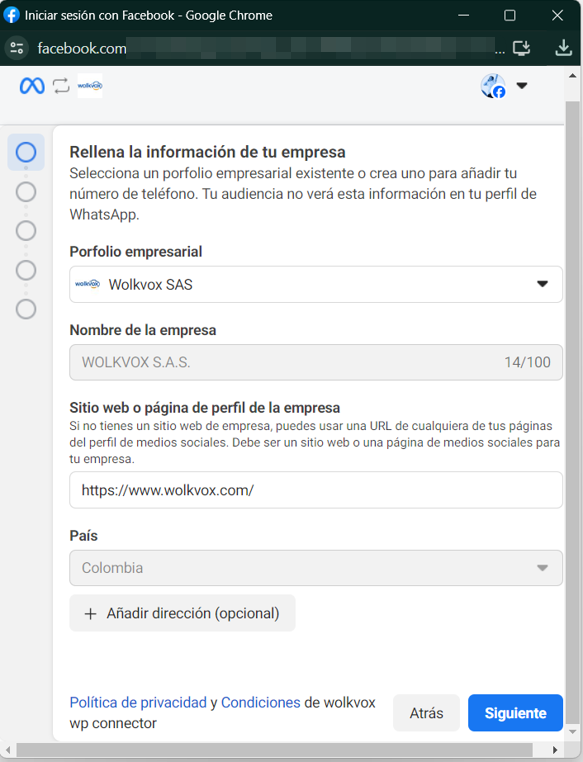
Select your WhatsApp Business account with which you want to integrate with wolkvox.
In this third step, you must create the WhatsApp Business profile. The “WhatsApp Business account name” will be the name of the chat that will appear to the customer in the list of active chats on their WhatsApp app.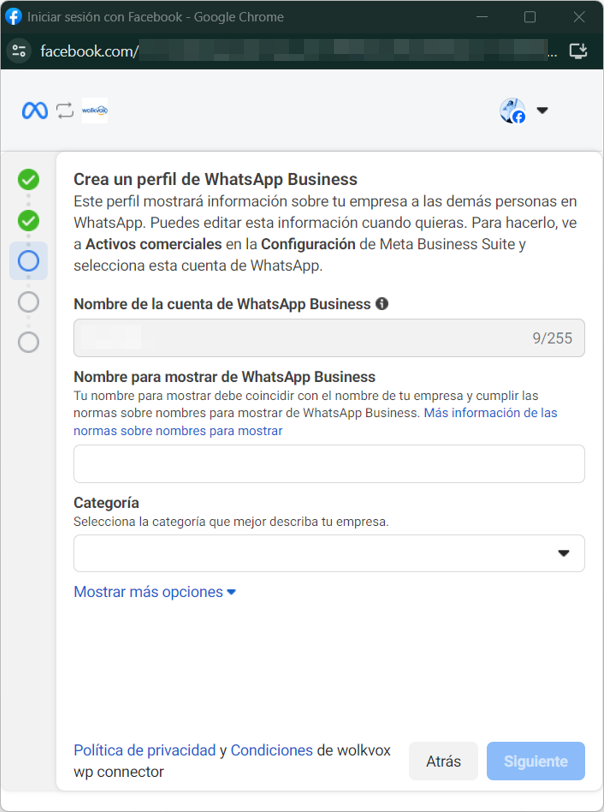
The next step will be to add the phone number for the WhatsApp connector. Additionally, you will need to verify the number through text message or phone call.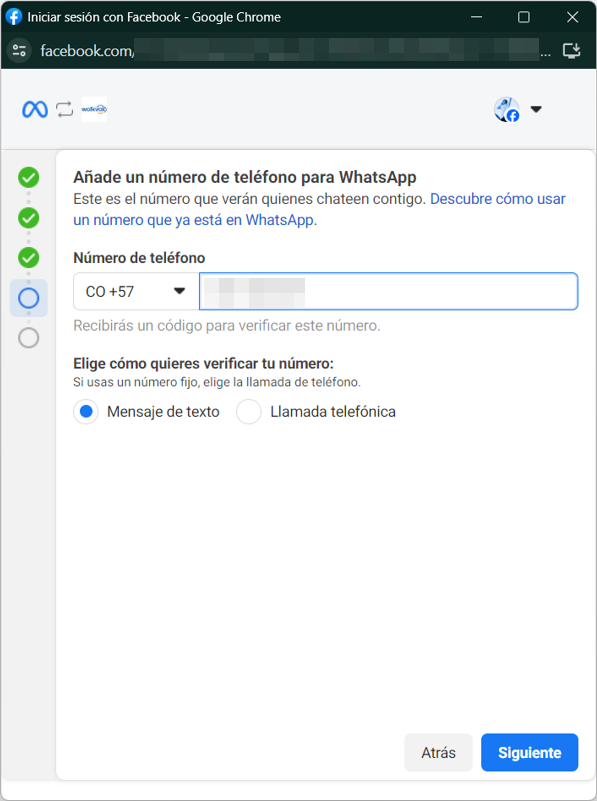
Here you can see an example of number verification using the “Text Message” option.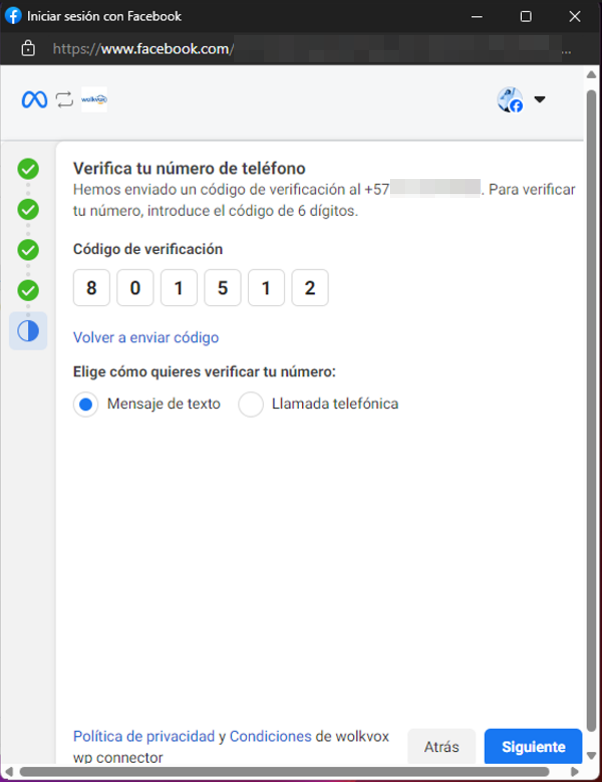
In the following step, a summary of the permissions that will be granted to the wolkvox connector in your Meta account will be displayed.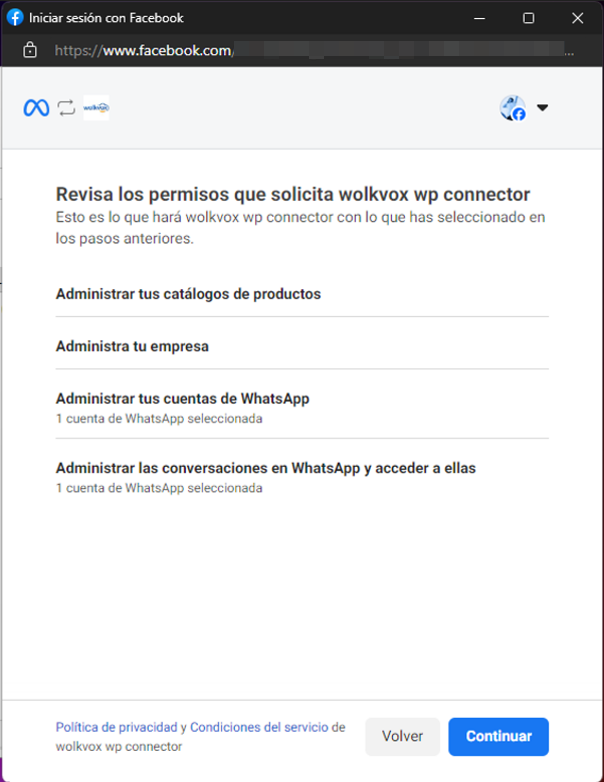
After accepting the previous step, a message will be displayed informing that the connection with the wolkvox connector has been successful.
Finally, configure the options for your Business account. Assign a name to the connector, choose the WhatsApp Business account and number, and click “Save”. Note: To ensure that the number remains in “connected” status, it is necessary to have the payment method configured within our Business account on Meta.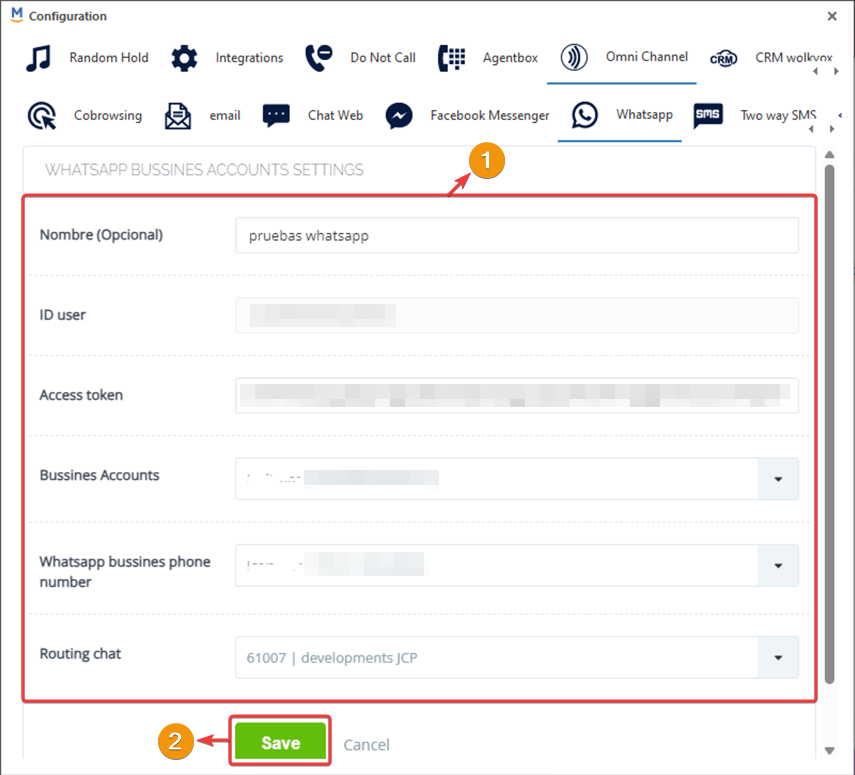
#
Pending number status solution #
An additional recommended step is as follows:
- Click on the button with an icon consisting of three vertically aligned dots.
- Select the “Register number” option.
This will change the status of the registered number in Meta from “pending” to “connected”, but it is necessary to have the payment method configured in Meta.
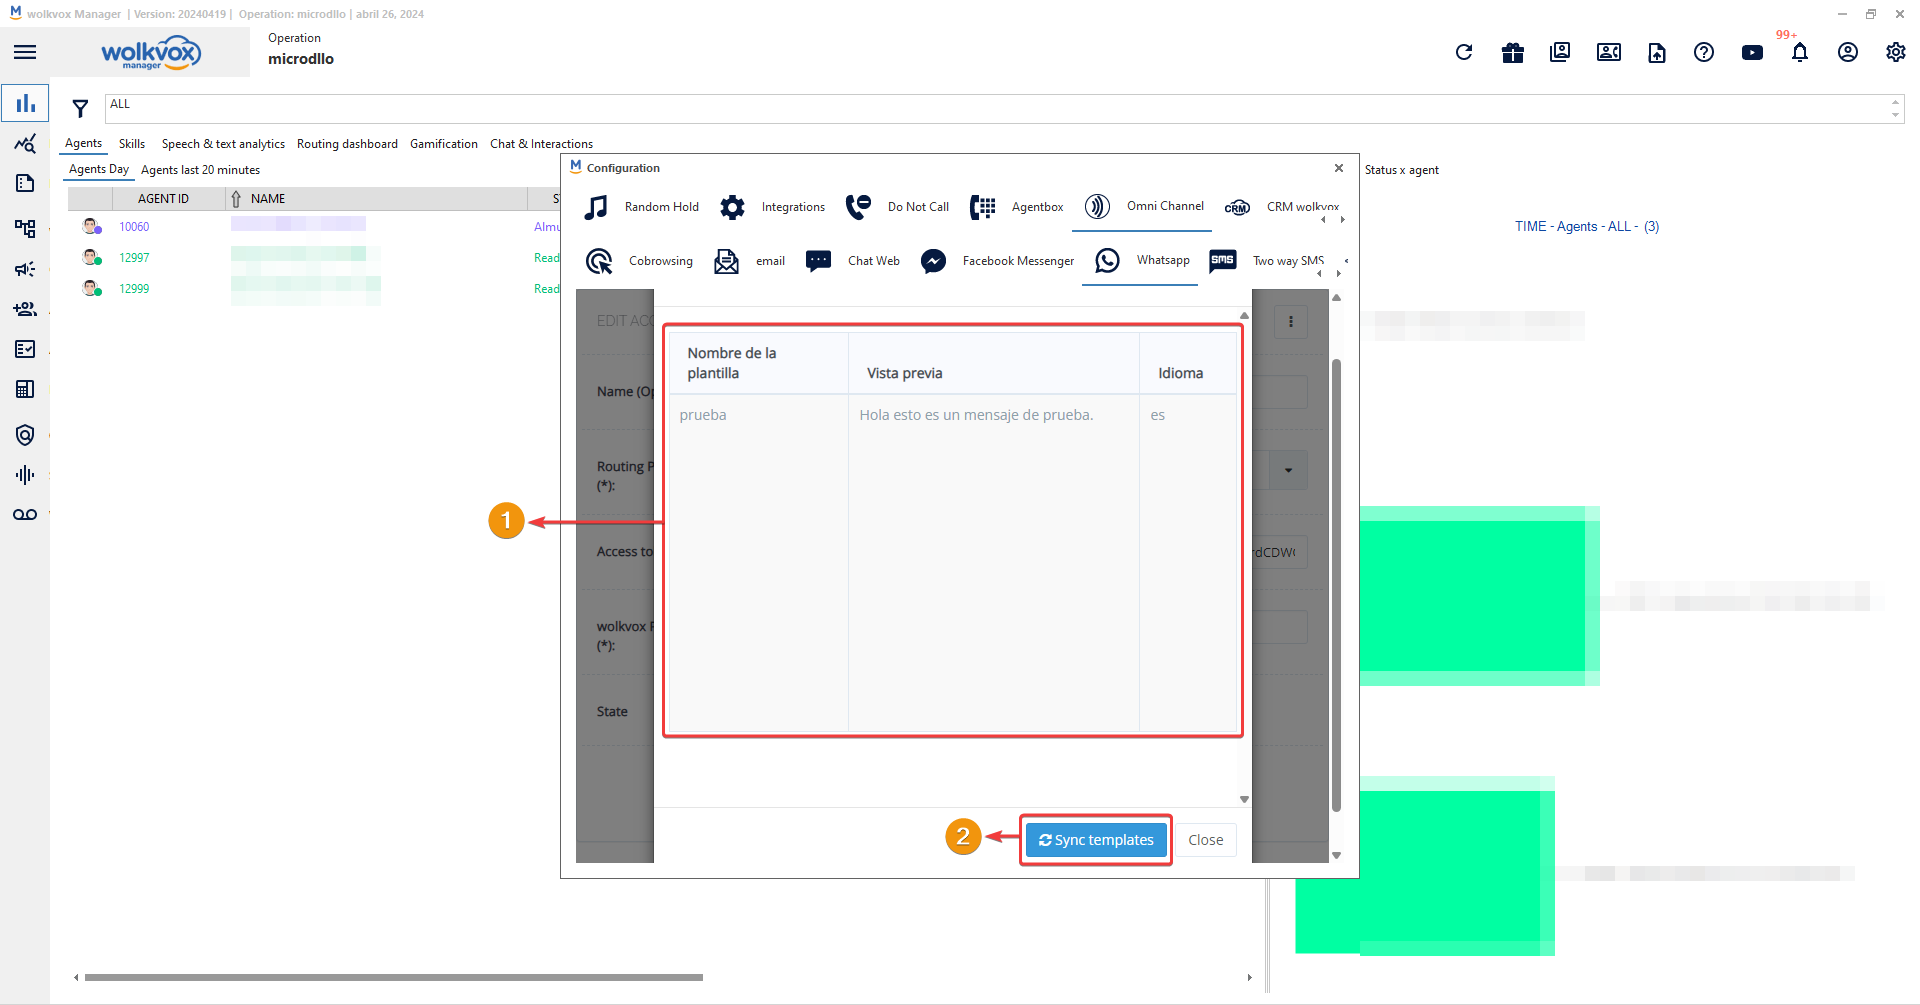
Message template synchronization #
If you do not see all your WhatsApp message templates, it is recommended to follow these steps for template synchronization:
- To synchronize the message templates you have in your Meta account for WhatsApp, enter edit mode of your WhatsApp Cloud API connector and then click on the button identified by three vertically aligned dots.
- Now, select the “Manage message templates” option.

- In the “Messages templates” table, all the message templates created in your WhatsApp account are listed.
- If you cannot see one that you have in your account, click on “Sync templates” so the system can search the database and synchronize all the message templates you have in your account.
#
