This component allows you to create a form for the agent to capture data specified by the customer.
It is located within the component group called “Basics” and is only available for Agent Scripting.
Configuration #
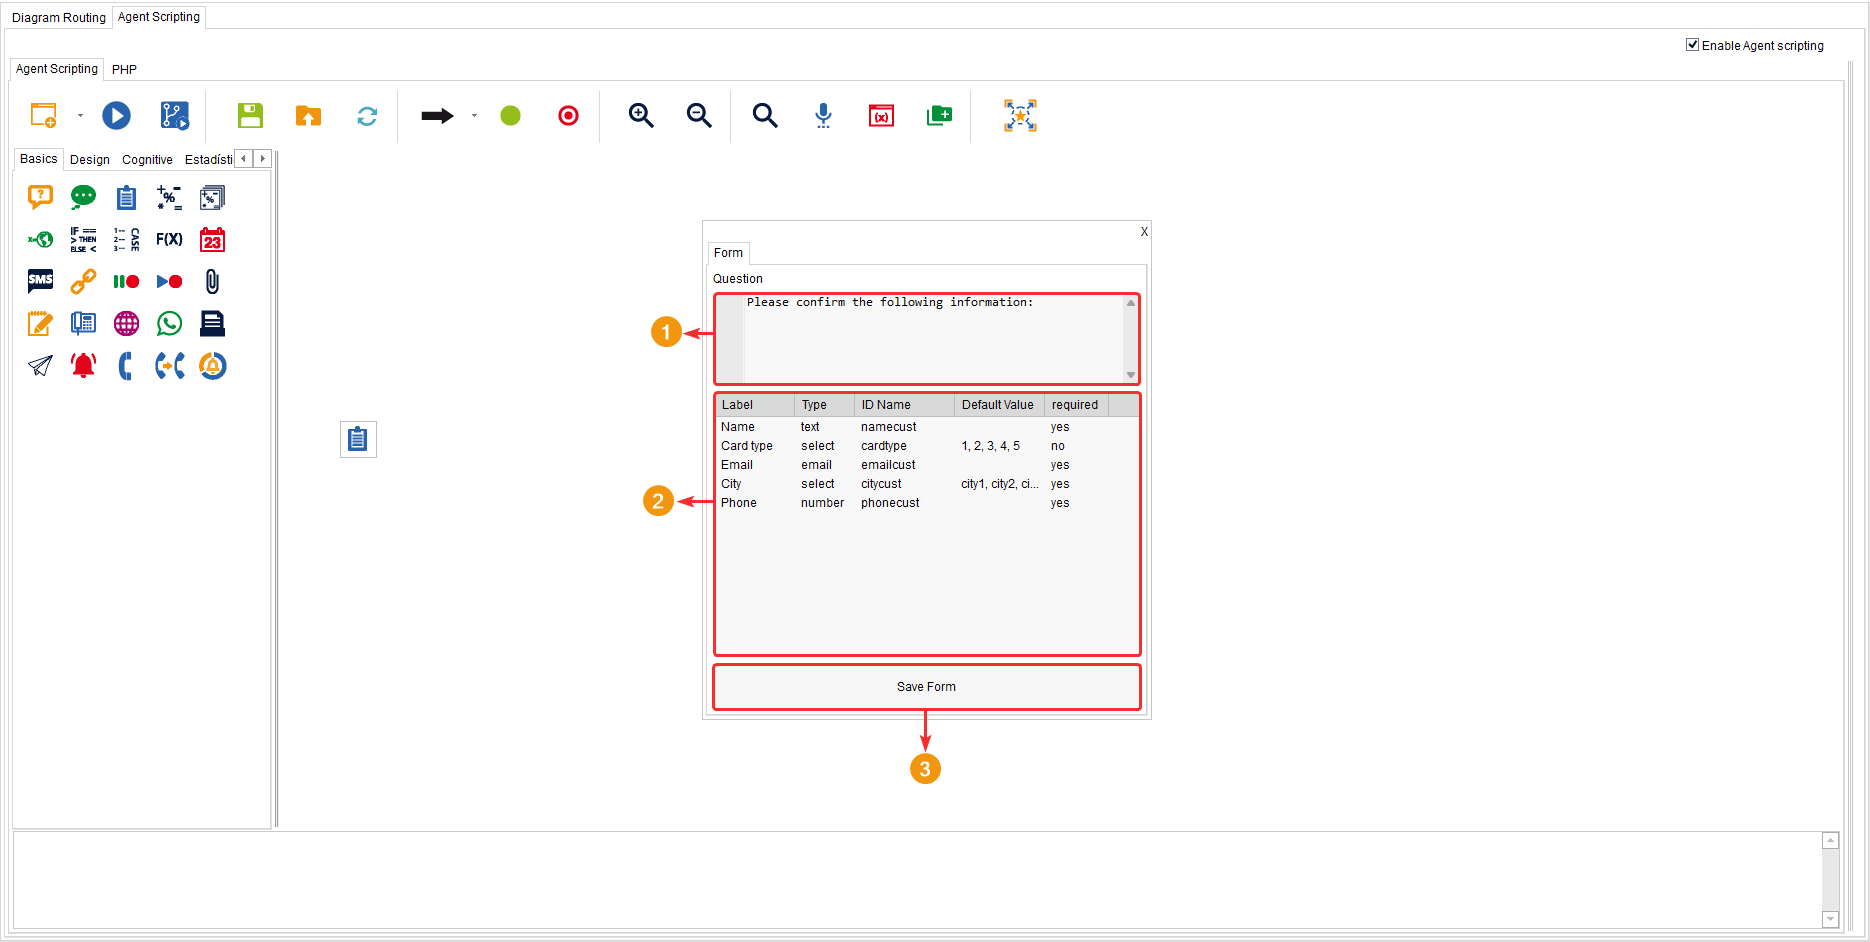
- Write the question the agent should ask the customer.
- Design your table of response options according to your criteria and possible answers the customer may give.
- Click on “Save Form” to apply the changes.
In the window of this component, you can see that you must enter a question or text to guide the agent in obtaining customer data. In the following table, you should add the fields that you want the agent to capture.
In the following example, you can see that the agent must obtain the following customer data: “Name,” “Card Type,” “Email,” “City,” and “Phone.”
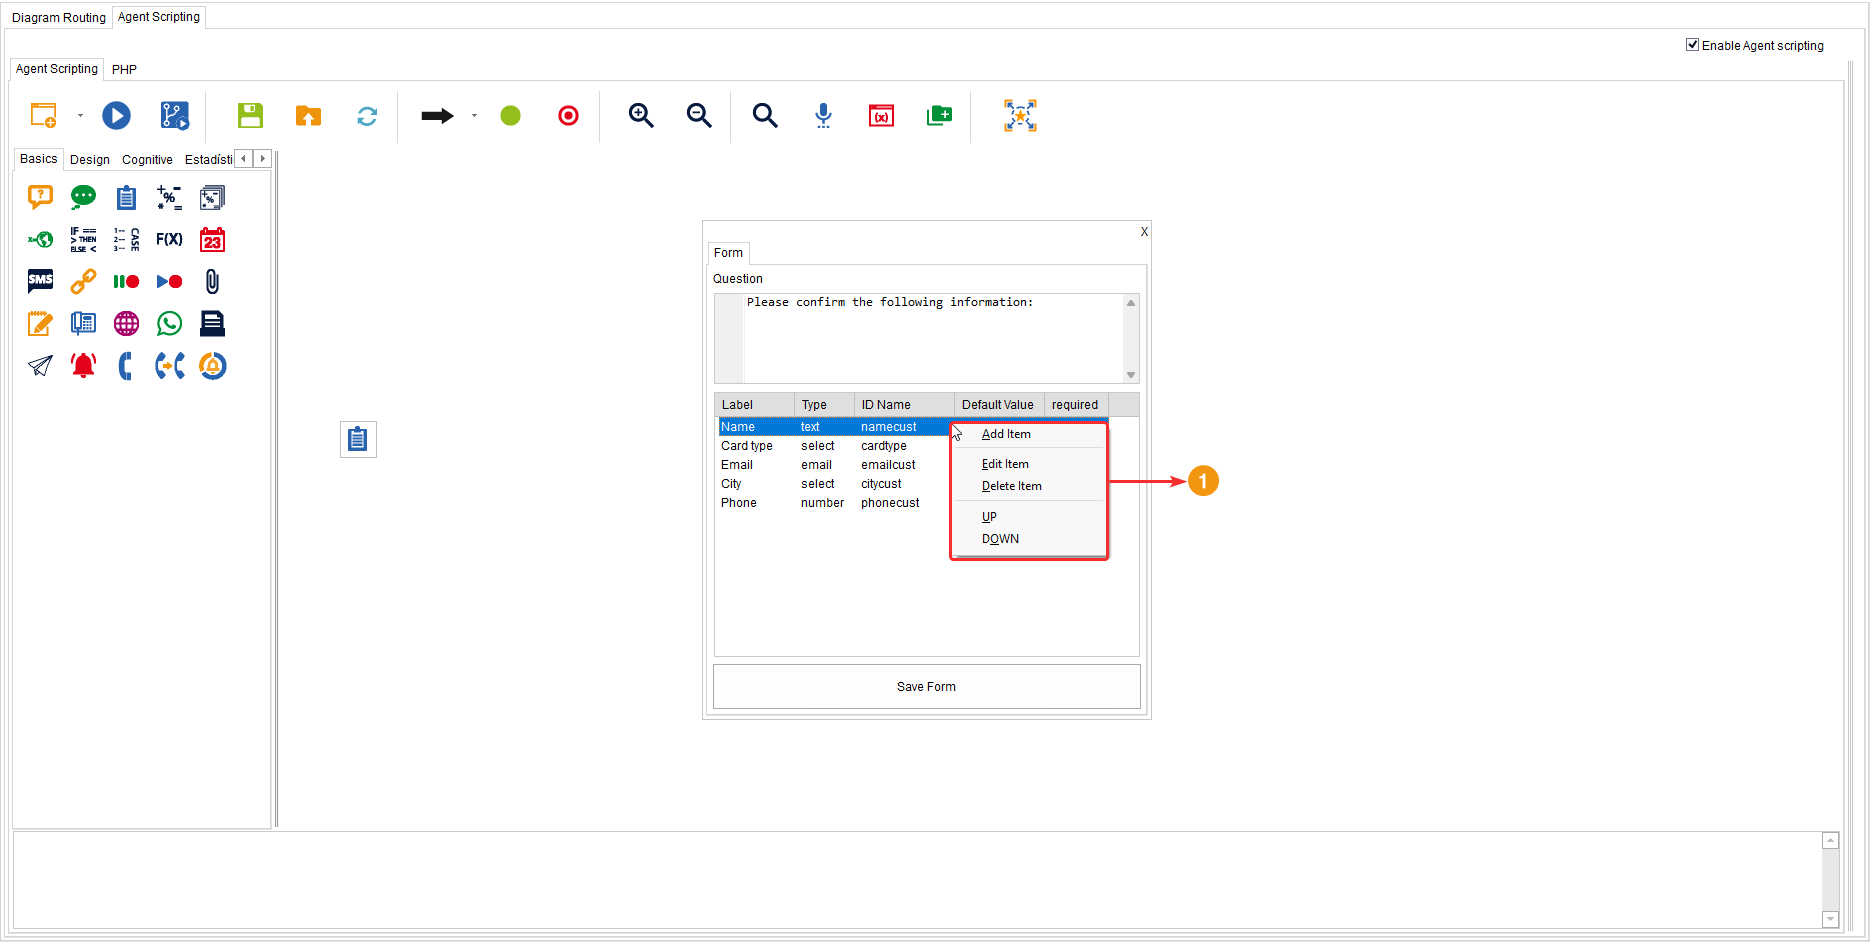
If you right-click on the table or any element in the table, you will see the options to: Add item, edit, delete, and sort the elements of the table by moving them up or down.
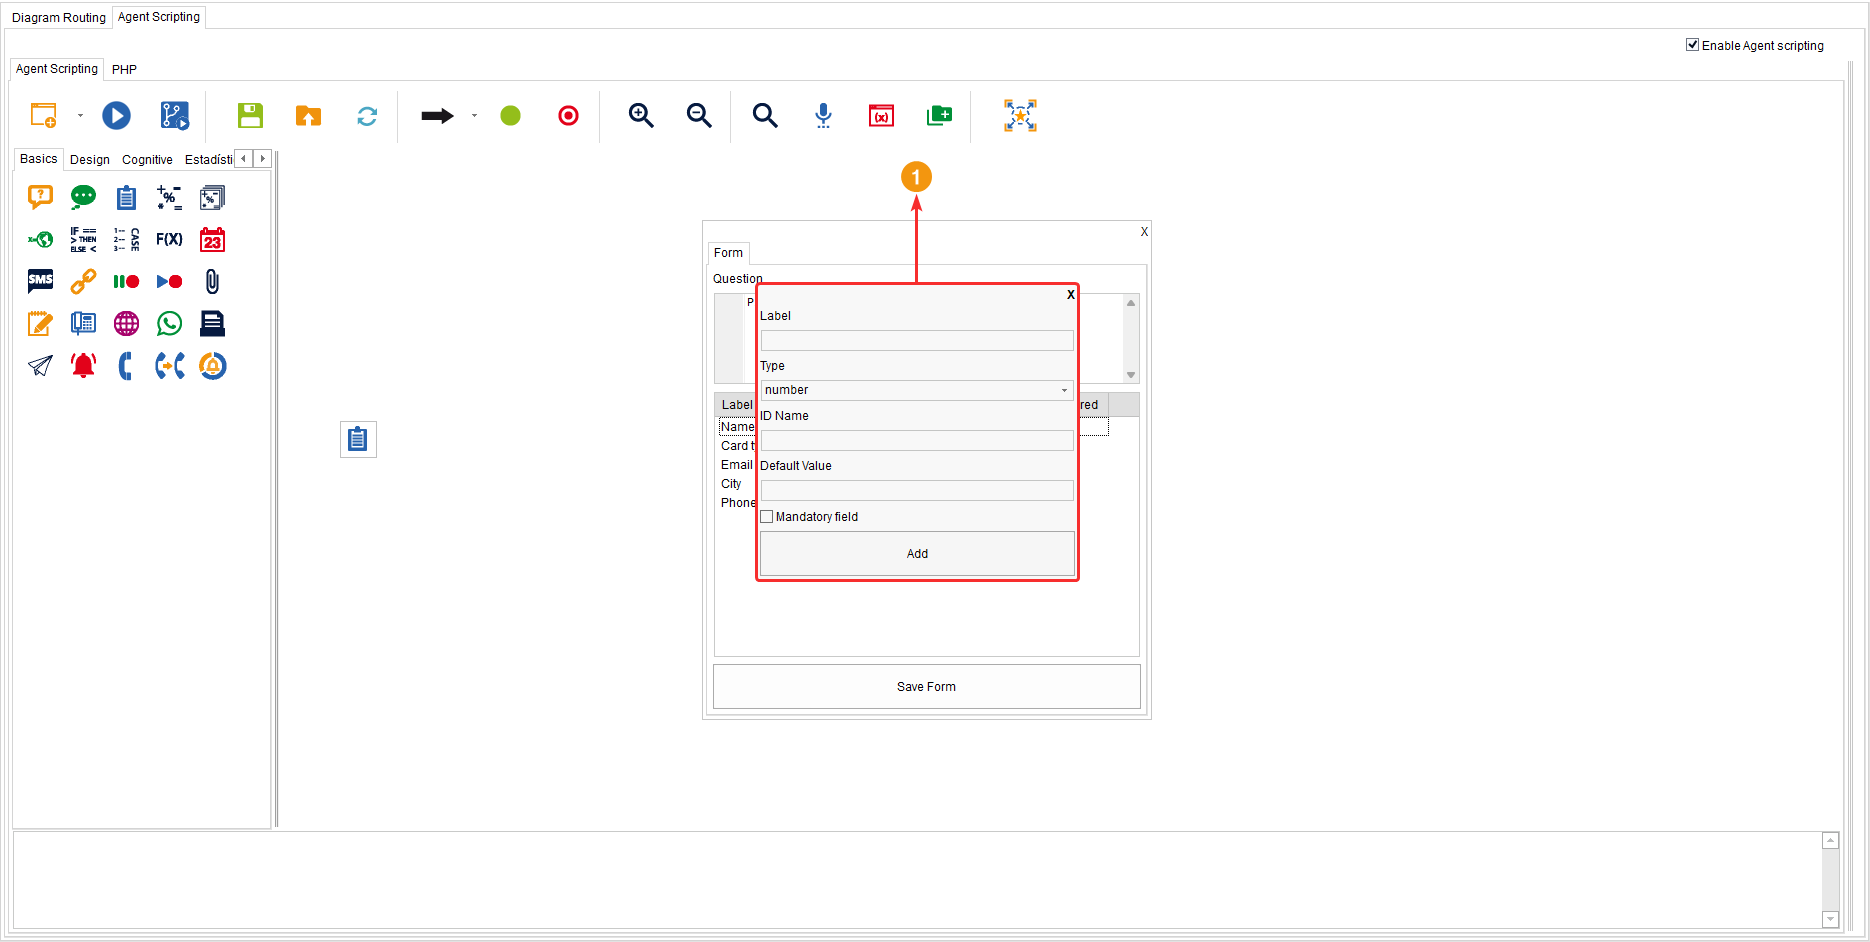
When you click on “Add” or “Edit item,” the following window will appear:
- Label: Label name for the field.
- Type: Choose the type of field to add. Most field types add an empty field for the agent to add information by typing it, but the “Radio” and “Select” field types allow you to add more than one value in the “Values list” field for the agent to select one of the options you have placed there. It is important to separate these values with a comma (,).
- ID Name: Variable name to store the data.
- Default Value: Predefined value for the field, but it is generally left empty for the agent to enter the captured data in the field.
- Values list: This field appears when we have selected the “Radio” or “Select” field type in “Type” and allows you to enter multiple options for the agent to select one from the list of options. The options you want to appear for the agent should be separated by a comma (,).
- Mandatory field: Make the field mandatory to fill, answer, or select an option.