

In the “Data Monitor” section, you have the necessary tools to monitor the activity of your operation. For example, you can listen to calls and satisfaction surveys, save the audio of each call, and view ongoing interactions and chats. In this section, important statistical data is obtained, similar to the Dashboard, but in the “Data Monitor” section, you can select date ranges to obtain statistical information.
Monitor calls #
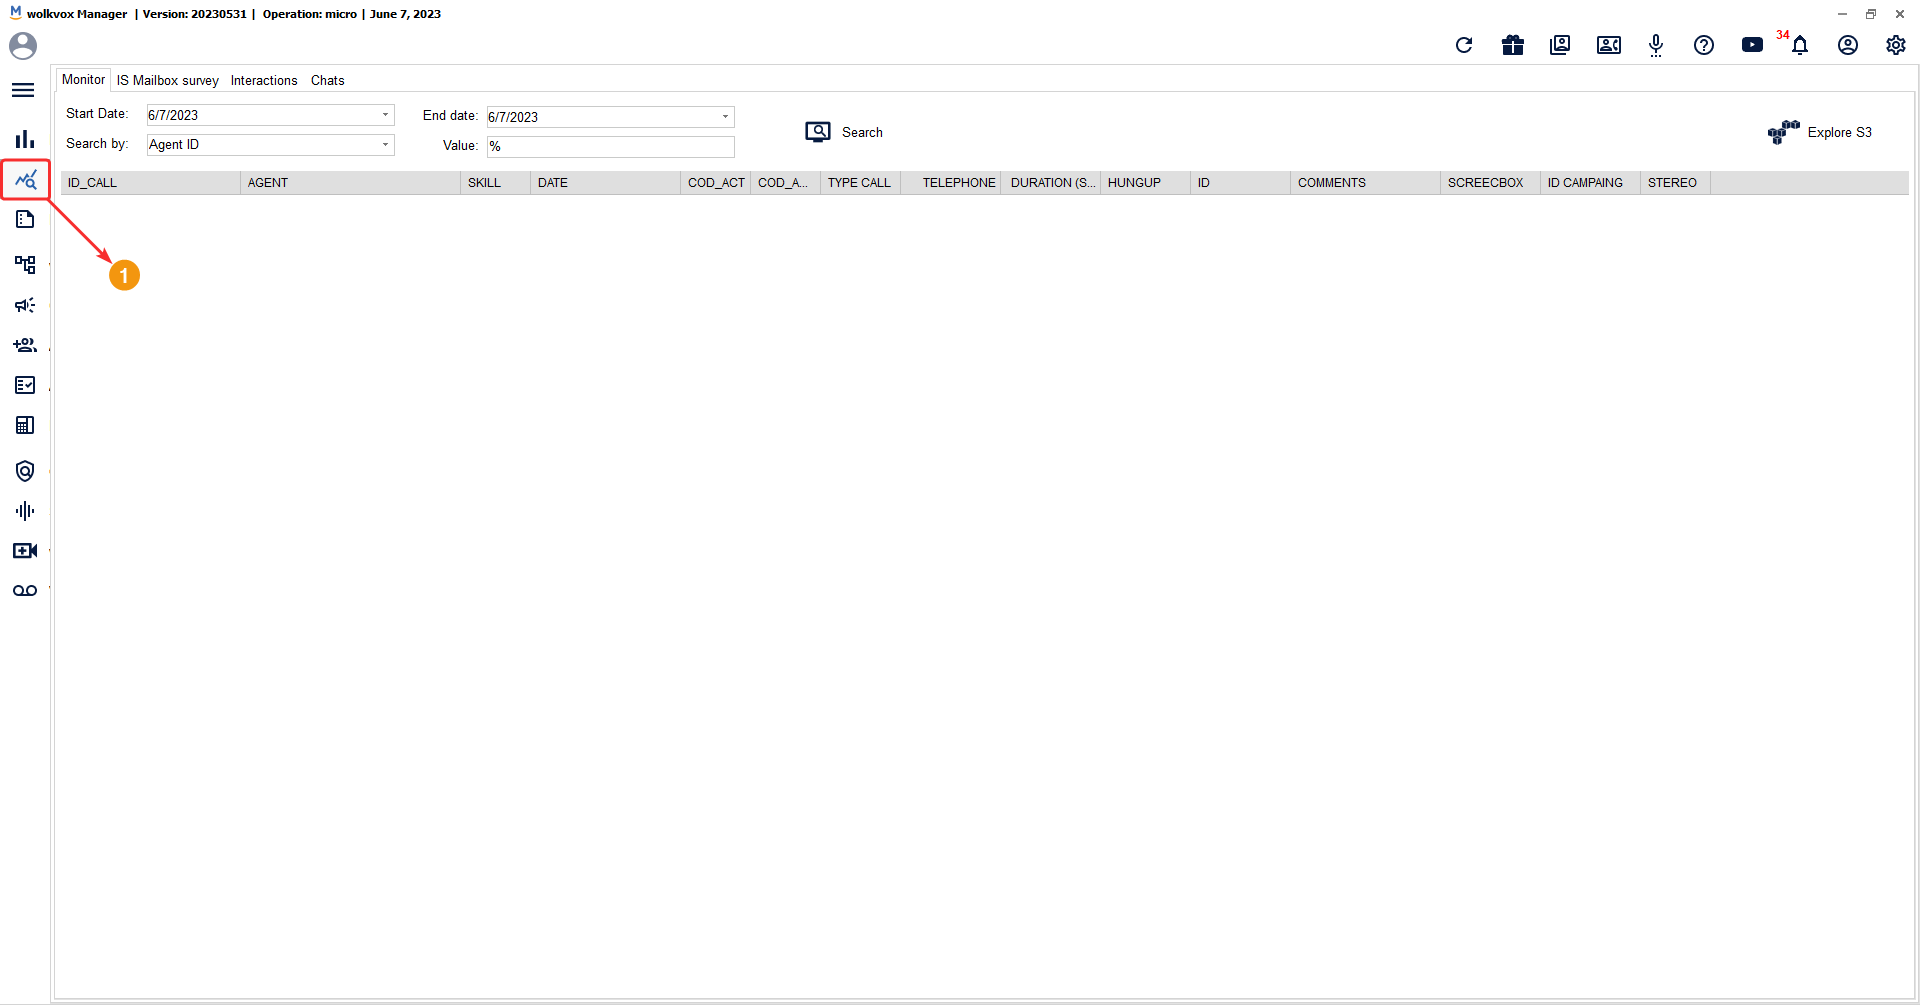
The “Monitor” tab allows you to track the calls made during a specified date range in the respective fields. Among its functions, you can, for example, listen to audio recordings or obtain all the call recordings listed in the table.

To perform a search for calls to monitor, follow these steps:
- Select a date range, keeping in mind that you can only select a range within the same month.
- In the “Search by” field, you can filter the search by agent extension (Agent ID), skill number (Skill ID), call identification number (Call ID), client identification number (Client ID), dialed phone number, or activity code used from activity group 1 or 2. In the “Value” field, enter the corresponding value based on the parameter you have selected in “Search by”.
- Click on “Search” to initiate the search for records based on the applied filter configuration.
Note: In the “Value” field, you can use the “%” character to perform a search without a specific value.

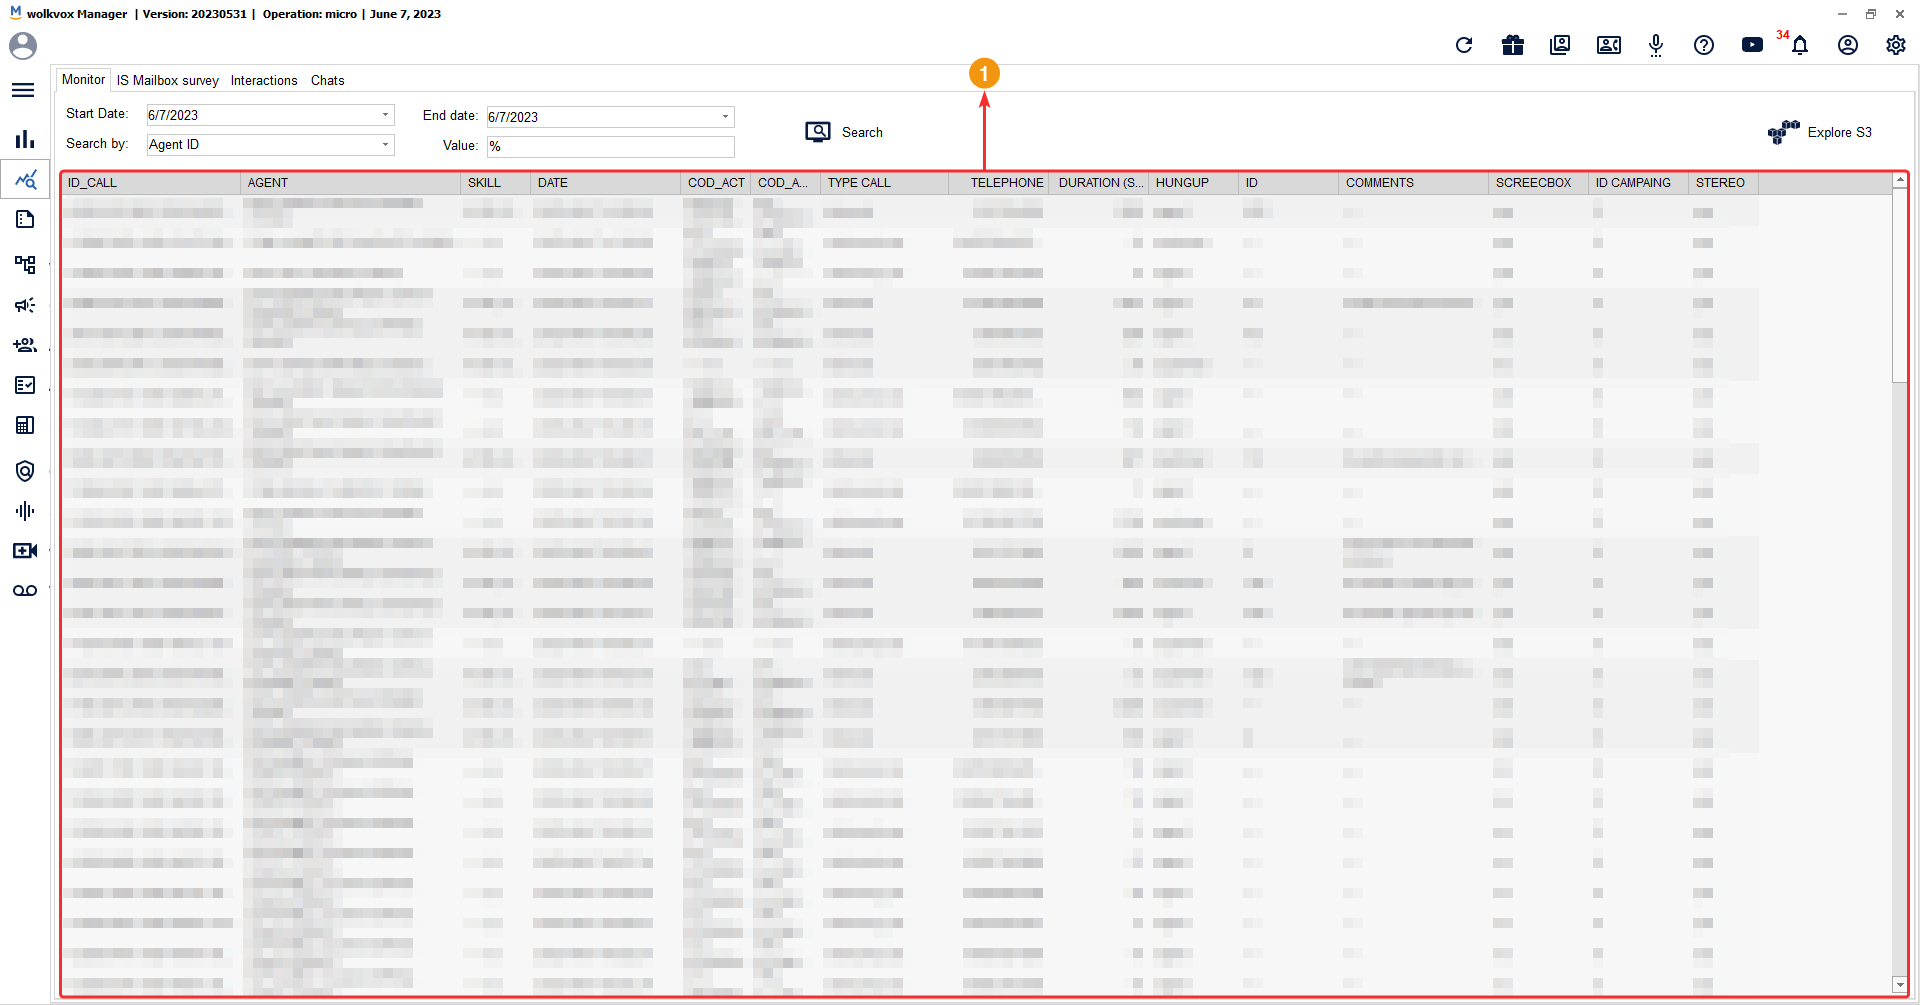
In the search results table, the following columns are identified:
- Call ID: Identification number of the call.
- Agent: Name and extension number of the agent.
- Skill: Number of the skill or agent group.
- Date: Date when the call occurred.
- Activity Code:Activity code from the Activity Code Group #1 used to categorize the call.
- Activity Code 2: Activity code from the Activity Code Group #2 used to categorize the call.
- Call Type: Type of call, whether outbound, inbound, internal, or conference.
- Telephone: Phone number dialed.
- Duration: Total duration of the call in seconds.
- Hungup: Indicates who ended the call.
- ID: Identification number.
- Comments: Comments left by the agent.
- Screenbox: Indicates if the agent’s screen was recorded.
- Campaign ID: Identification number of the campaign.
- Stereo: Indicates if the call was recorded in stereo or not. In stereo calls, the agent’s voice is recorded on one audio channel, while the customer’s voice is recorded on another audio channel. In contrast, “Mono” refers to calls where both voices are combined.
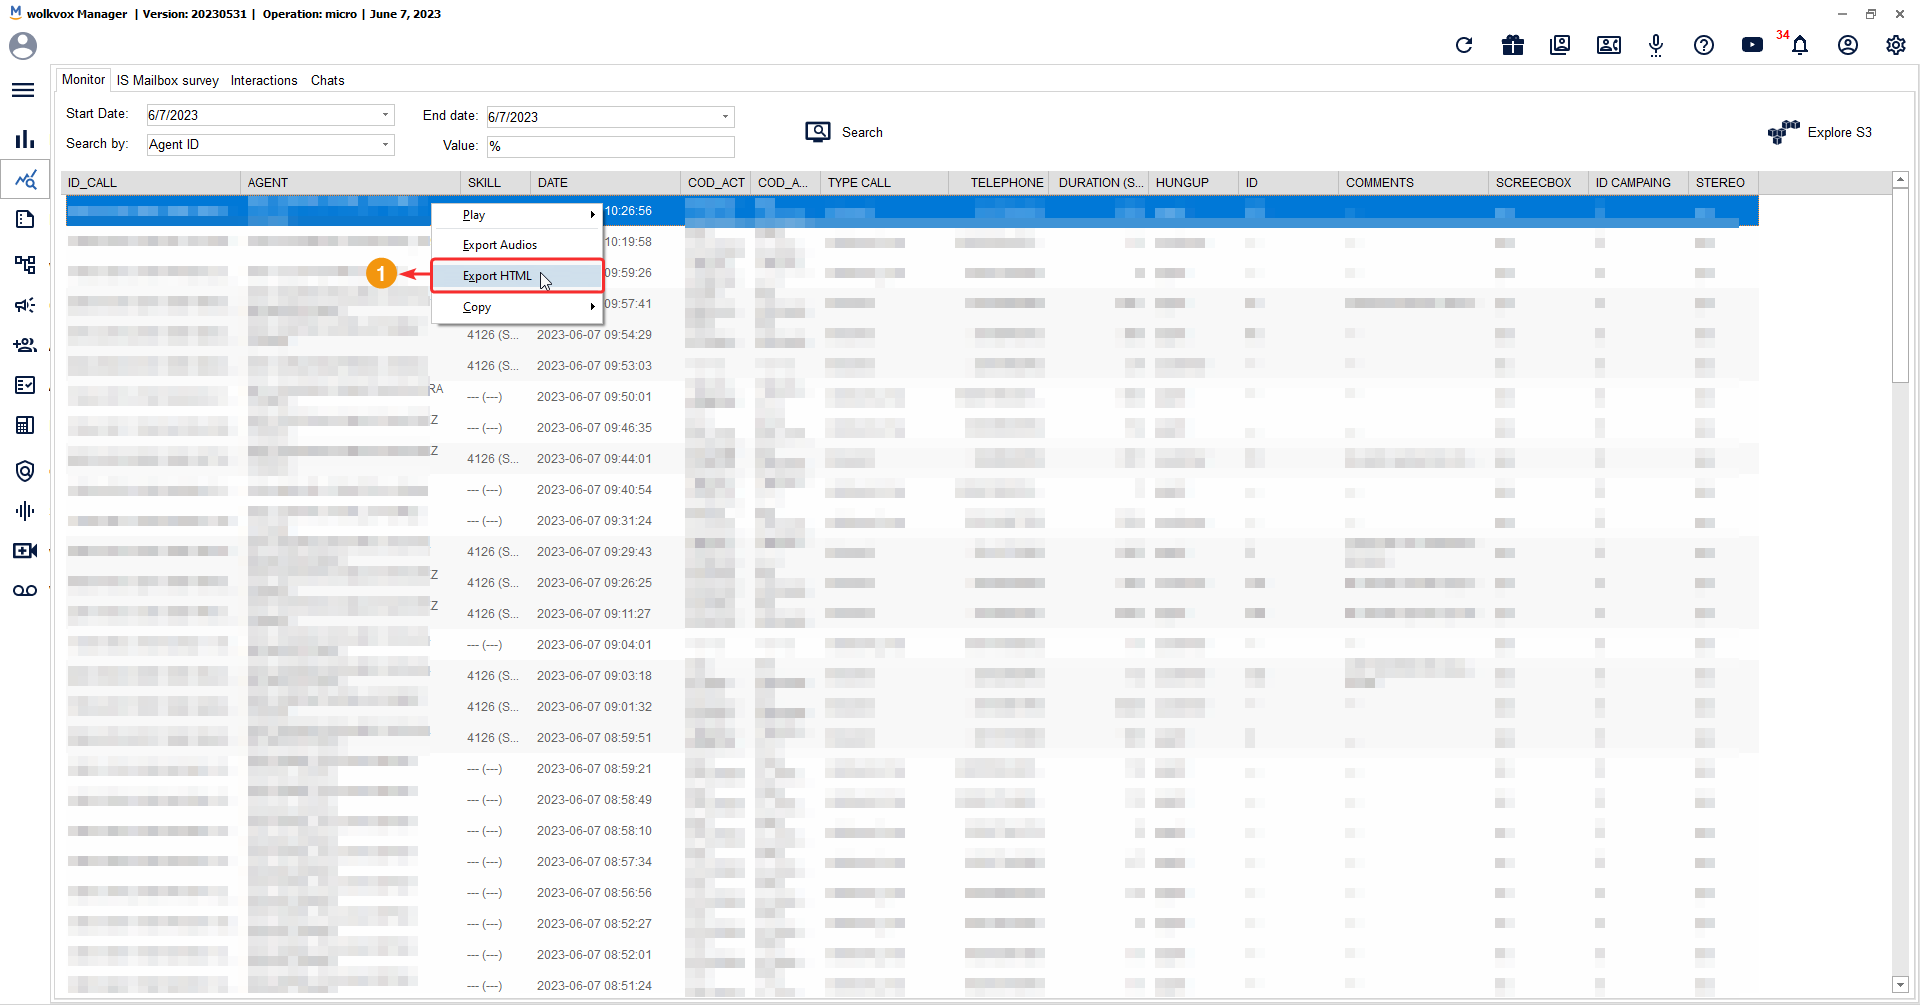
You can export the table to HTML format by right-clicking on it and selecting the “Export HTML” option.
You can also copy five data points of each call to the clipboard: Call ID, Agent Name and Extension, Call Date, Dialed Phone Number, and Client ID.

Listen to call recording #
To listen to a call recording, follow these steps:
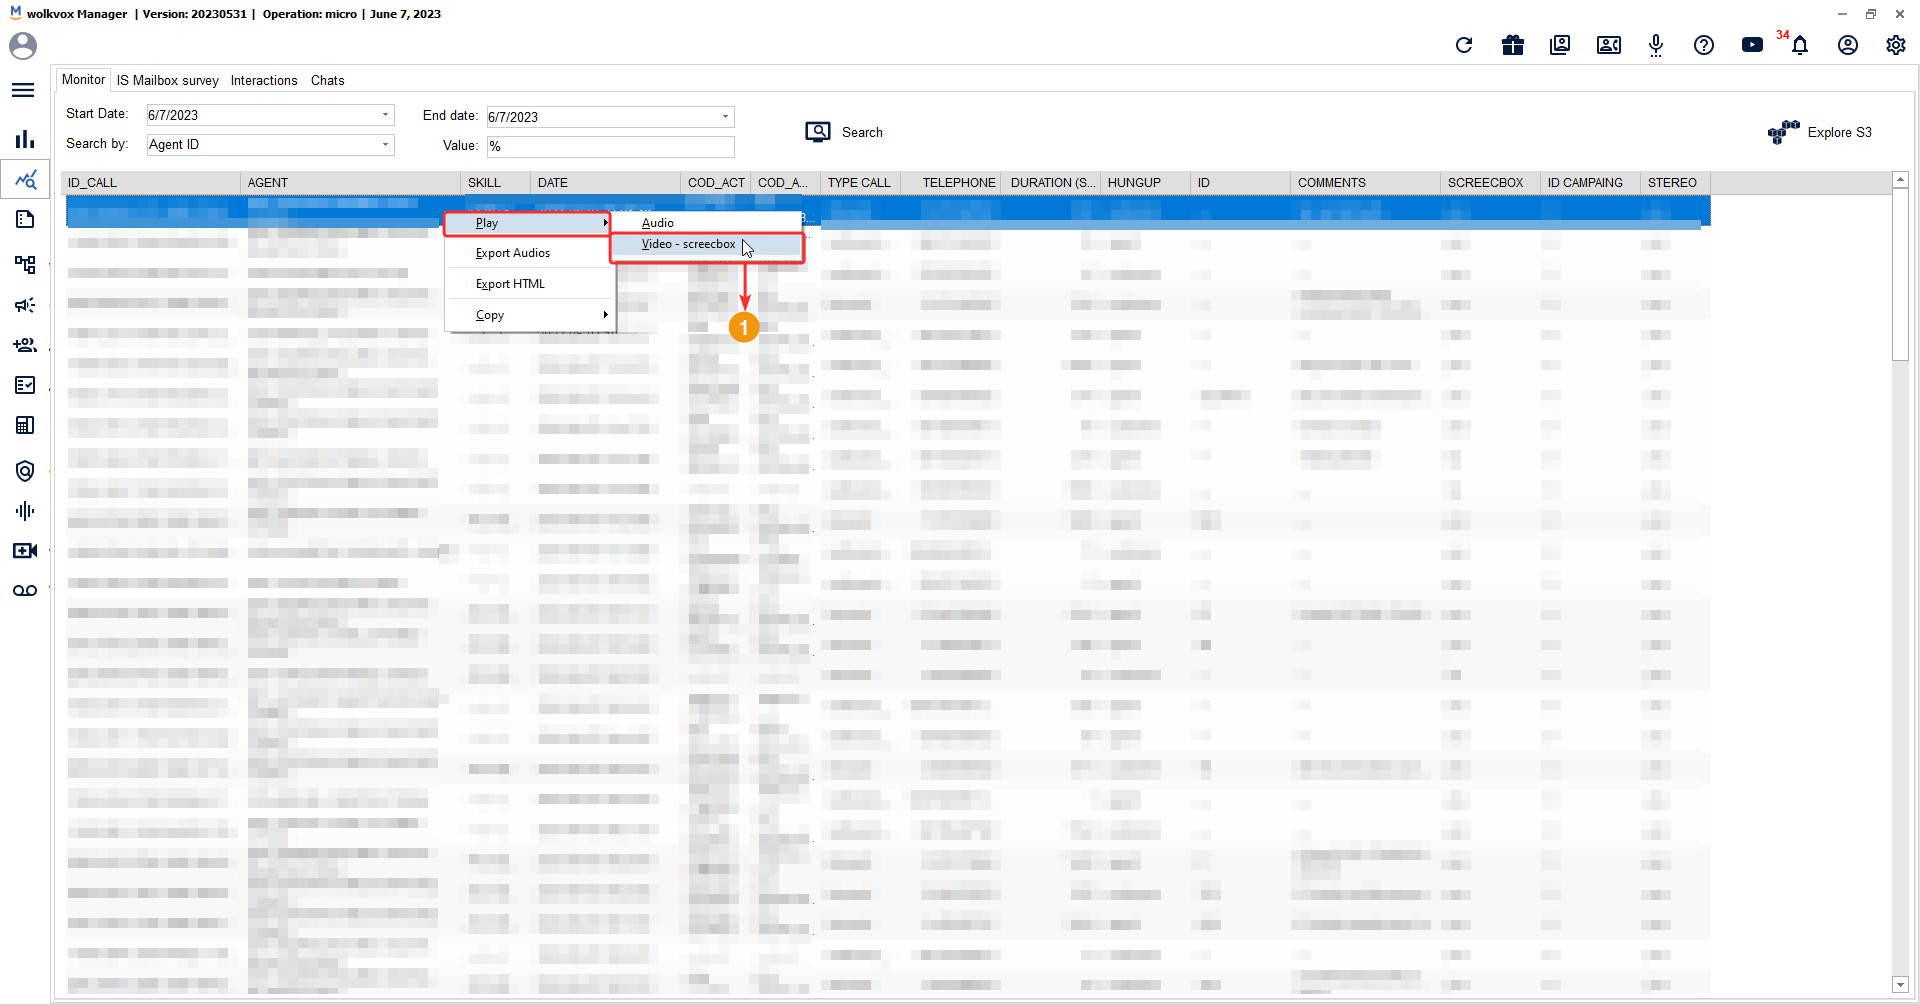
- Right-click on the call you want to listen to. Select the option “Play” and then “Audio”.

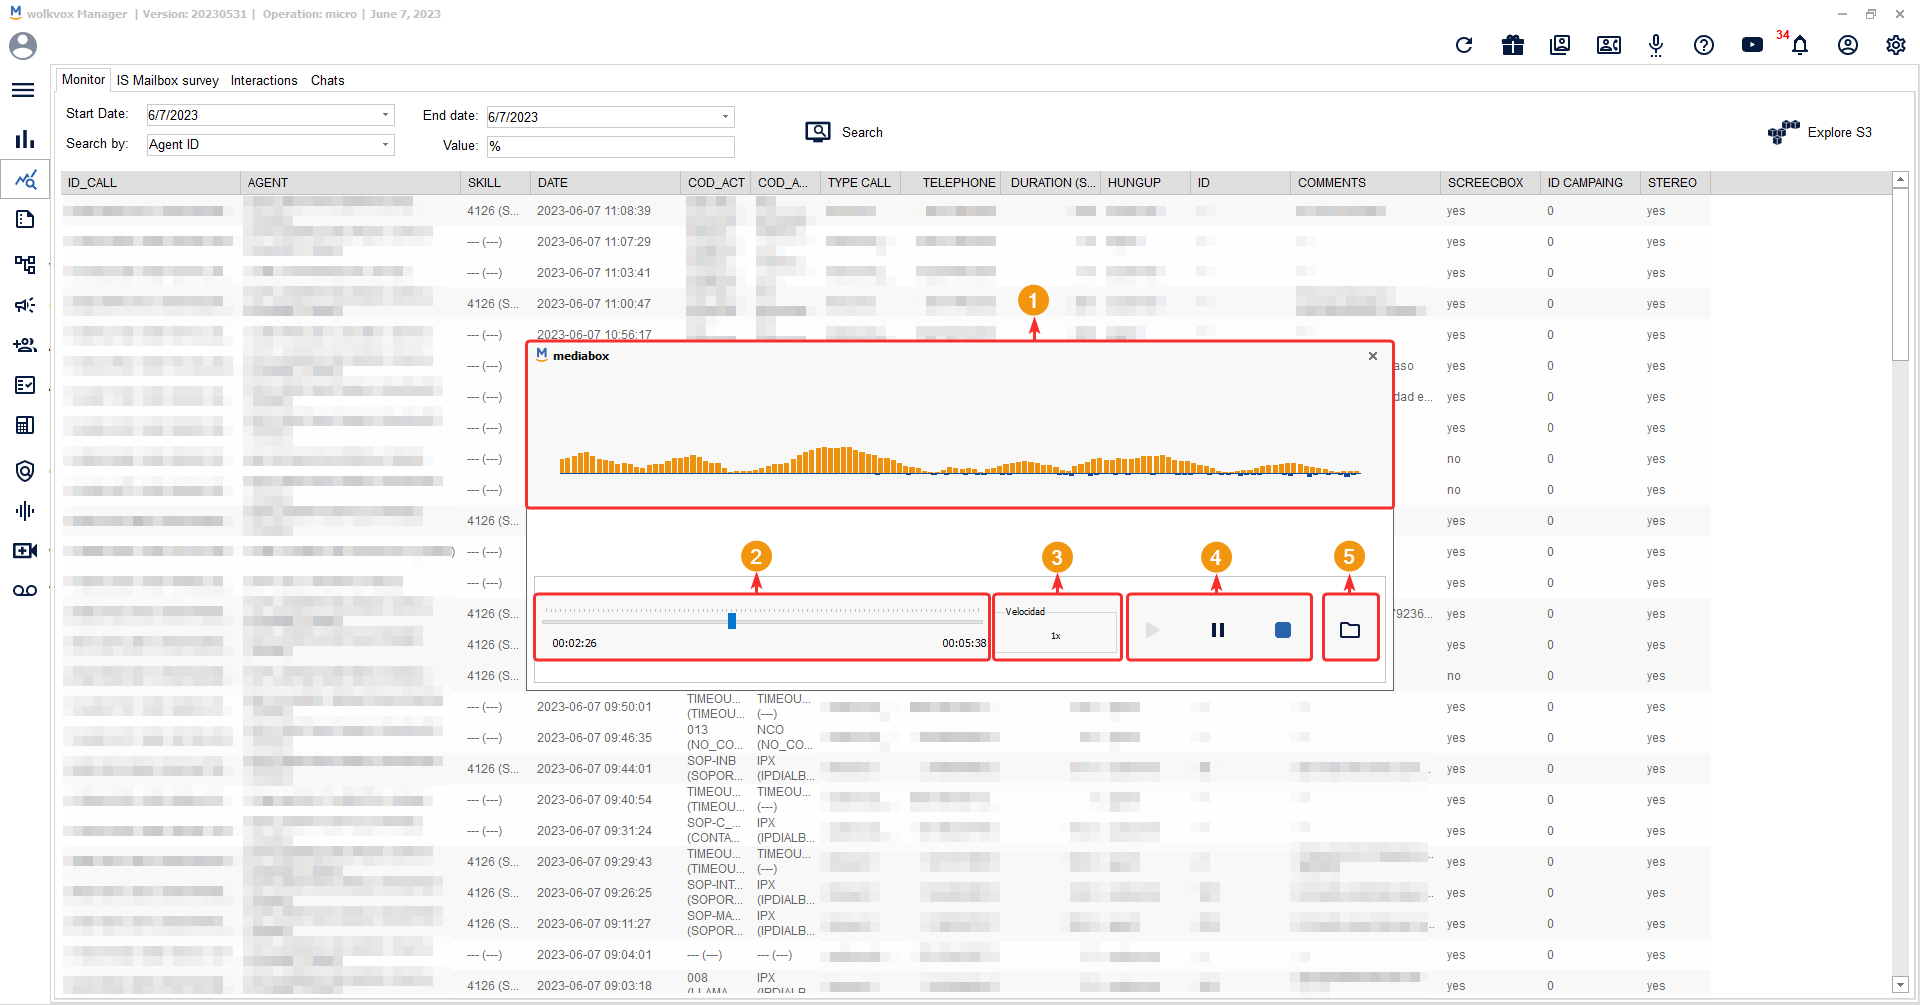
- A new window opens with an audio player. At the top, you can see the audio waves.
- At the bottom, there is a dial to navigate through the audio, along with a time counter and the total duration of the call.
- Under “Speed” you can increase the playback speed. The available values are 1x, 1.2x, 1.5x, and 2x.
- You can start, pause, stop, or resume the audio playback using the highlighted buttons.
- The button with a folder icon allows you to open the Windows file explorer to search for the audio file on your computer. The audio format will be MP3.
Listen to the audio recording while simultaneously viewing the screen recording #
The value “Yes” in the “Screenbox” column of a call indicates that the agent’s screen has been recorded.
To view the screen recording, follow these steps:
- Right-click on the call for which you want to view the agent’s screen recording. Select the “Play” option and then choose “Video – Screenbox”.
- A window opens where you can view the screen recording video, and of course, the call audio is also played.
- You have playback controls at your disposal to fast forward or rewind the recording. The current time and total duration of the recording are also displayed.
- In the “Speed” field, you can change the playback speed of the video. You can play it at 1x, 1.25x, 1.5x, and 2x speeds.
- You can start, pause, stop, or resume the recording.
- The button represented by the folder icon allows you to open the Windows file explorer to locate the screen recording file on your computer. Note: The video file format will be AVI.

Export and save all audio call recordings #
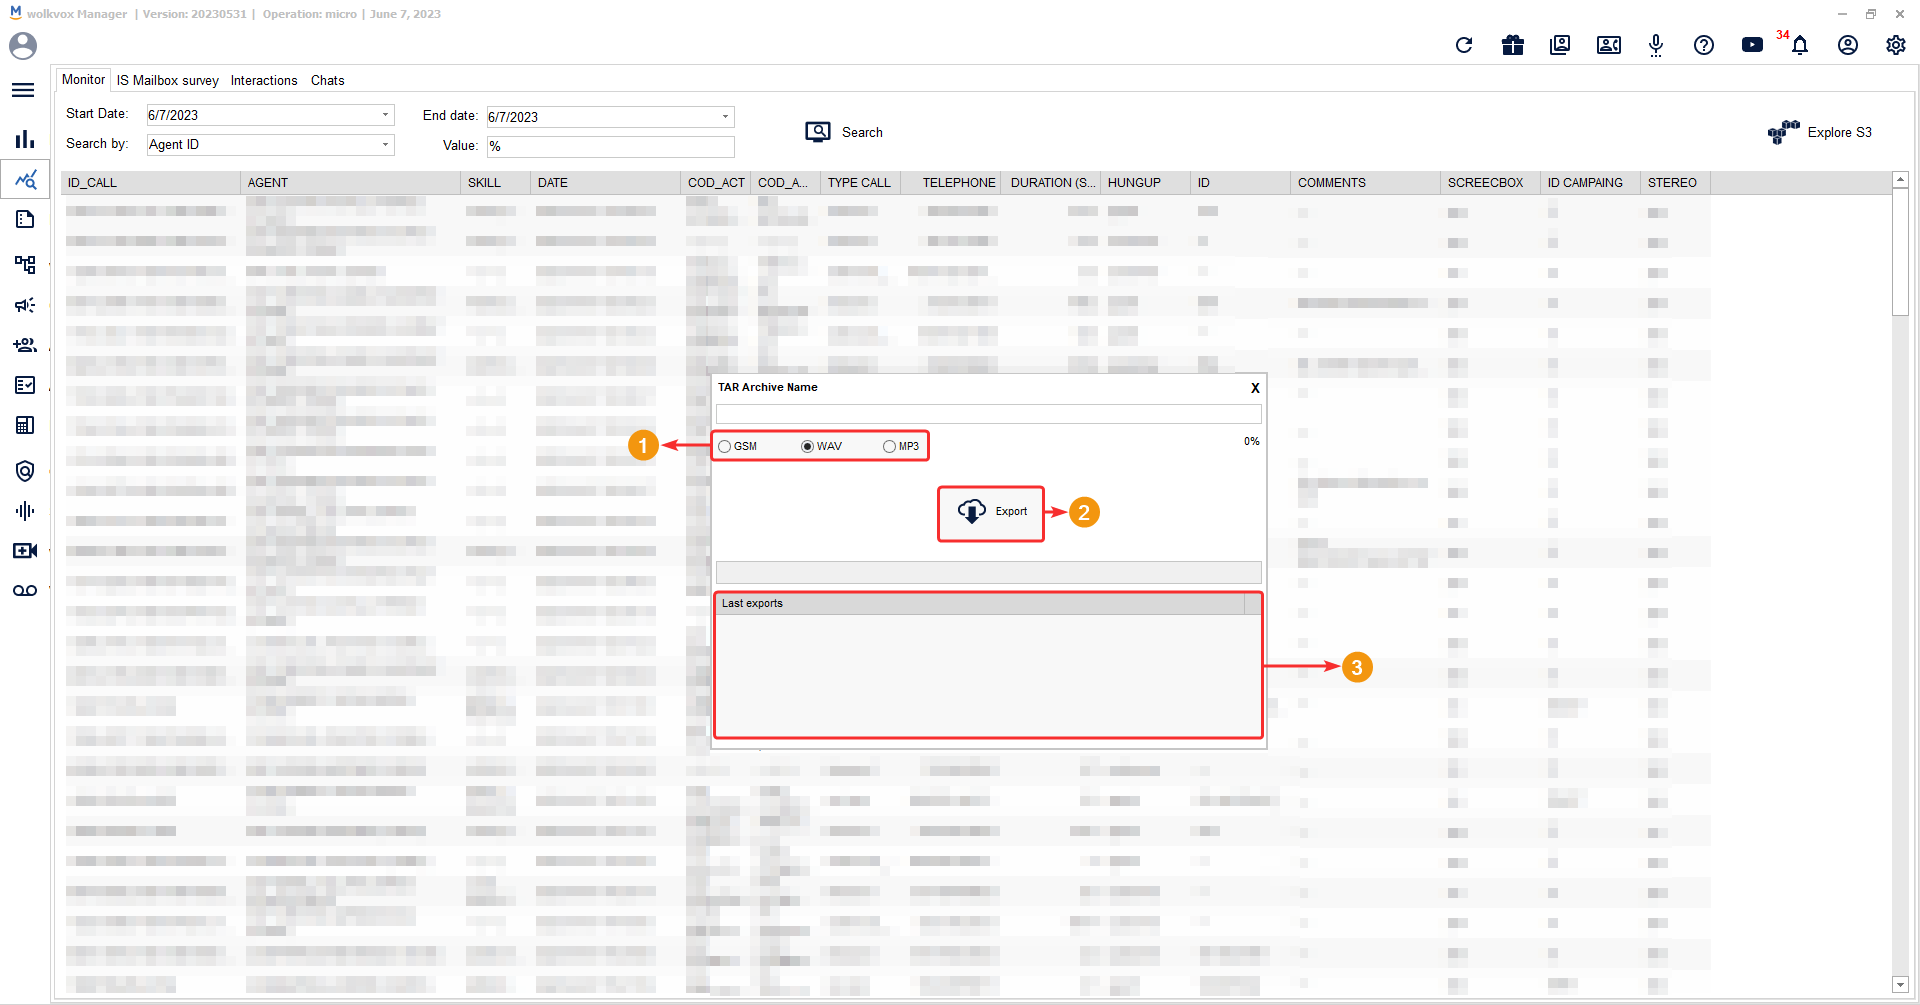
This function exports all audio recordings and compresses them into a TAR file, which you can later decompress.
- You can export all call audio recordings by right-clicking on the call list and selecting the “Export Audios” option.

- Select the desired audio format for the files. It can be GSM, WAV, or MP3. The filename for the audio file will be automatically generated.
- Click the “Export” button to start generating the compressed file with all the audio recordings. Once the export is complete, a window will open in your default browser, which also opens the file explorer to select where you want to save the exported audio files. Please, wait for the file export to complete.
- The “List exports” section displays the latest successful export requests. If your latest list of exported audio files does not appear in the “Last exports” list, you can right-click on the table and select “Refresh” to reload the list. Similarly, if you right-click and select “Download,” you can attempt to download the audio files.
Note: If an error occurs while trying to export, it means there is high traffic, and therefore, you should retry the export.
Note: This bulk export does not include video recordings; only audio recordings are downloaded.
Note: There is a progress bar to verify the completion of the audio export. When everything is complete, the entire progress bar will be green.
Monitor the survey mailbox #
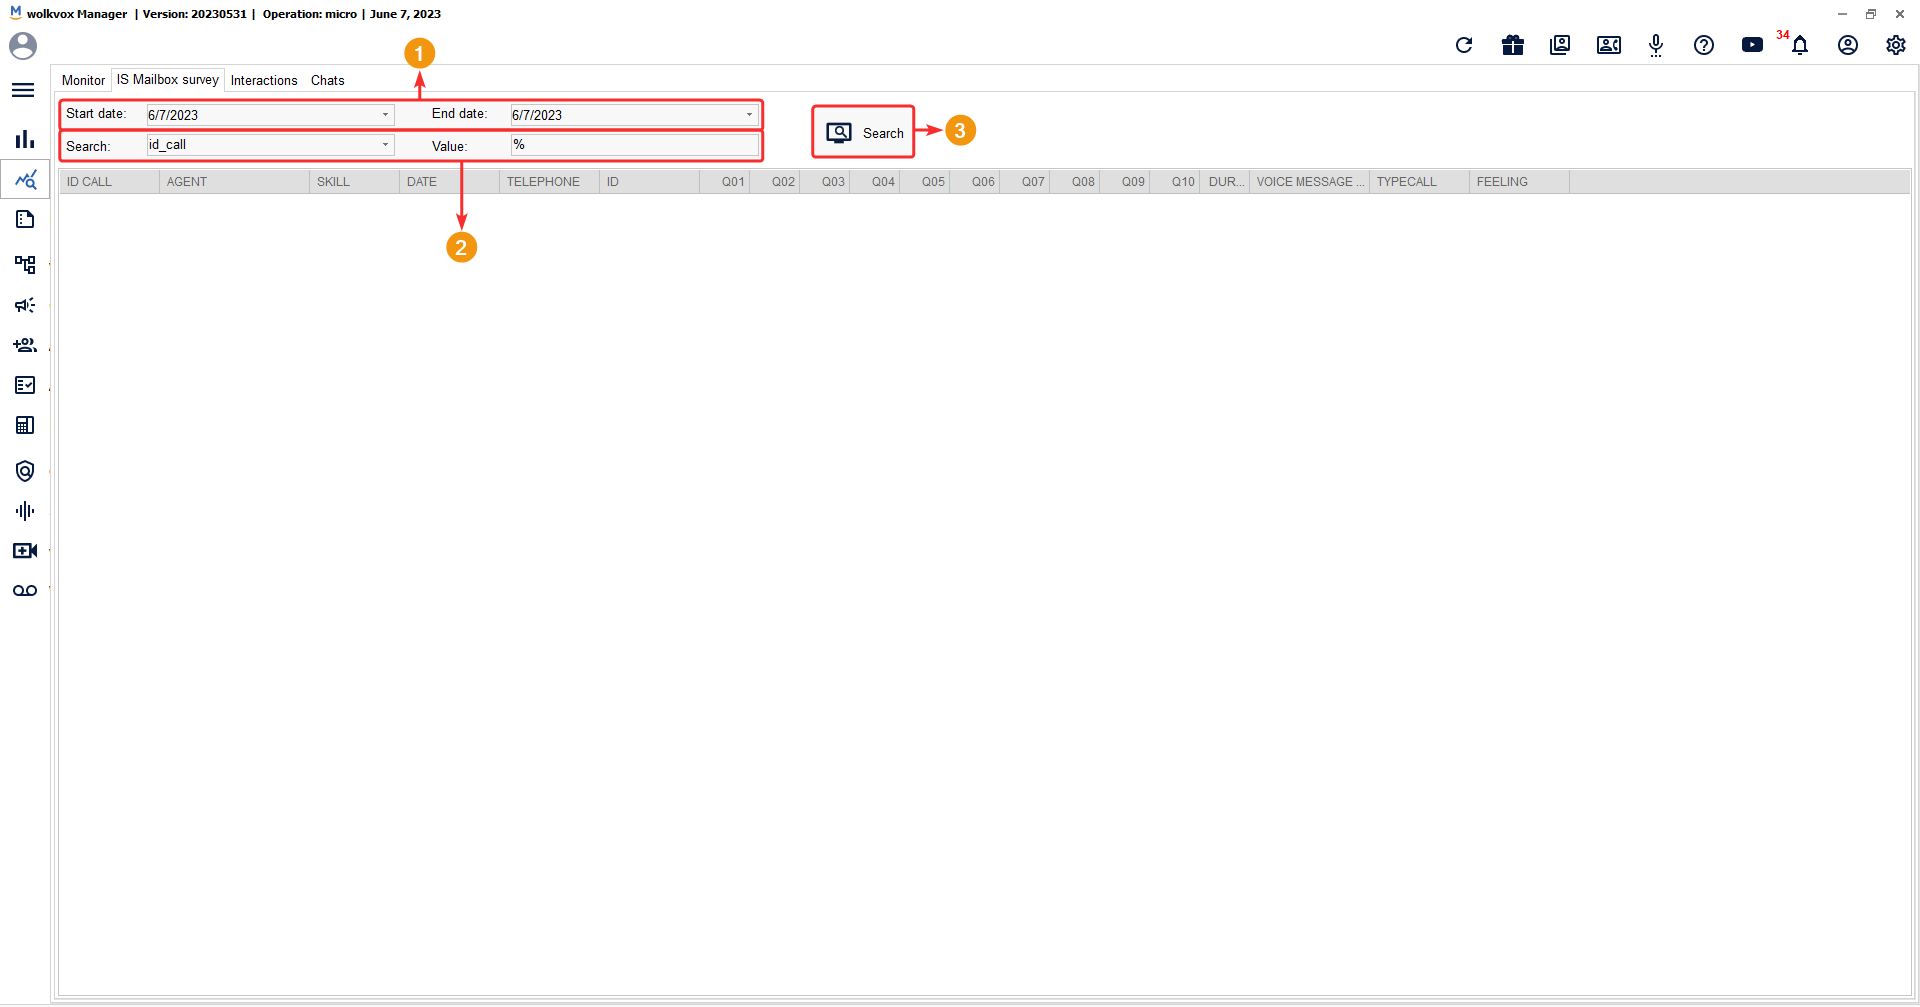
In the ‘IS Mailbox survey’ tab, you can view the records of voice surveys by selecting a date range. You will have important statistics regarding the voice responses of the survey for each call that your customer left.

To perform the survey search, follow these steps:
- Select a date range.
- You can customize the search by specifying whether you want to search by call identification number (id_call), agent extension number (id_agent), skill identification number (id_queue), customer’s phone number (tel_number), or customer identification number (id_customer). In the ‘Value’ field, you can enter a specific value based on the selected search criteria in the ‘Search’ field.
- Click the ‘Search’ button to initiate the search based on the criteria you provided.
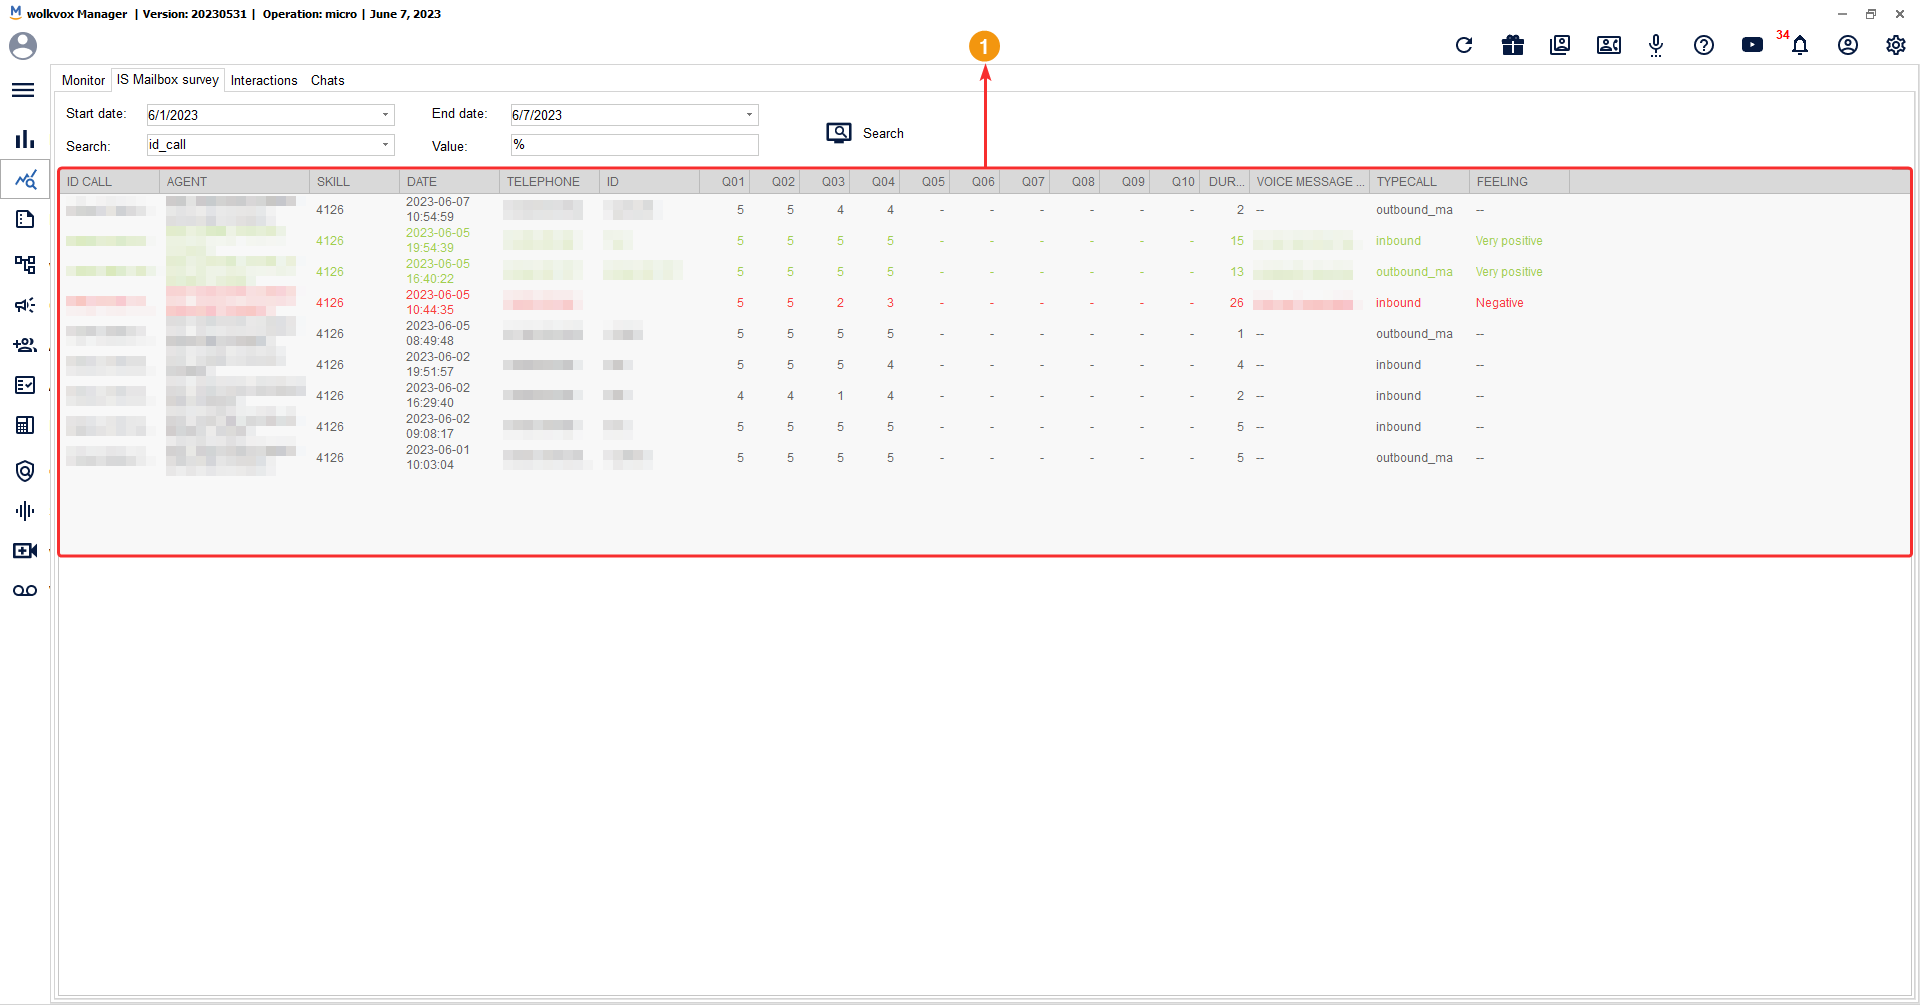
The following columns are identified in the search results table:
- ID Call: Call identification number.
- Agent: Agent’s name and extension number.
- Skill: Skill identification number.
- Date: Date and time the survey was conducted.
- Telephone: Customer’s phone number.
- ID: Customer identification number.
- Q01: Rating given by the customer for question #1.
- Q02: Rating given by the customer for question #2.
- Q03: Rating given by the customer for question #3.
- Q04:Rating given by the customer for question #4.
- Q05: Rating given by the customer for question #5.
- Q06: Rating given by the customer for question #6.
- Q07: Rating given by the customer for question #7.
- Q08:Rating given by the customer for question #8.
- Q09: Rating given by the customer for question #9.
- Q10: Rating given by the customer for question #10.
- Duration: Duration of the customer’s response to the survey.
- Voice Message Text: Summary text of the call.
- Typecall: Type of call made.
- Feeling: Type of sentiment identified in the customer. Feelings range from very negative to very positive.
You can export the search results in HTML format. To do this, right-click on the table and select the ‘Export HTML’ option.

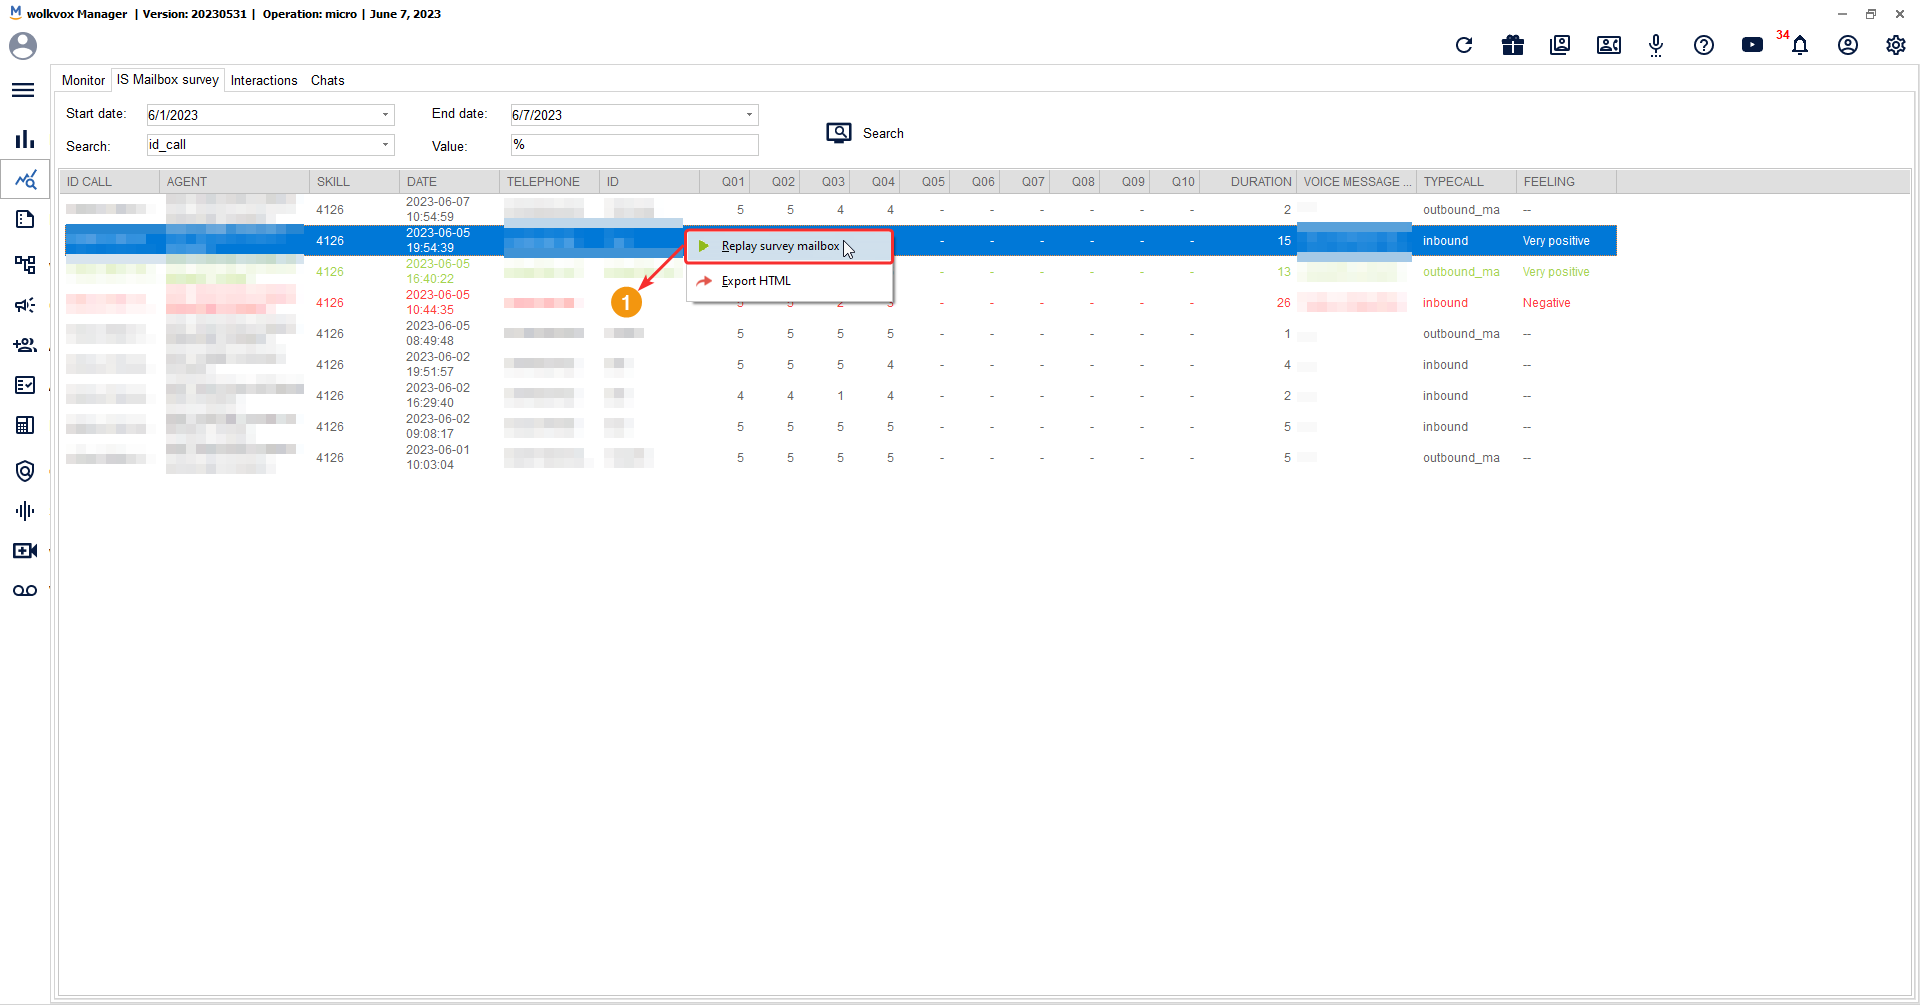
Play the recording of a survey #
It is possible to listen to the recording of the voice message that the customer left in the survey mailbox. To do this, right-click on the survey you want to play and select the ‘Replay survey mailbox’ option.
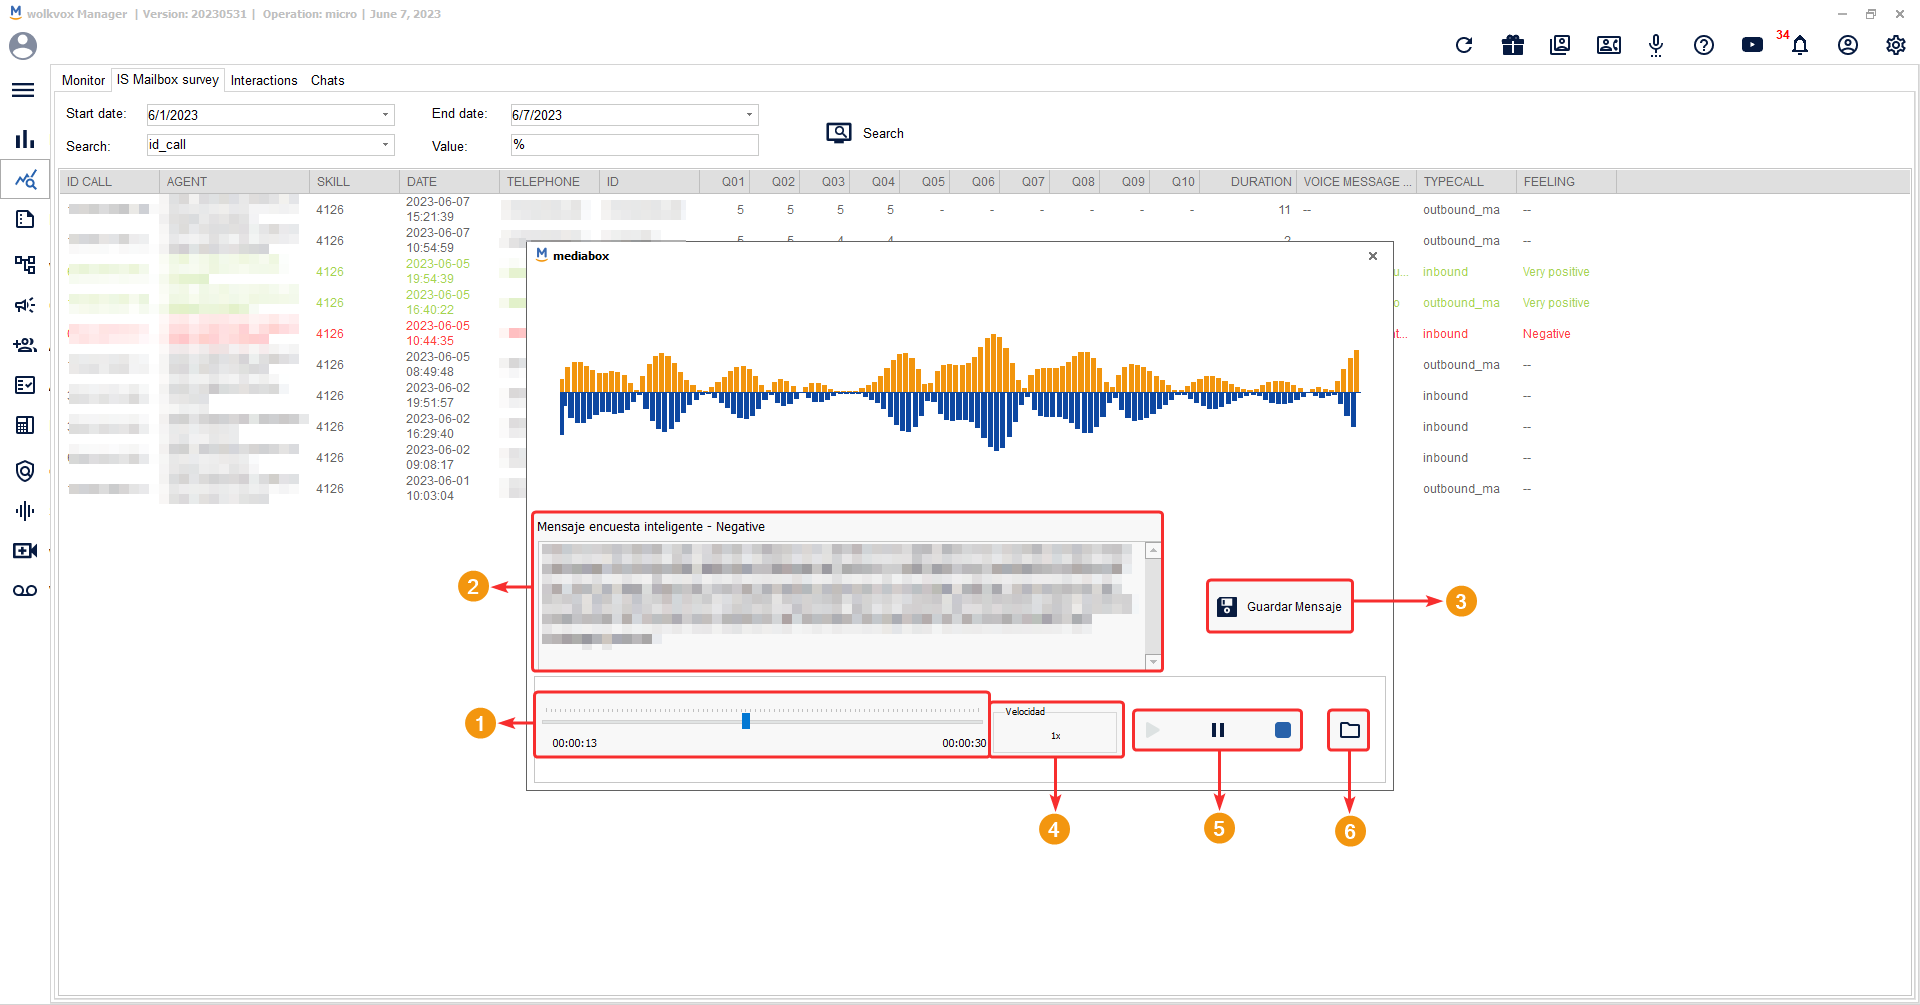
A window opens with the following functionalities to listen to the survey audio:
- You have playback controls that allow you to fast forward or go back to a point in the audio track. The current time and total duration of the audio are also displayed.
- In the ‘Smart survey message’ field, the audio is converted to text. In other words, it is a transcription of the voice message. It is also possible to modify this section and type in it to clarify the message.
- Click on ‘Save message’ to apply the changes made in the ‘Smart survey message’ field.
- You can change the playback speed of the audio, with available speeds of 1x, 1.25x, 1.5x, and 2x.
- You have buttons to start, pause, stop, and resume the recording.
- The button with a folder icon allows you to open the survey recording file in the Windows explorer. The files are saved in MP3 format.
Monitor the interactions #
In the ‘Interactions’ tab, you can monitor everything related to interactions (Email, Facebook Page, Instagram, and Twitter).

To perform the search for interactions, follow these steps:
- Select a date range.
- You can customize the search by selecting your preferred criterion in the ‘Search by’ field. It allows you to search by channel type, customer email (Email cliente), agent name, agent extension number (ID Agente), case identification number (ID Caso), email subject, interaction status, and classification code used in the interaction.
- In the ‘Value’ field, enter the value you want to search for based on the selected criterion in the ‘Search by’ field.
- Click the ‘Search’ button to initiate the search for records.
The following columns are identified in the search results table:
- Channel: Displays an icon indicating the type of interaction channel. It can be email, Facebook, Instagram, or Twitter.
- Customer: Sender’s username.
- Agent: Name of the agent handling the interaction.
- Skill: Skill number linked to the interaction.
- Subject: Displays the subject of the message.
- Status: Indicates whether the interaction is open or closed.
- Act Code: Classification code used to classify the interaction.
- Attachments: Number of attachments included in the interaction.
- Creation: Date of interaction creation.
- Closed: Date when the interaction was closed.
Previewing an interaction #
If you left-click on an interaction from the list, a preview window opens where you can see what happened in that interaction.
Export interaction records #
You have two ways to save the records found in the search:
- Excel: Allows you to download the records in an XLS file format used in Excel software. A file browser window will appear for you to select the location where you want to download the file.
- Export: Allows you to send a message to your email address that will contain a link where you can download the records compressed in a TAR file format.

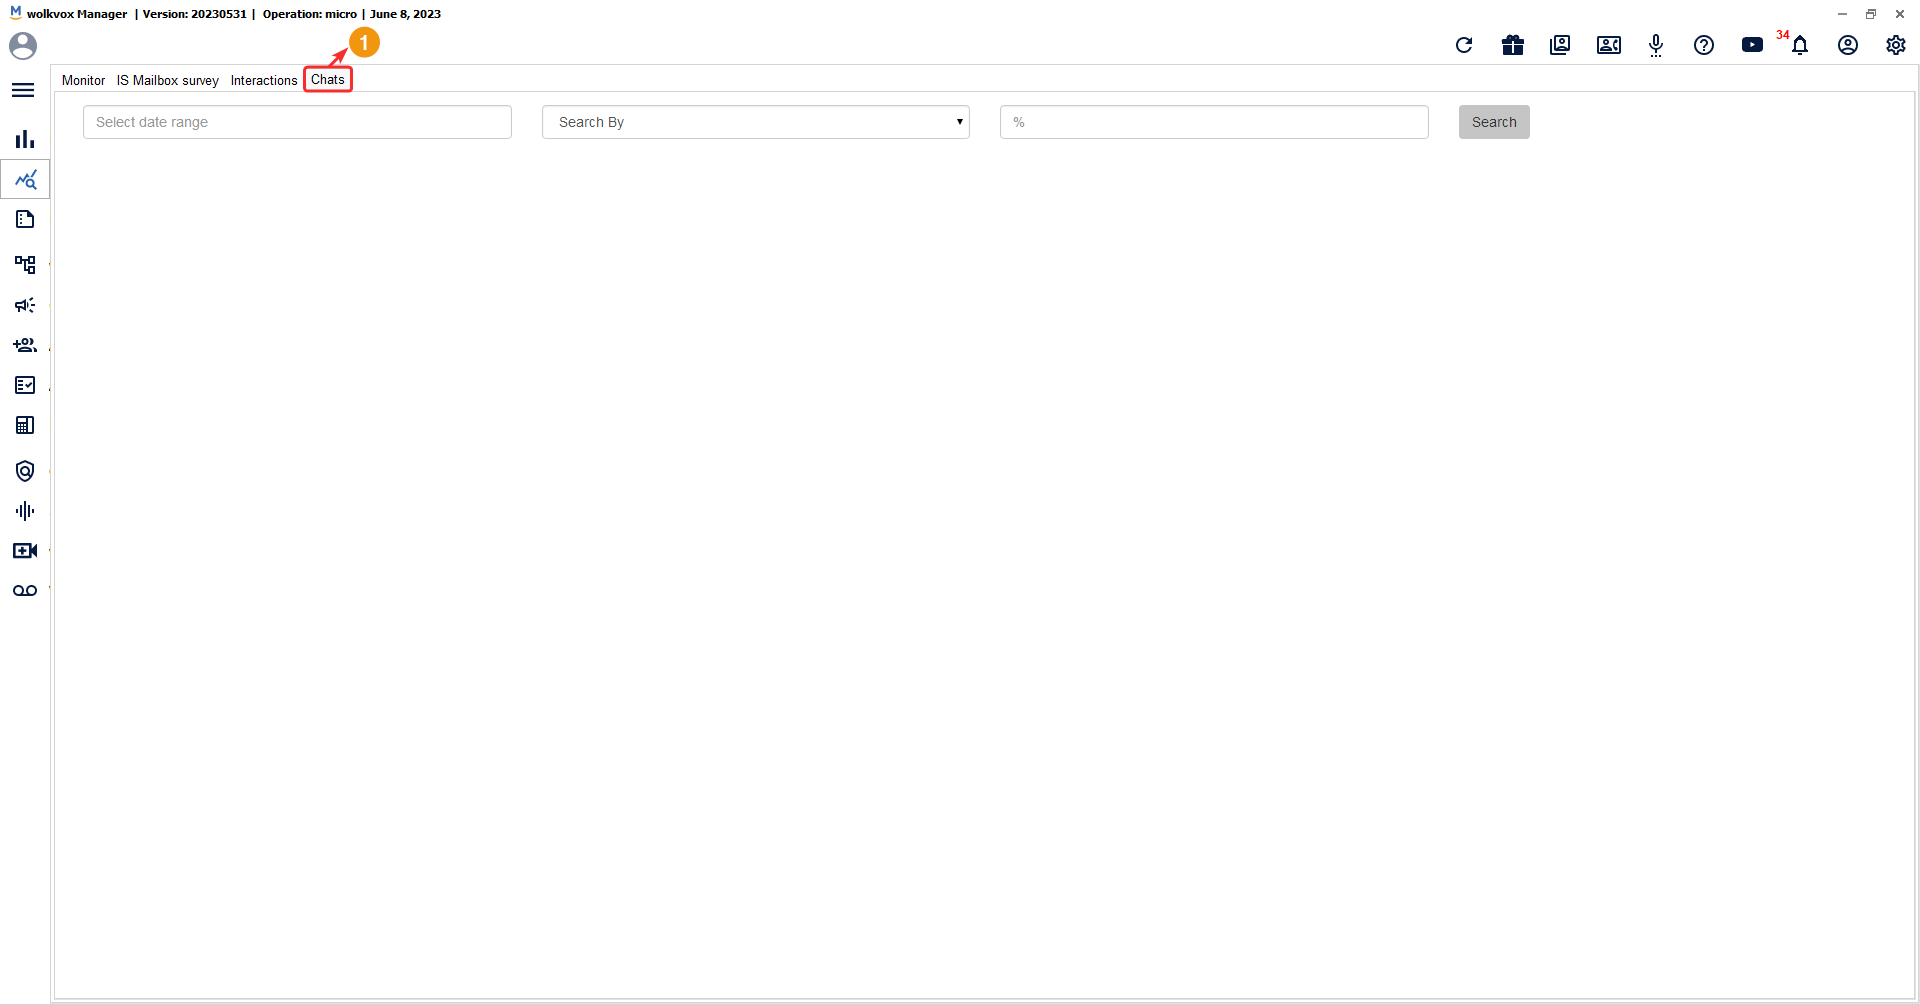
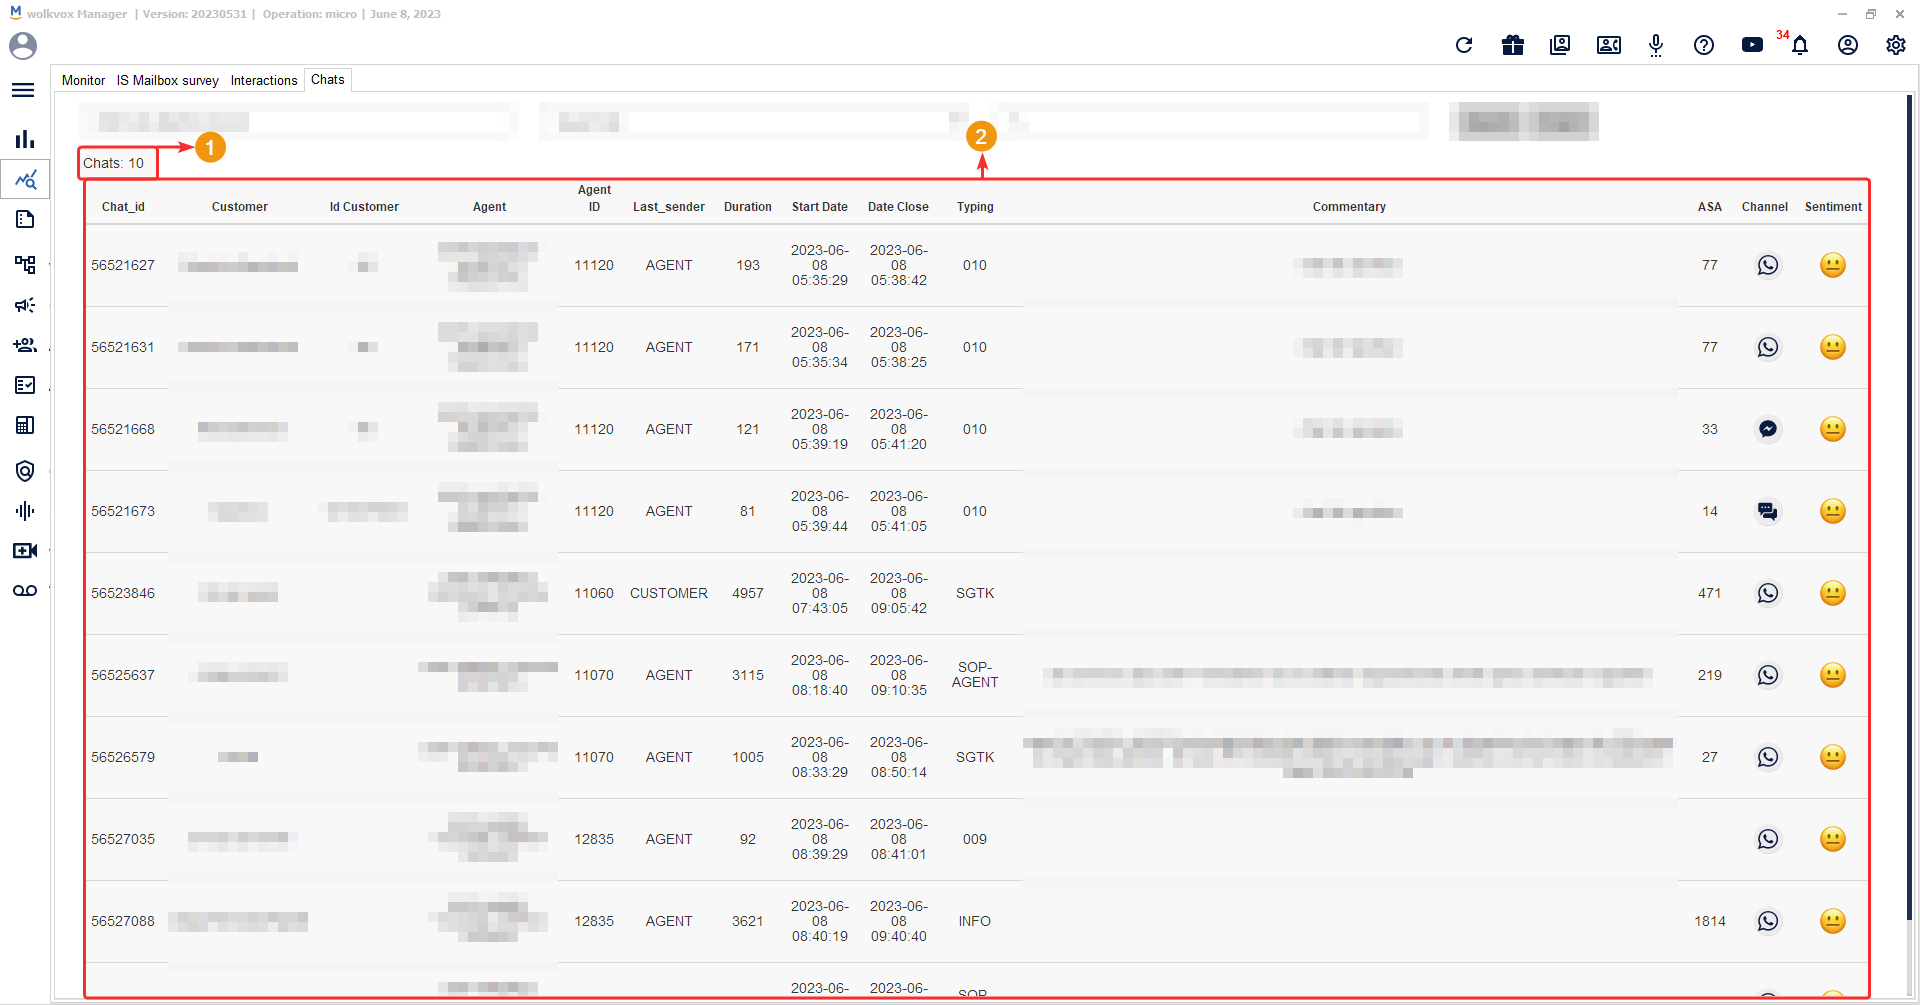
Monitor chats #
In the ‘Chats’ tab, you can monitor everything related to WhatsApp, Web chat, Line, and Telegram chats.
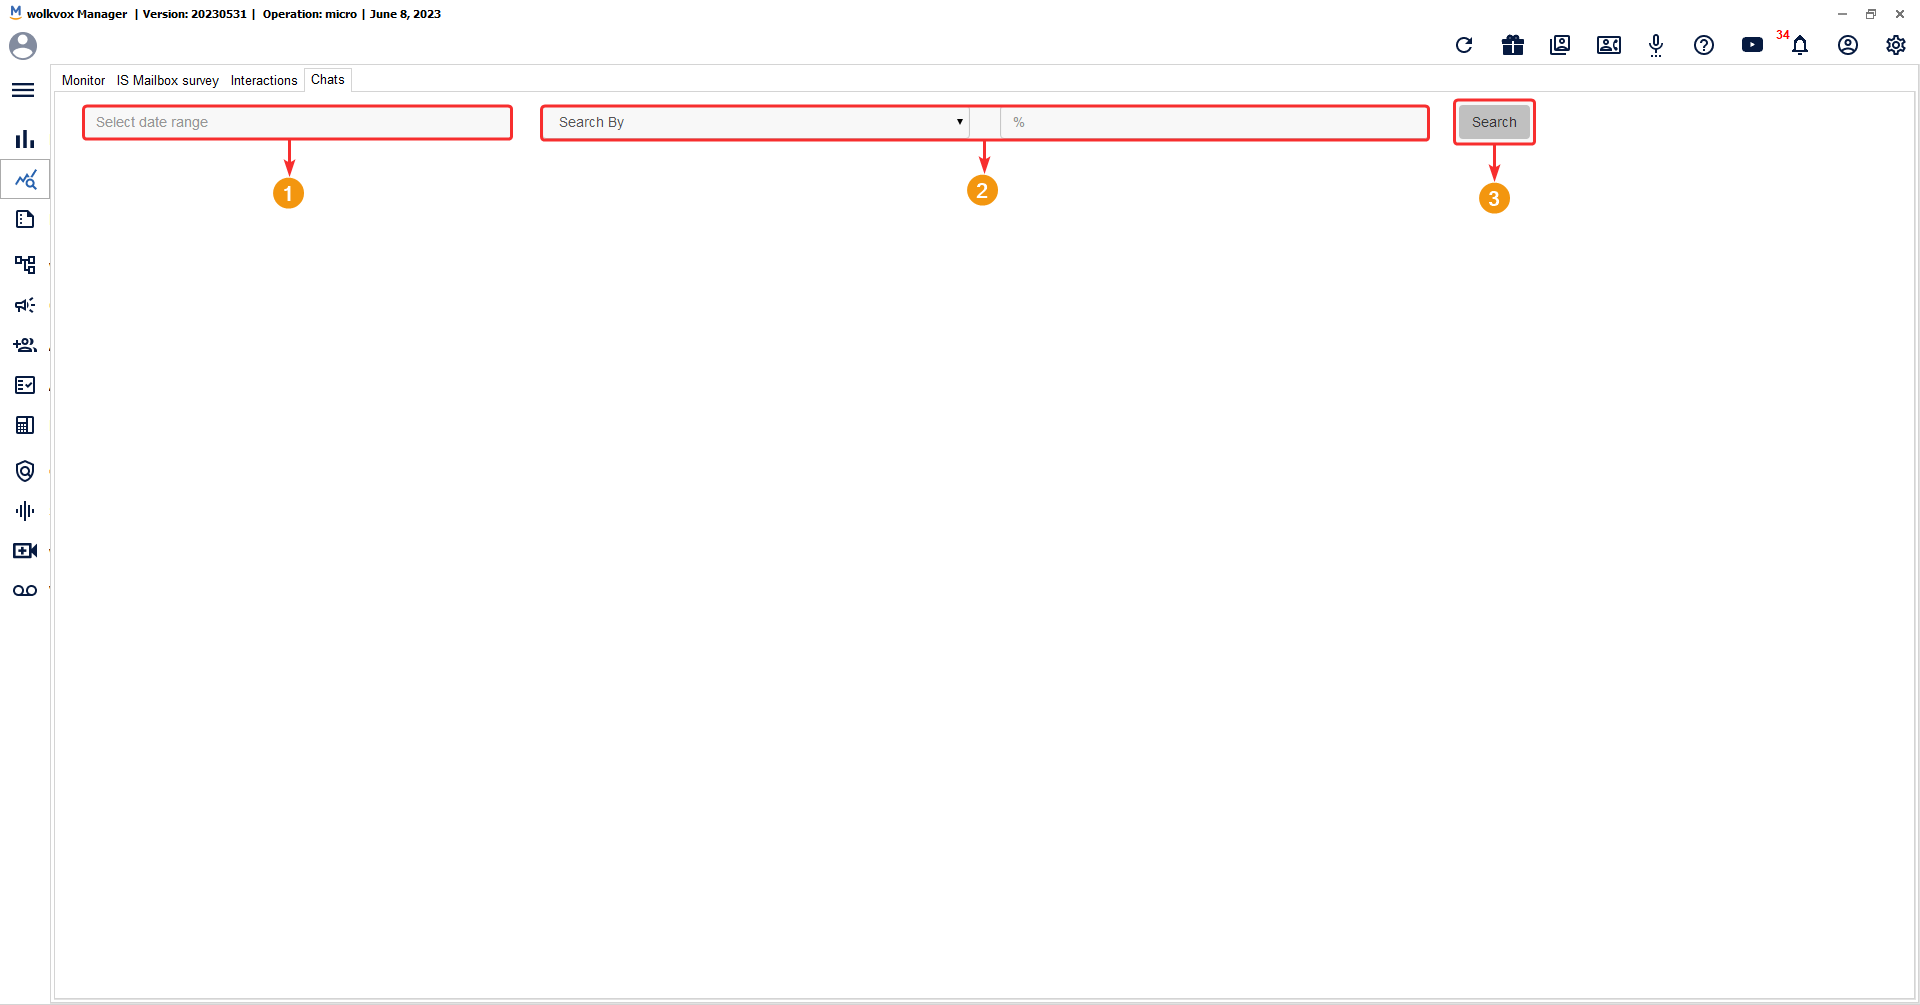
If you want to track chats in your operation, follow these steps:
- Select a date range. The maximum allowed is ‘Last 30 days’ or ‘Current month’.
- In the ‘Search by’ field, you can select a filtering option such as agent extension number (id Agent), used classification code, chat identification number (id Chat), customer identification number (id Customer), and customer phone number (Phone).
- Click the ‘Search’ button to initiate the search for records based on the selected criteria.
- At the top, the number of found chats is displayed.
- The following columns are identified in the search results table:
- Chat_id: Chat identification number.
- Customer: Customer name.
- id Customer: Customer identification number.
- Agent: Agent name.
- Agent ID: Agent extension number.
- Last_sender: Indicates who was the last sender in the chat.
- Duration: Total duration of the chat in seconds.
- Start Date: Exact date and time the chat started.
- Date Close: Exact date and time the chat was closed.
- Typing: Classification code used by the agent to classify the chat.
- Commentary: Displays the comment left by the agent.
- ASA: Average Speed of Answer, indicating the average time in seconds it takes for the agent to respond when the customer sends a message.
- Channel: Indicates the channel used in the chat, which can be WhatsApp, Telegram, Line, or Web Chat. This is displayed using icons.
- Sentiment: Indicates the sentiment identified in the agent. This is displayed using emoticons.
Previewing a chat #
If you left-click on one of the chats, you will be able to preview its chat history. Within the chat preview window, basic information about the chat is displayed, along with the conversation messages, including audio messages.

Exporting chats #
It is possible to export the chats and view the history of each one. The system compresses all chat records and saves them in TAR format. Upon decompressing the TAR, it is possible to see that each chat has been saved in HTML format. This file contains the history of all messages left in the chat.
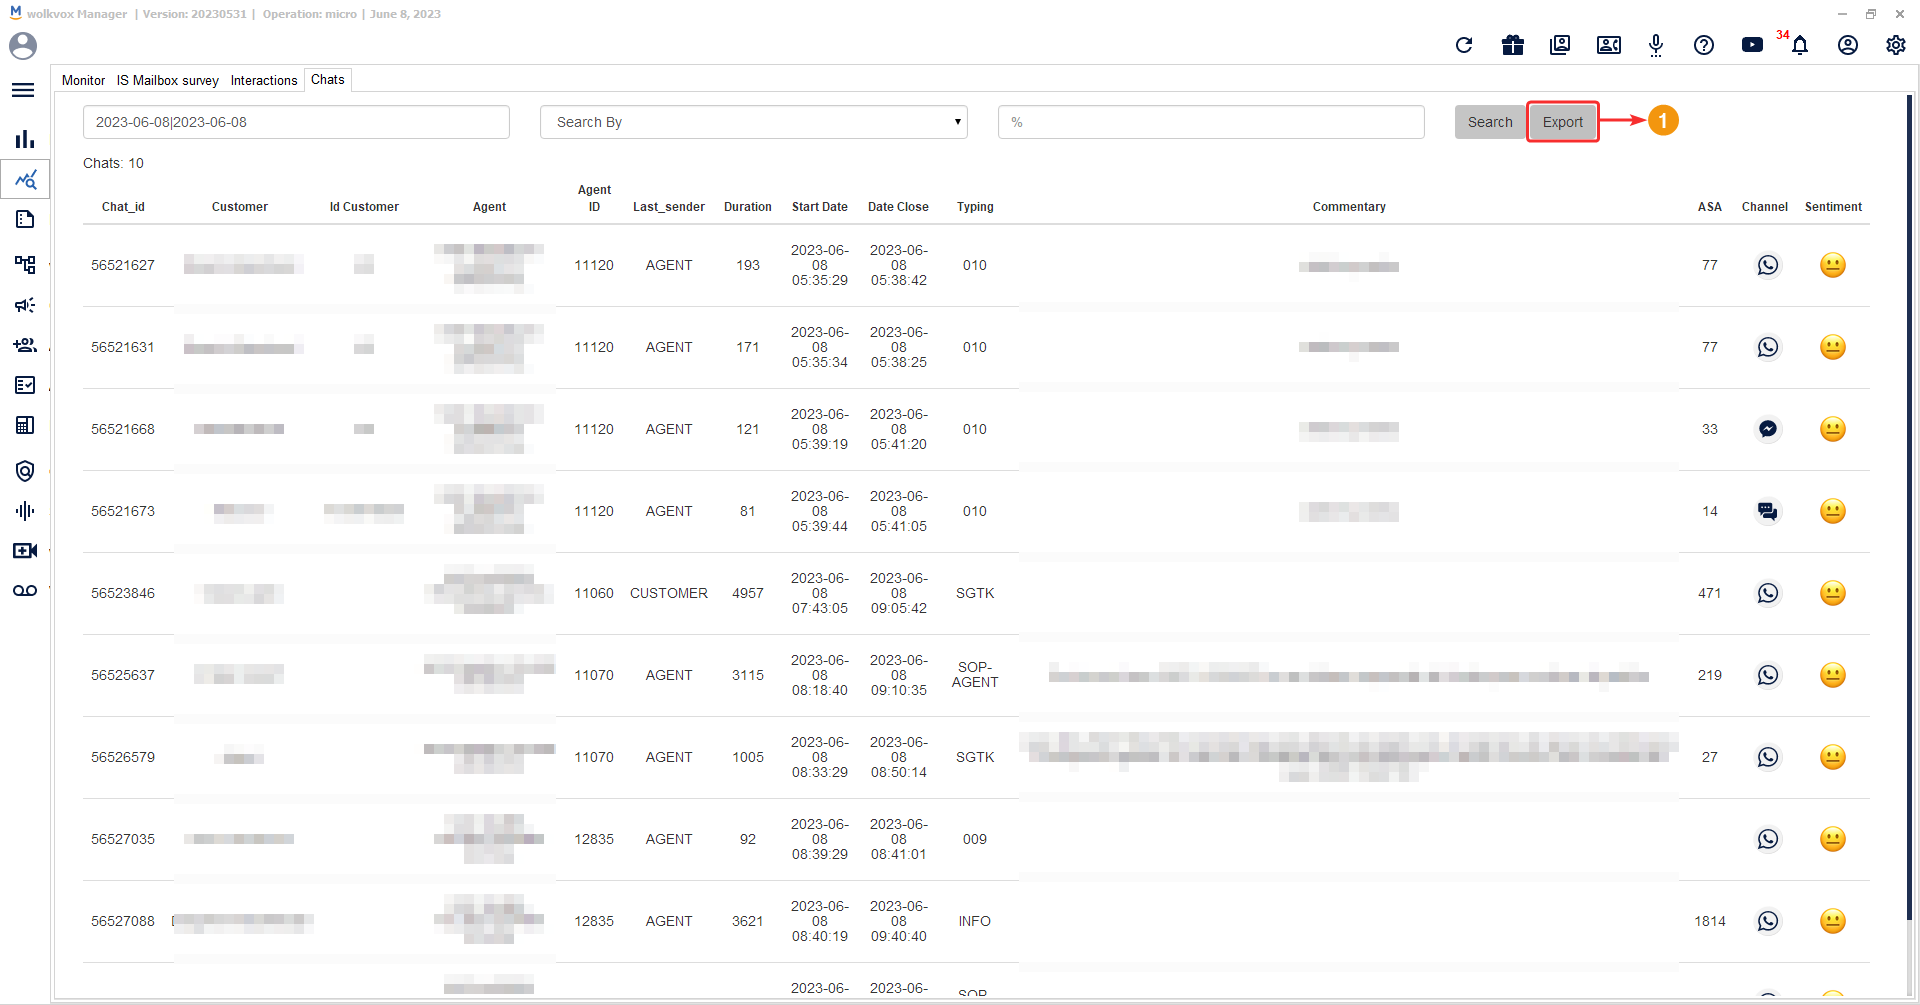
- In this window, you should click on the “Export” button, and the system will start generating the compressed file. Wait until it completes, and the loading icon disappears.
- The compressed file will be added to the export list. The list displays the filename along with the number of chats it contains. If you left-click on a file from the list, it will open the file explorer where you can select the location to save the compressed file.
- If you are unable to view your exported file, you can use the “Refresh” button to update the file list.

