 Change in the contact display when creating or editing cases in the “Cases” module #

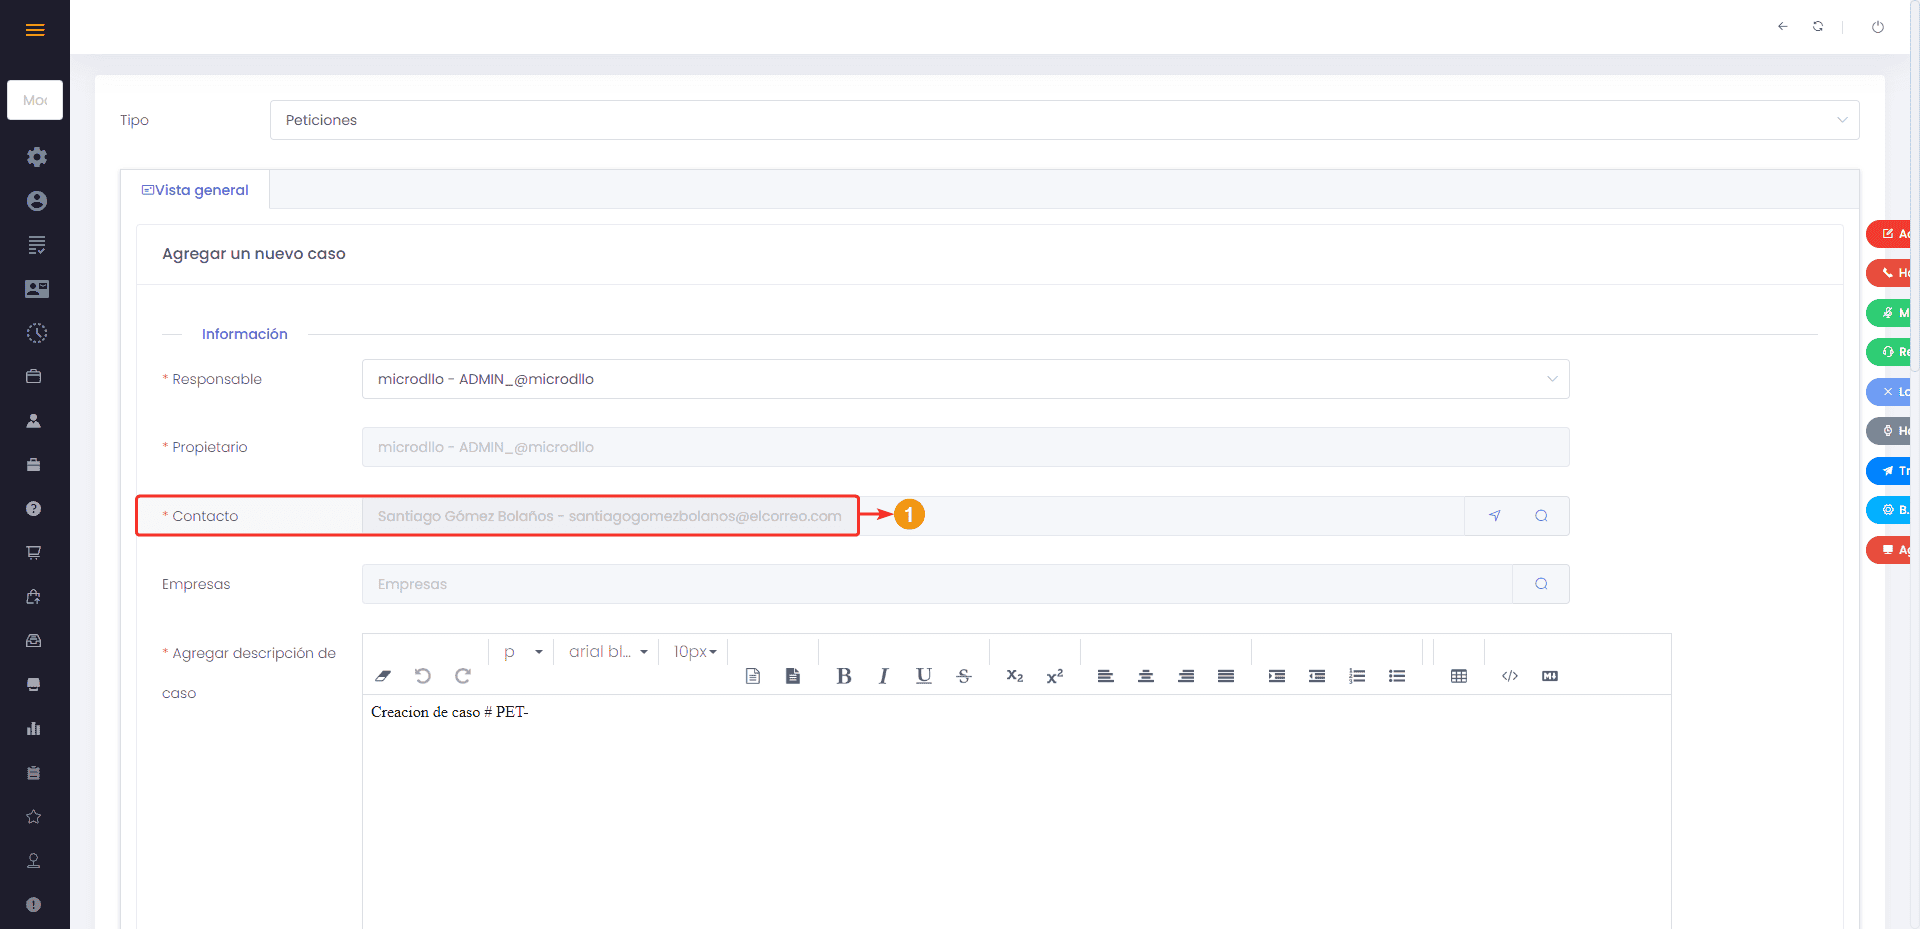
Now, in the “Contact” field of the Cases module, you will be able to view the email address of the contact when editing or creating a case. This new feature was implemented in order to add an important piece of information such as the email address and easily identify the person associated with the case.
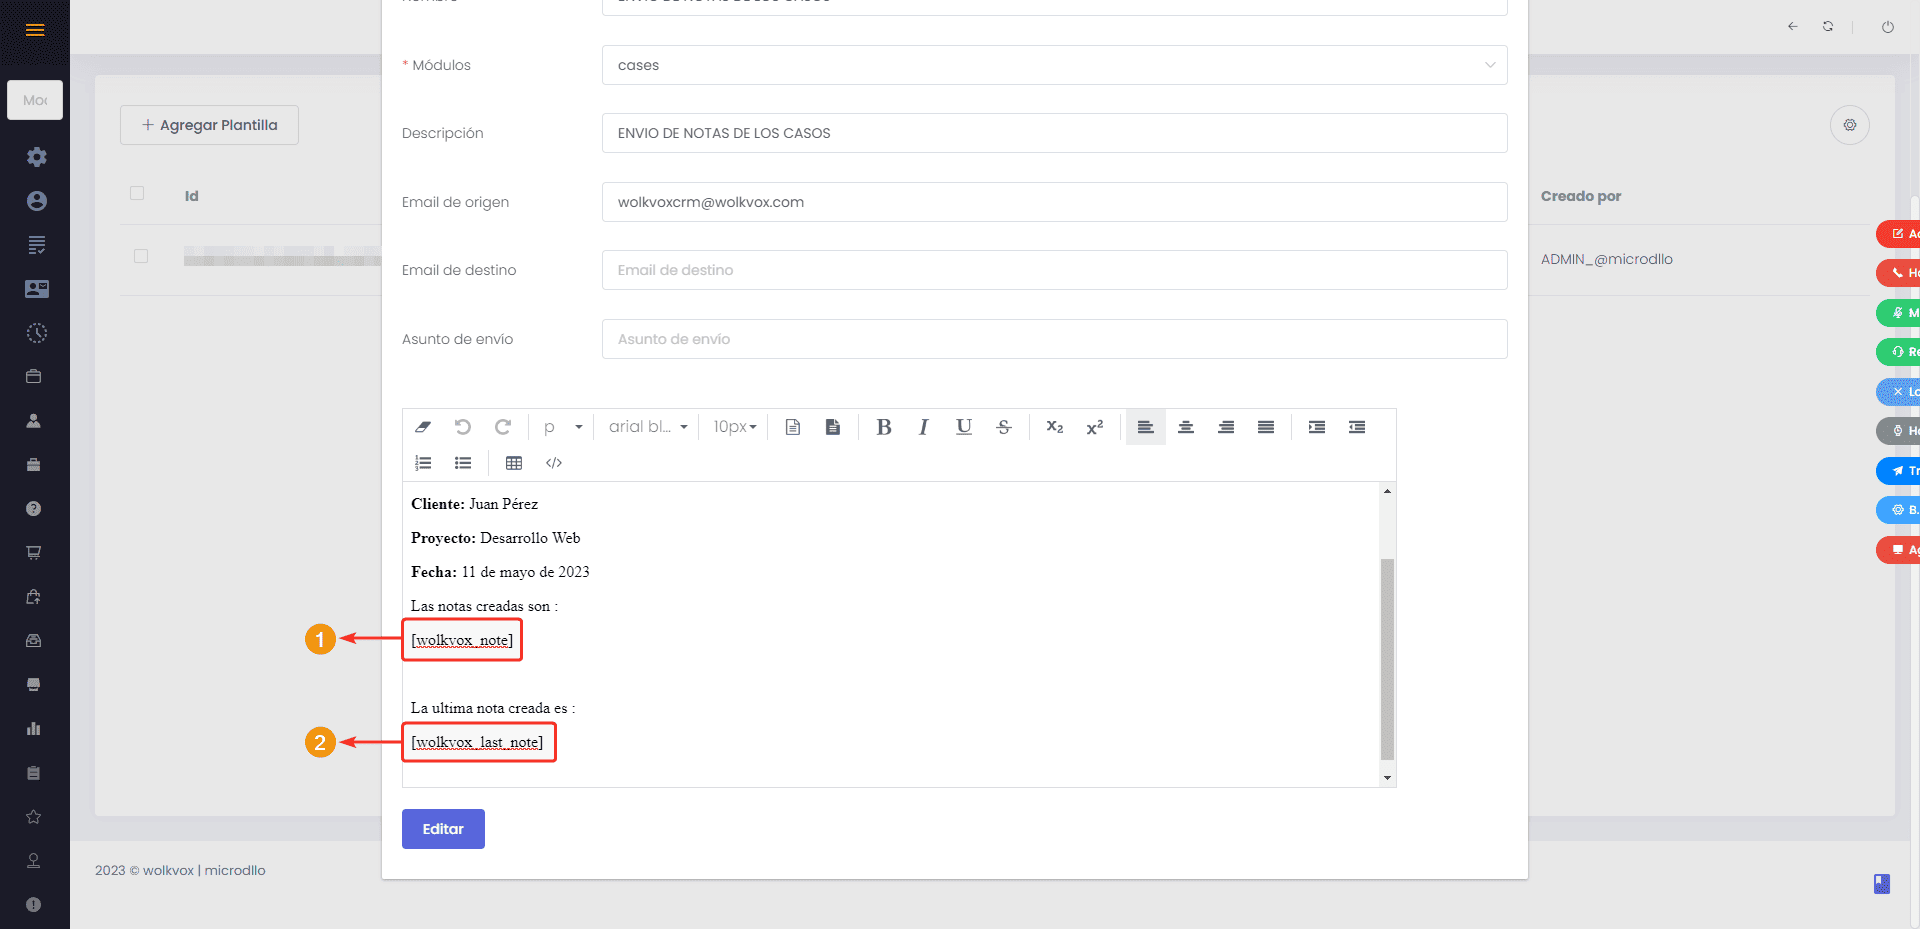
New variables have been added to save and send case notes in the “Cases” module #
- [wolkvox_note]: This variable retrieves all the notes created for the case.
- [wolkvox_last_note]: This variable retrieves the last note created for the case.
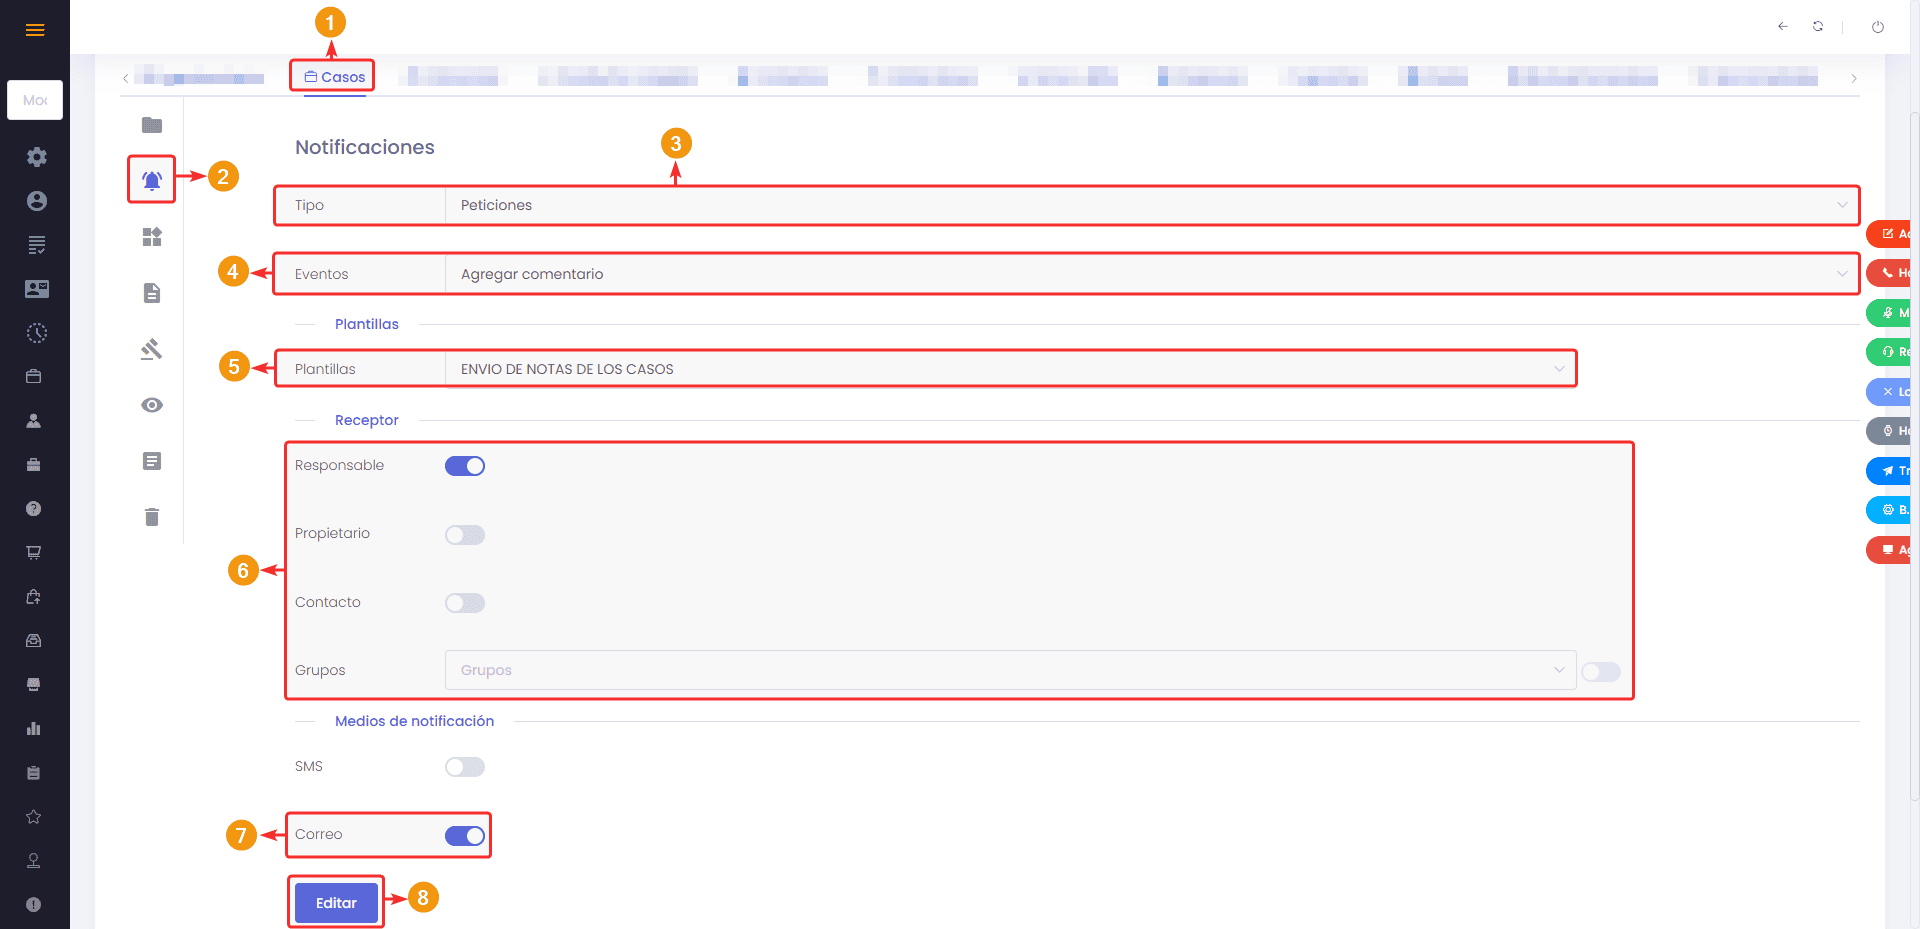
To configure notifications for the “Cases” module and receive an email every time a note is added, follow these steps:
- Access the configuration of the “Cases” module: Click on the “Settings” button located in the left sidebar, select the “Modules and Fields” option, and choose the “Cases” module from the top menu where all the modules are listed.
- Go to the “Notifications” section.
- Select the type of case for which you want to configure the notifications.
- Under “Events,” choose the “Add comment” event to trigger a notification whenever a new note is added.
- In the “Templates” section, select the email template you want to use and where you should use the variables [wolkvox_note] and/or [wolkvox_last_note] depending on your objective.
- Choose the desired recipient, such as the case owner, responsible agent, related contact or client, and/or agent group.
- Enable the “Email” option under the “Notification Channels” section.
- Click “Edit” to save the changes.