This component allows directing the customer along one route or another based on the analysis performed by artificial intelligence and the result obtained in the variable. In other words, here you can set the possible words that the customer might say and create links according to the outcome or intention.
Group your customers’ intentions into categories for agile management using artificial intelligence.
It is located within the component group called “Cognitives” and is available in all types of routing (Voice, Interaction, Chat, and CRM + Webhook).
Configuration #
- Enter the “Classification” tab.
- In the “Creative Area” field, enter the variable that contains the information obtained from the customer.
- Then proceed to the “Train” tab where you will prepare the system to configure categories and words to be recognized.
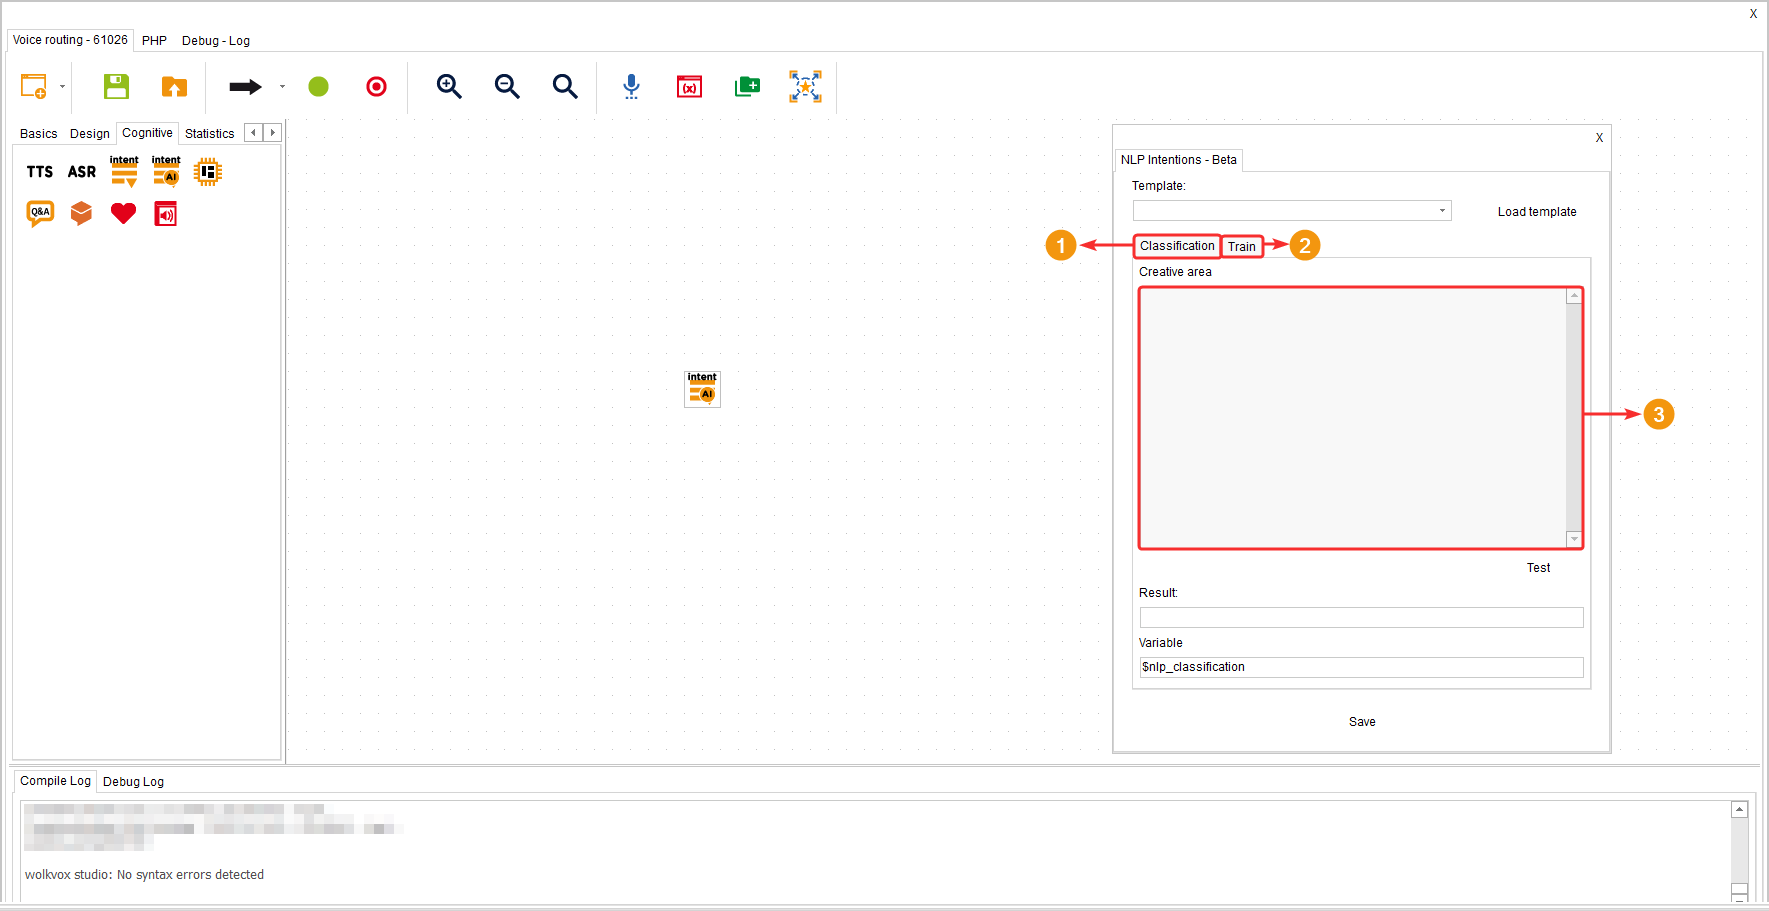
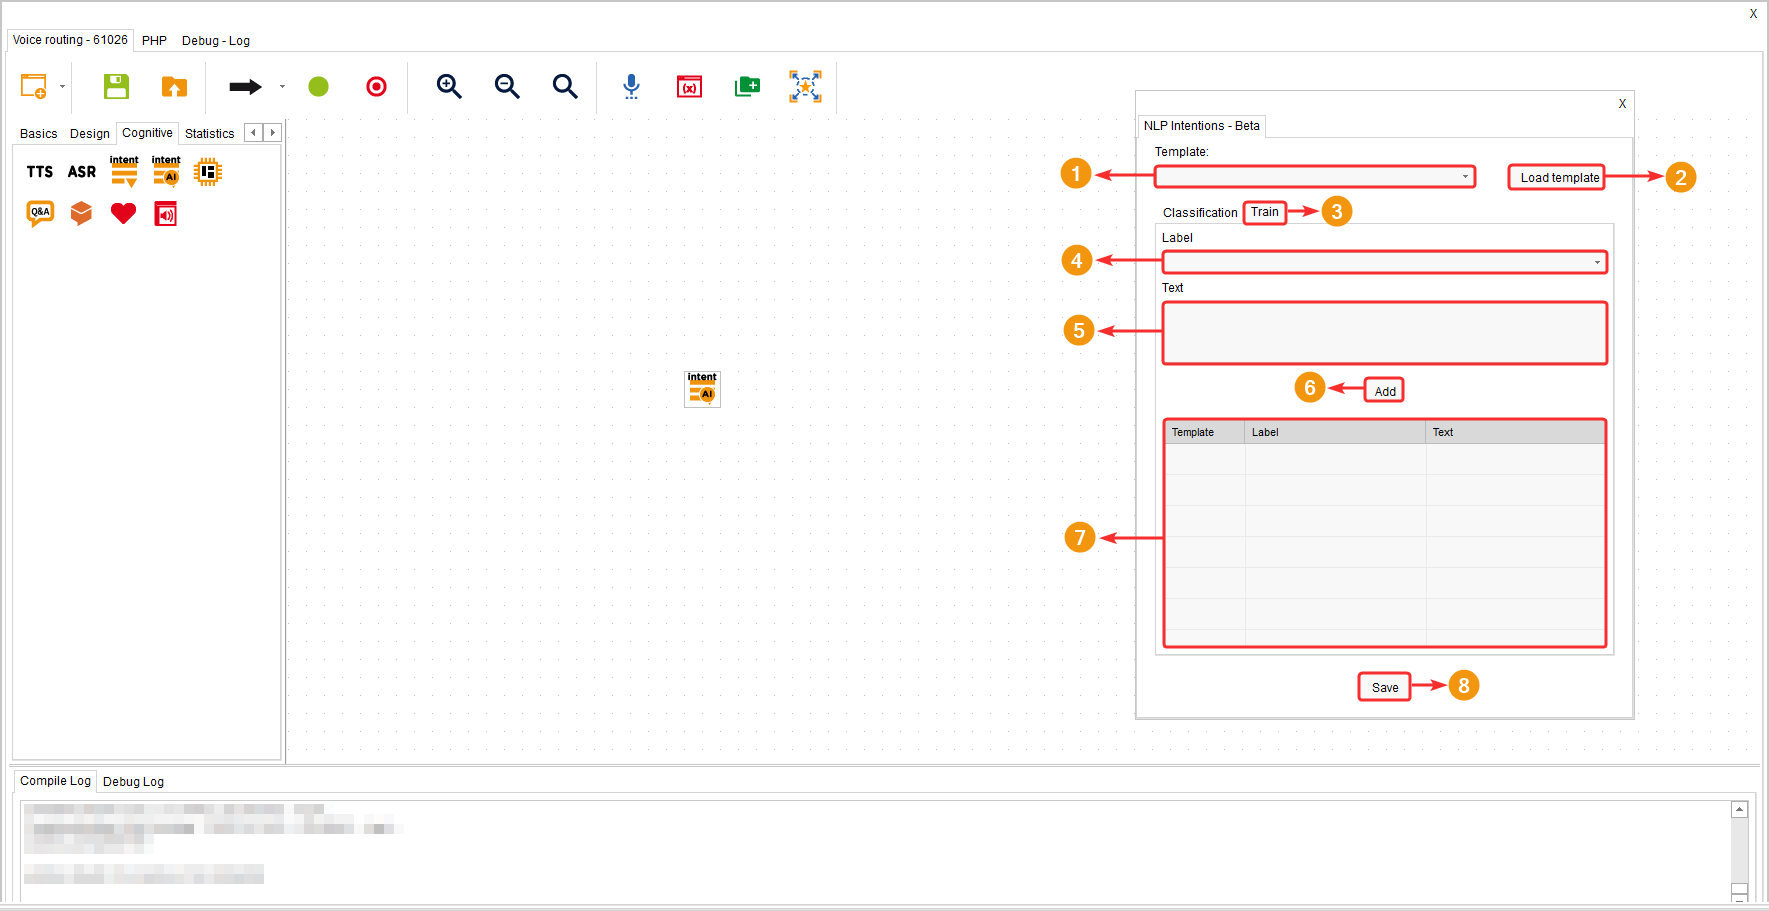
- Enter the “Train” tab.
- Select the template you want to use. This template contains the categories and words already trained in the system. You can also enter the name of a new template to start a new training of categories and words.
- Click on “Load template” whether you have selected an existing one or you are creating a new one.
- .In the “Label” field, you create or edit the categories. It is important to note that the categories from the template will be the different routes the customer can take based on what they have said.
- In the “Text” field, you specify the words or phrases related to the category, in order to help the system identify that what the customer said falls within the created category. Separate phrases and words with commas “,”.
- Click on the “Add” button to add the category along with its words and phrases.
- In the lower table of the component window, all added categories, words, and phrases are listed in the template.
- Click on the “Save” button to apply the changes.
- Note: Once you finish adding the labels with their words, you should go to the “Classification” tab and test the training so that the component allows you to save the changes.
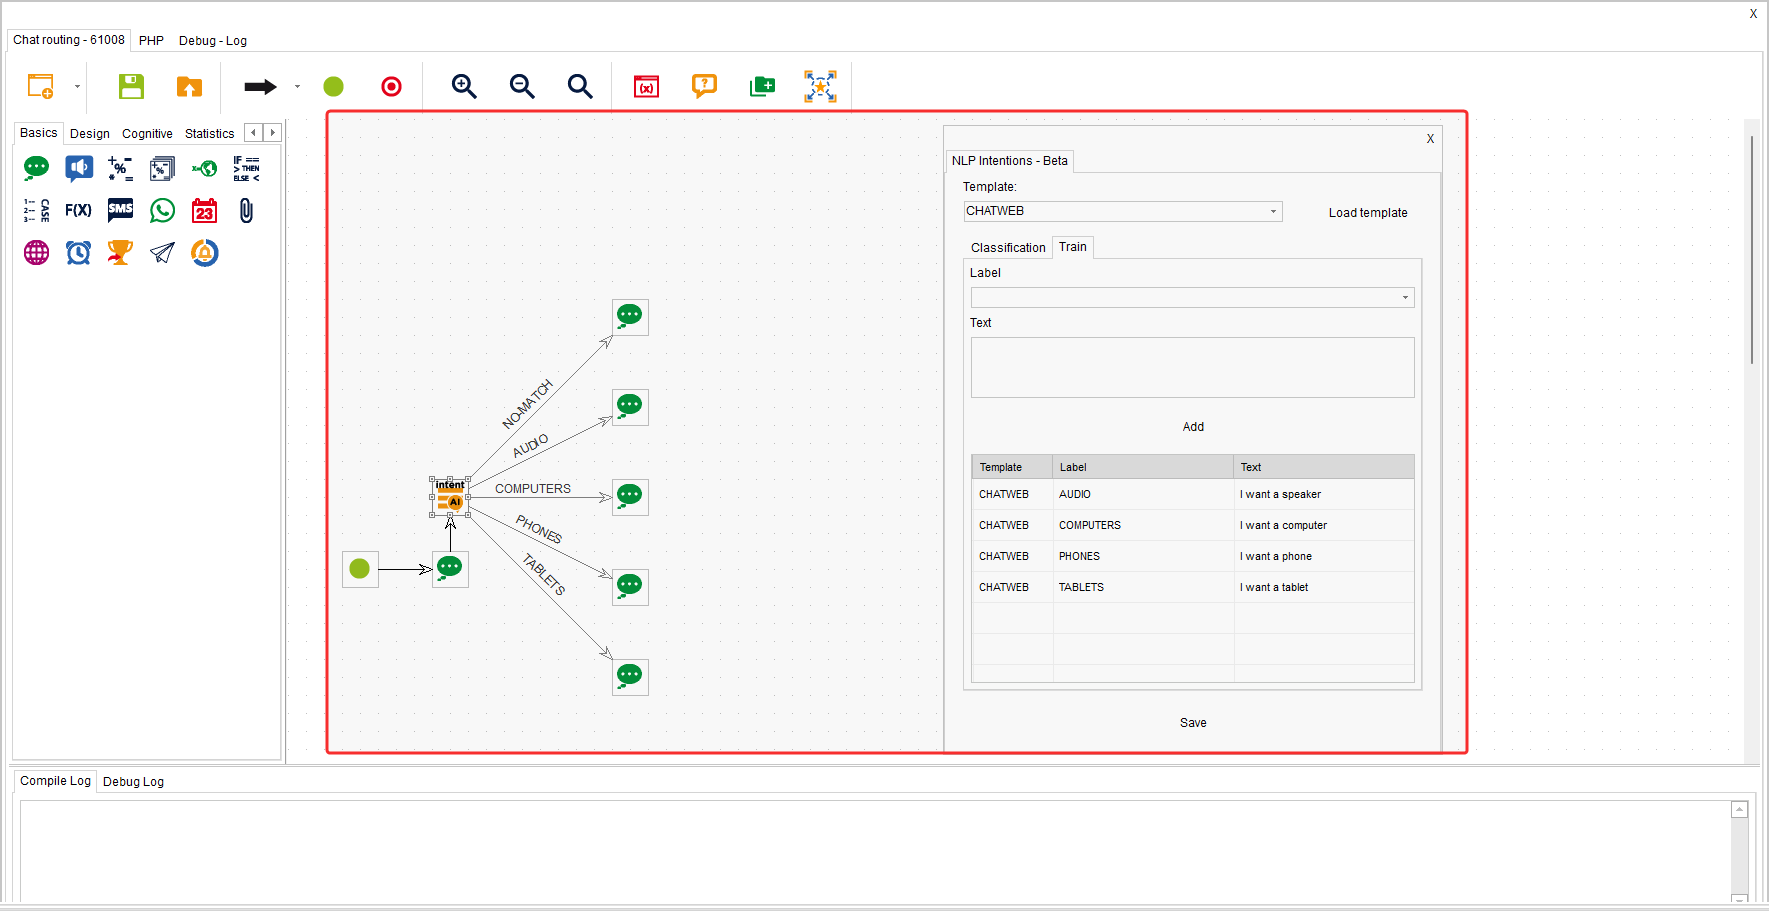
Example #
In the following example, the system has been trained to detect the topic related to the text typed by the customer.