


The “Reply Chat” component is a fundamental tool within the software’s chat capabilities. This component allows you to draft and send messages interactively and efficiently to customers, streamlining communication with them through the chat platform. You can include variables to personalize message sending and responses.
Key Features
Message Composition: The “Reply Chat” component enables the drafting of text messages to respond to customer inquiries. Users can include emoticons and enhance their responses with visual elements to provide a more engaging communication experience.
Attached Links: In addition to text messages, the component allows the inclusion of attached links in responses. This enables sharing additional information or providing relevant resources directly to customers.
Buttons via Official WhatsApp: The “Reply Chat” component offers the functionality to add interactive buttons to messages, leveraging the capabilities of official WhatsApp. These buttons allow users to offer predefined options to customers, enhancing the interaction experience and facilitating navigation through conversations.
Advanced Configurations: The component also provides advanced configurations, including the ability to select WhatsApp API Cloud and WhatsApp API Business templates. These options offer flexibility in customization and enable adapting responses to different business situations and needs. Additionally, when using the component within an Interaction-type routing point, you also have the capability to send Facebook templates.
Configuration #
-
In the designated field, write the message you want to send. You can use variables and send emoticons. Remember that on Windows, you can open the emoticon menu by pressing the Windows key + “.”.
-
In the “Attached File Link” field, you can enter the URL of an image or document hosted publicly.
-
In the “Buttons” field (this option is only available in web chat and the official WhatsApp connector), you can add buttons that will accompany the message. Each button must be separated by commas. The functionality of this option allows the client to choose an option, and their selection will be saved in a variable called “txt-query”. Therefore, the use of these buttons should be accompanied by the “Intents” component so that the client continues on a specific route depending on the selected button.
-
If the “Continue Chatbot” checkbox is enabled or checked, it means that a response from the client is not necessary to continue the chat.
-
Click “Save” to apply the changes.

Usage of the “send list message” template #

This template allows you to create interactive messages that will show the customer a list of options based on the question we have asked them.
Messages can include a menu of up to 10 options. This type of message provides a simpler and more consistent way for users to make a selection when interacting with a company.
Note: This template only works under Cloud API.
Specifications:
– Interactive messages can be combined in the same flow.
– Users cannot select more than one option at the same time from a list or button message, but they can go back and reopen a previous message.
– List or button response messages cannot be used as notifications. Currently, they can only be sent within 24 hours after the last message sent by the user. If you try to send a message outside the 24-hour window, you will receive an error message.
– Supported platforms: iOS, Android, and web.
Below you can see how to upload the template:
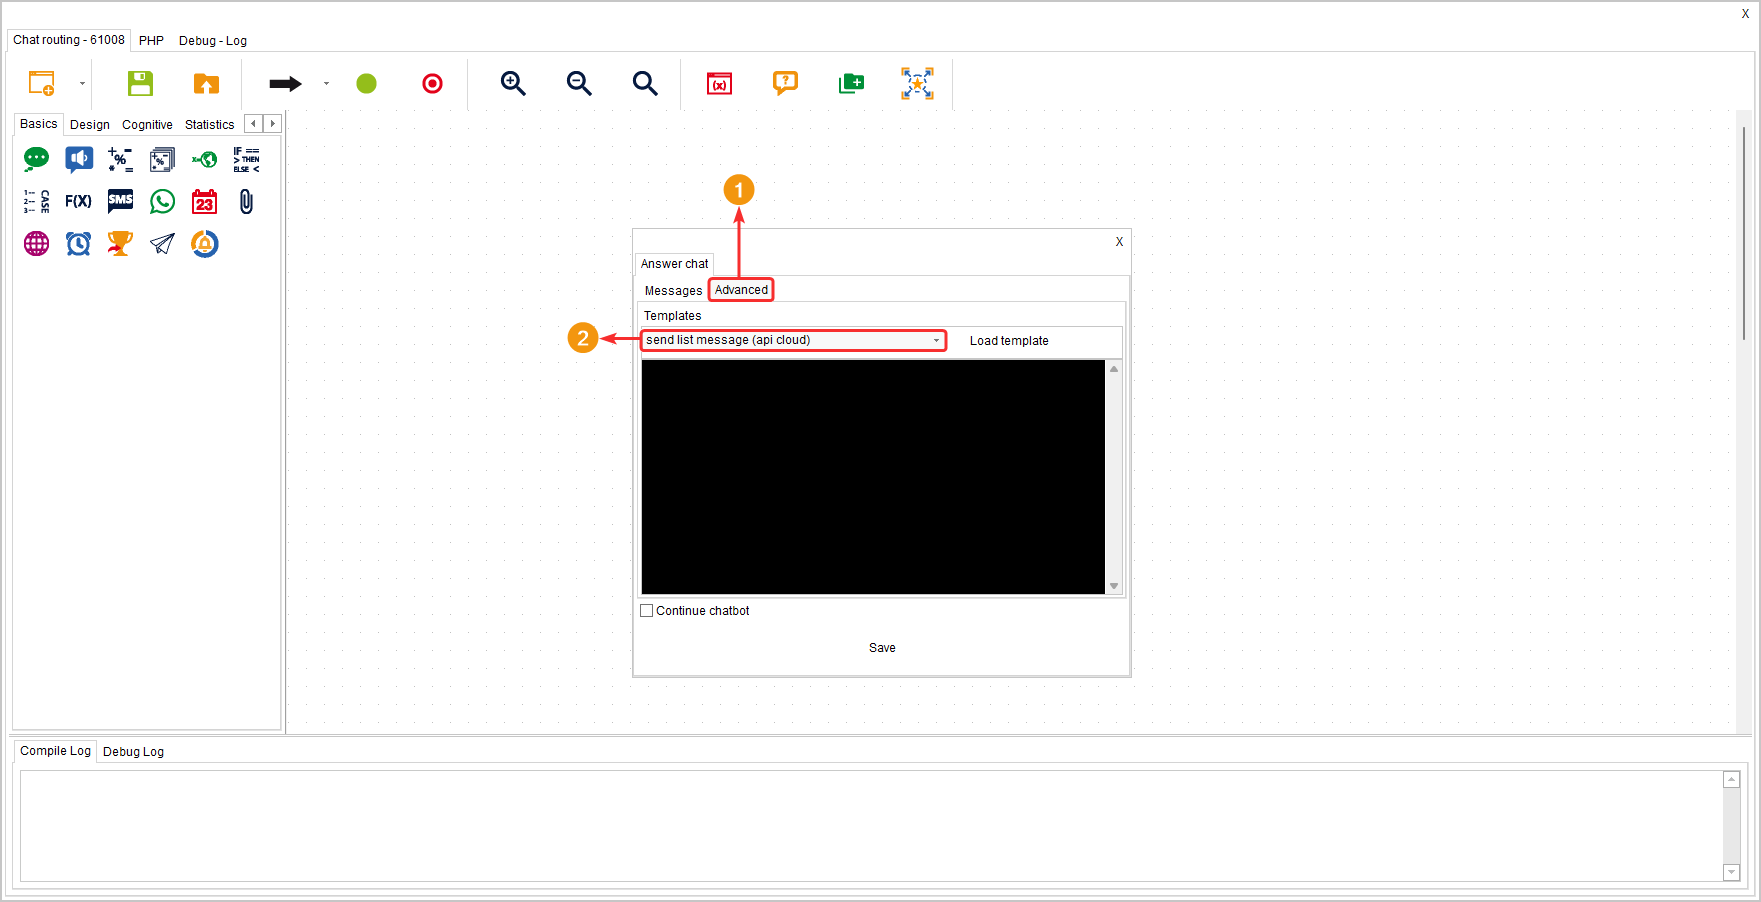
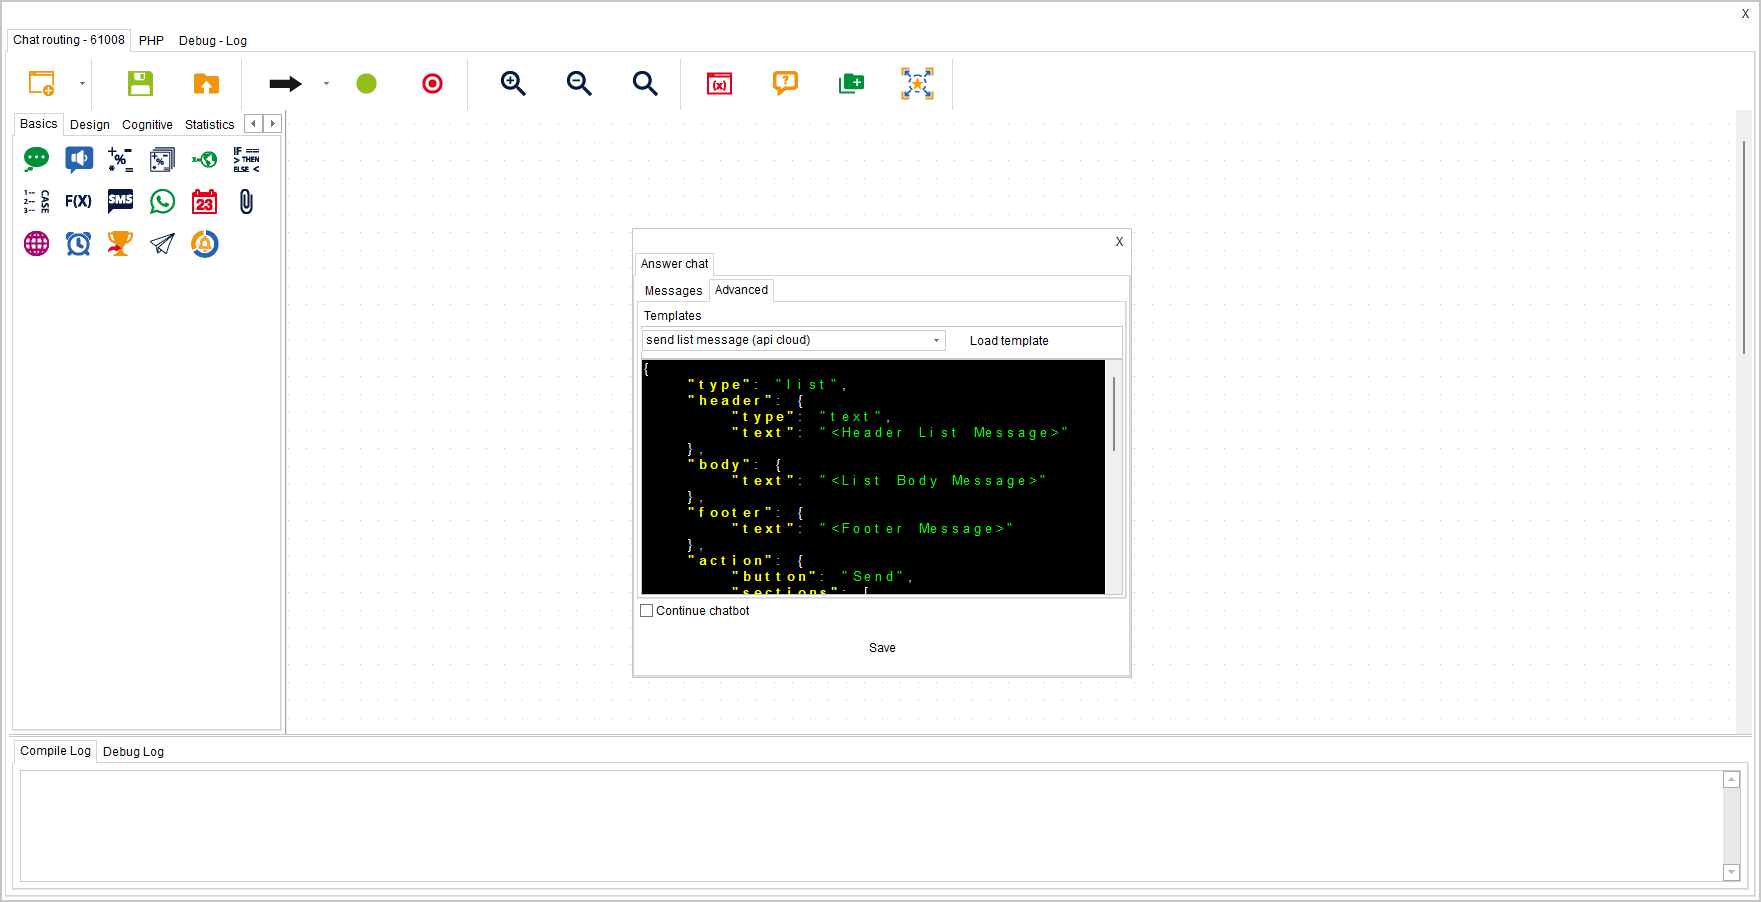
After clicking on “Load Template,” the message structure opens, which you should modify according to your needs.
The following are some restrictions to consider:
- If you don’t add text to any of the options, the component will stop working.
- The text in the Header has a limit of 60 characters.
- The text in the Body has a limit of 1040 characters.
- The text in the Footer has a limit of 60 characters.
- Exceeding the mentioned limits will result in the component not functioning.
Read the official Meta documentation about sending interactive messages on WhatsApp by clicking here.
