This component collects and attaches the information obtained from the customer during their journey through the routing point. It is used before transferring to an agent or skill, so that the agent receiving the customer has the attached information at hand. For example, the customer’s entered identification number, age, among others, can be attached.
It is located within the component group called “Basics” and is available in the following routing types: Voice, Chat, and CRM + Webhook.
Configuration #
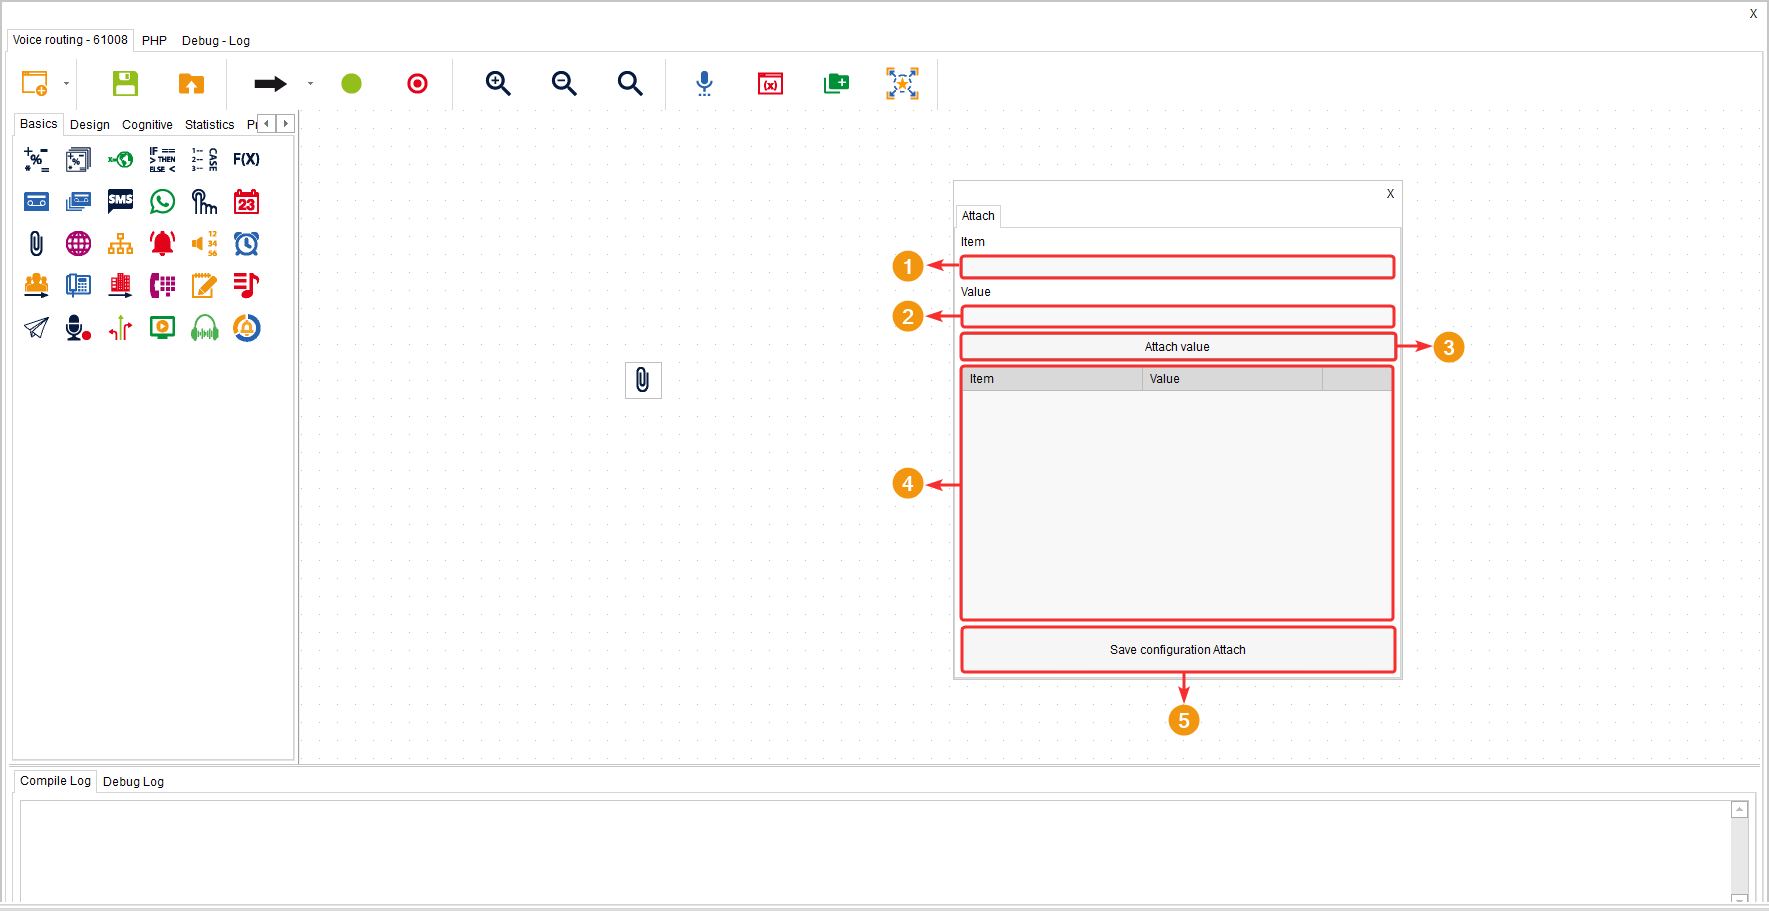
In the component’s configuration, you can add one or several variables that contain the desired data.
- In the “Item” field, assign a title to the data stored in the variable.
- In the “Value” field, write the name of the variable that contains the data you want to attach.
- Click on “Attach Value” to add the collected data.
- The table lists all the added items.
- Click on “Save Attach Configuration” to apply the changes.
Example #
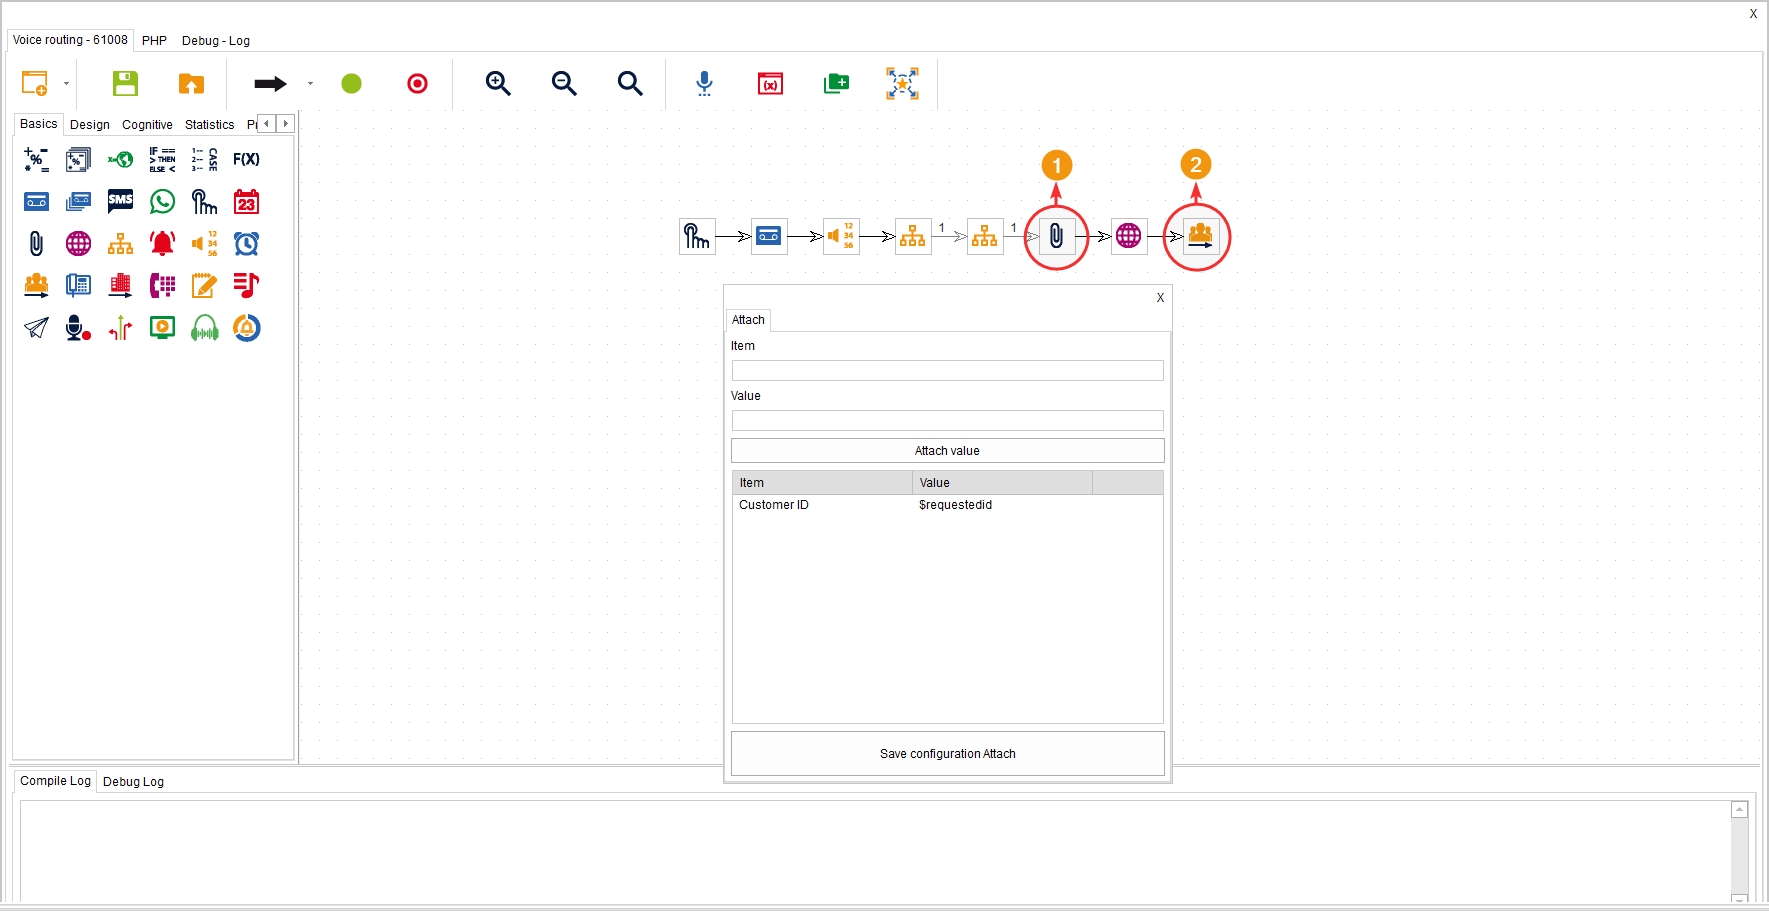
The following example aims to attach the customer’s identification number and send it to the agent who will assist the customer.
To do this, firstly, there is the “Get Data” component, which prompts the customer to enter their identification number and saves the information in a variable called “$requestedid”.
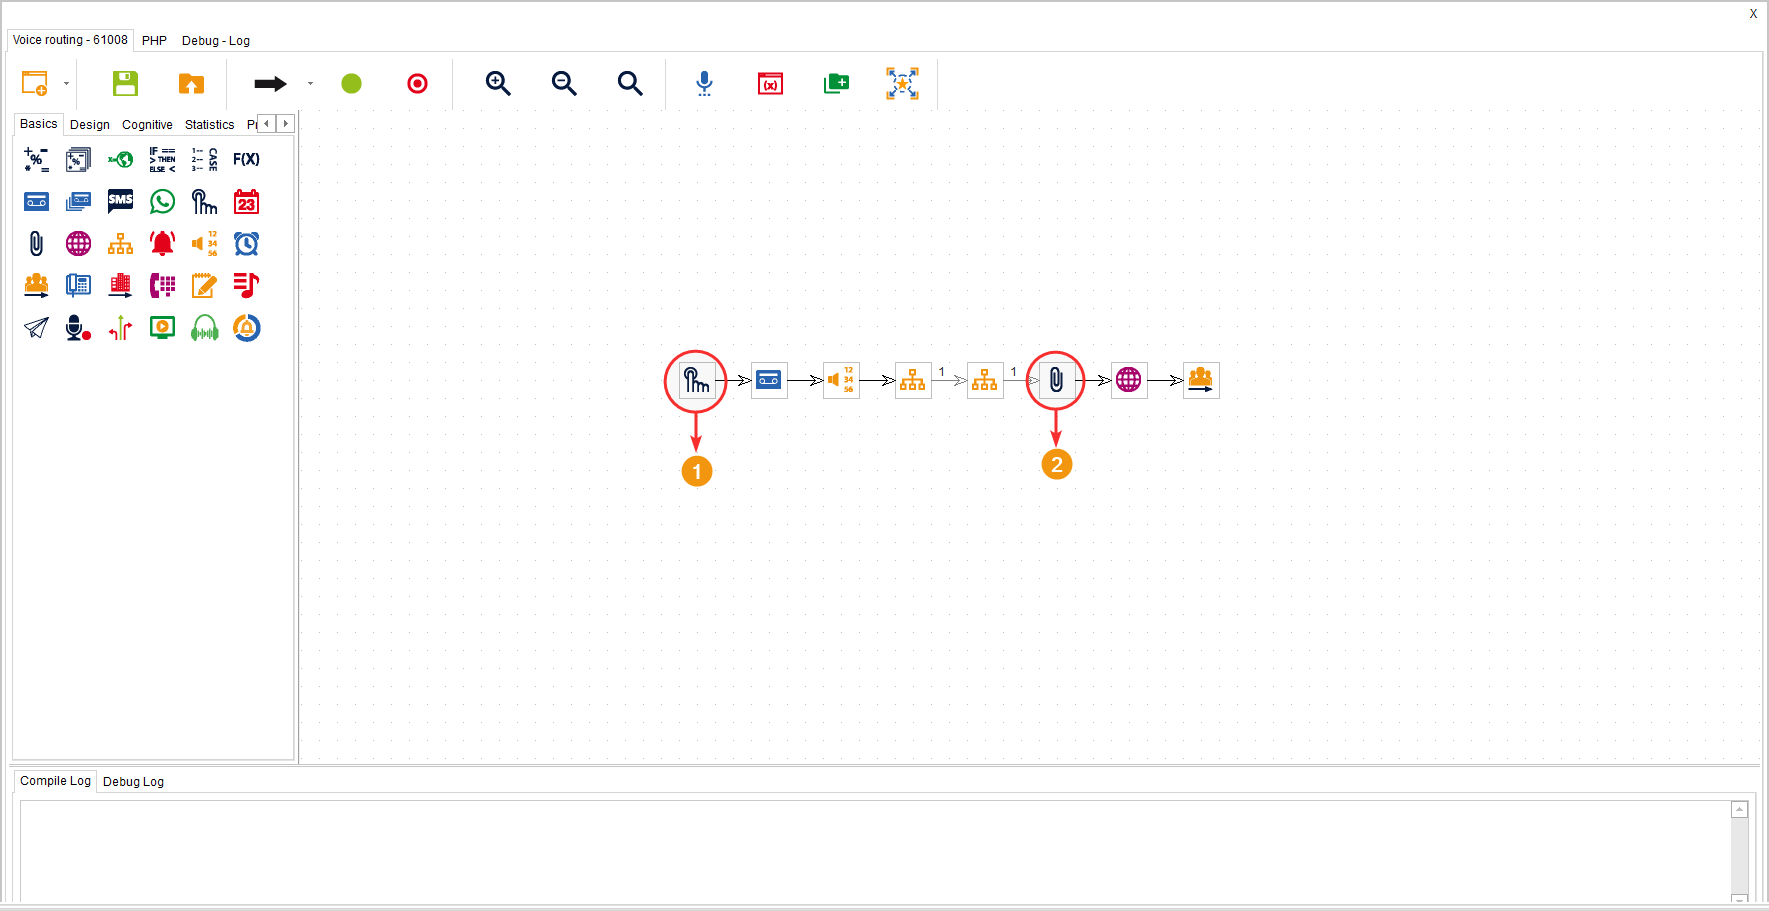
Then, the “Attach” component has been added to attach the variable “$requestedid” with its respective value and display it to the agent. Afterwards, the “Transfer to Skill” component has been placed, so the information is attached before transferring to an agent, and the agent will have the information from the variable “$requestedid” which, as defined in the item, corresponds to the client’s identification document.