A PBX, or Private Branch Exchange, is an internal telephone system used within a company. It enables users to communicate internally within the organization and externally outside the company using various communication channels such as VoIP, ISDN, or analog lines.
In the PBX tab, you can configure administrative extensions, which can receive and transfer calls easily to the enabled contact center queues within the same module.

Create a new PBX user #
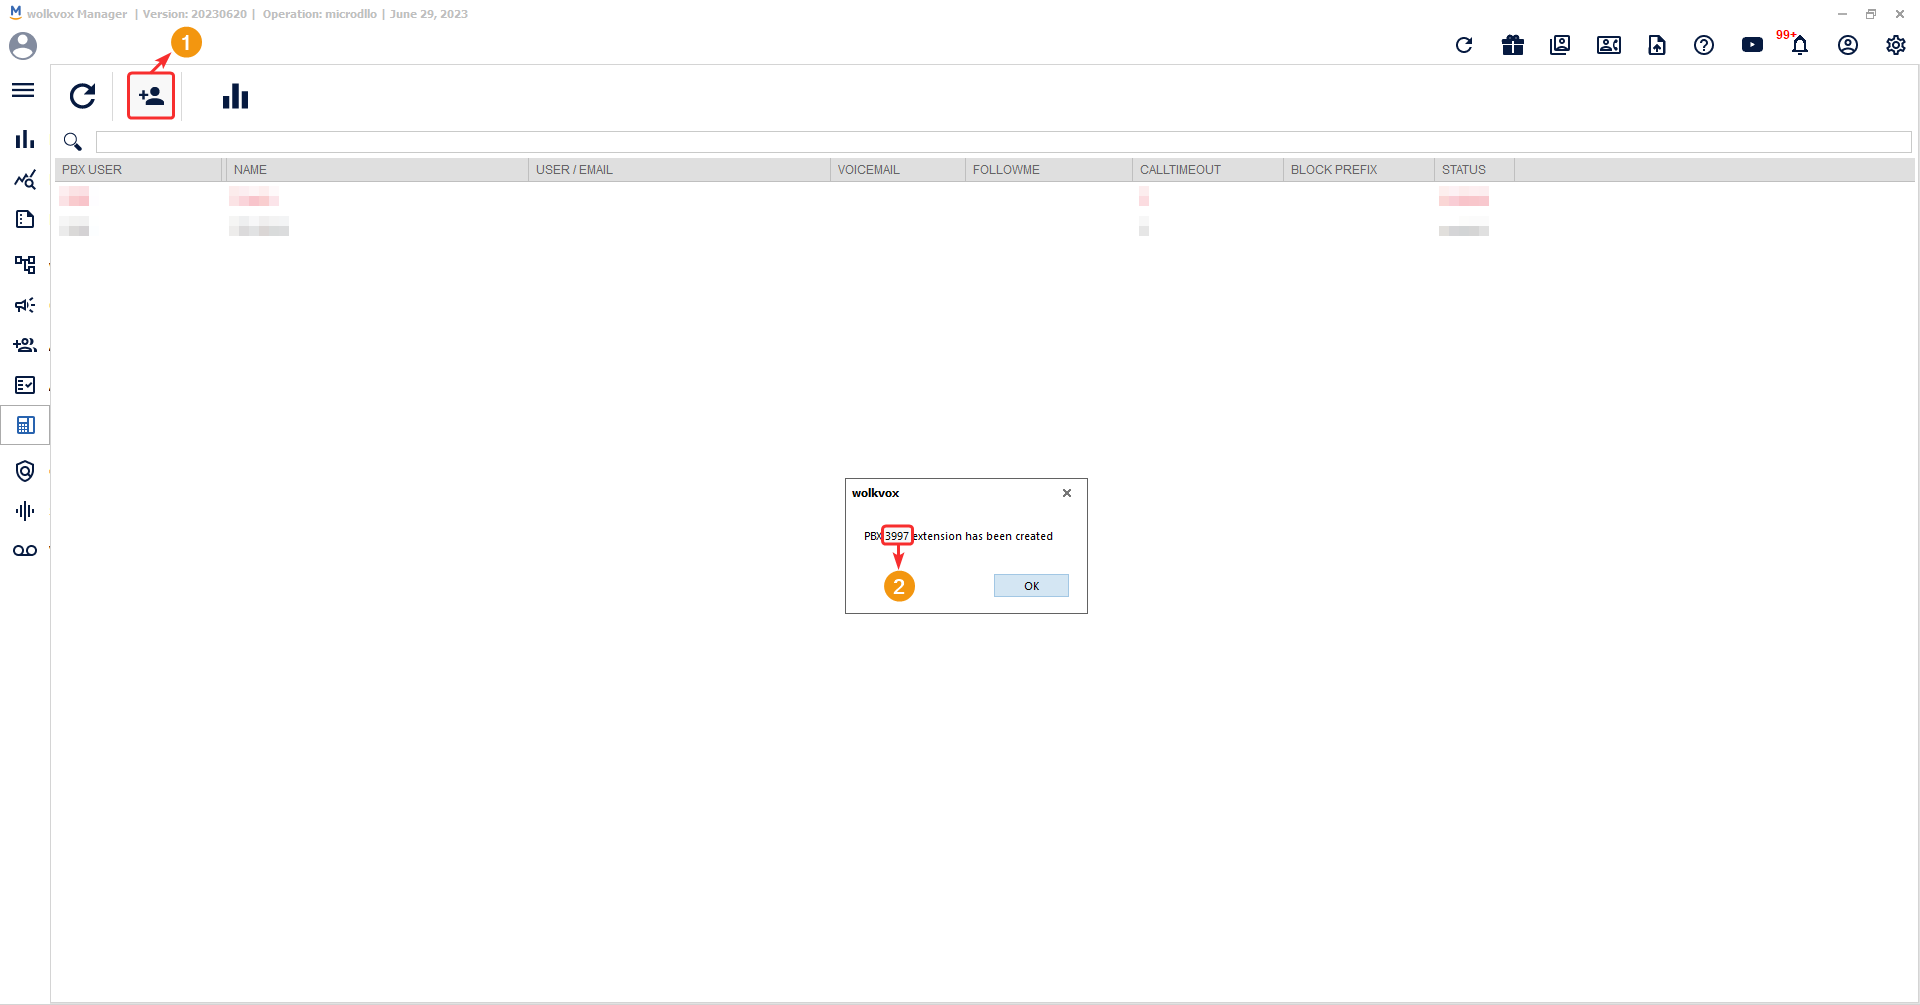
To create a user, click on “Create New User”, a window will appear informing you of the extension number assigned to the newly created PBX user.
Edit PBX User Information #
- Right-click on the PBX user whose data you want to change.
- You can view the user number, but it cannot be changed.
- Change the PBX user’s password.
- Specify the user’s name.
- Enter an email address associated with the PBX user.
- Select a voicemail box where audio messages will be delivered when the user doesn’t answer.
- In “Followme,” you can add a forwarding telephone number for when the user is unavailable.
- You can add a prefix restriction.
- Save the changes using the “Save” button.

Obtain the CDR report for each PBX user #
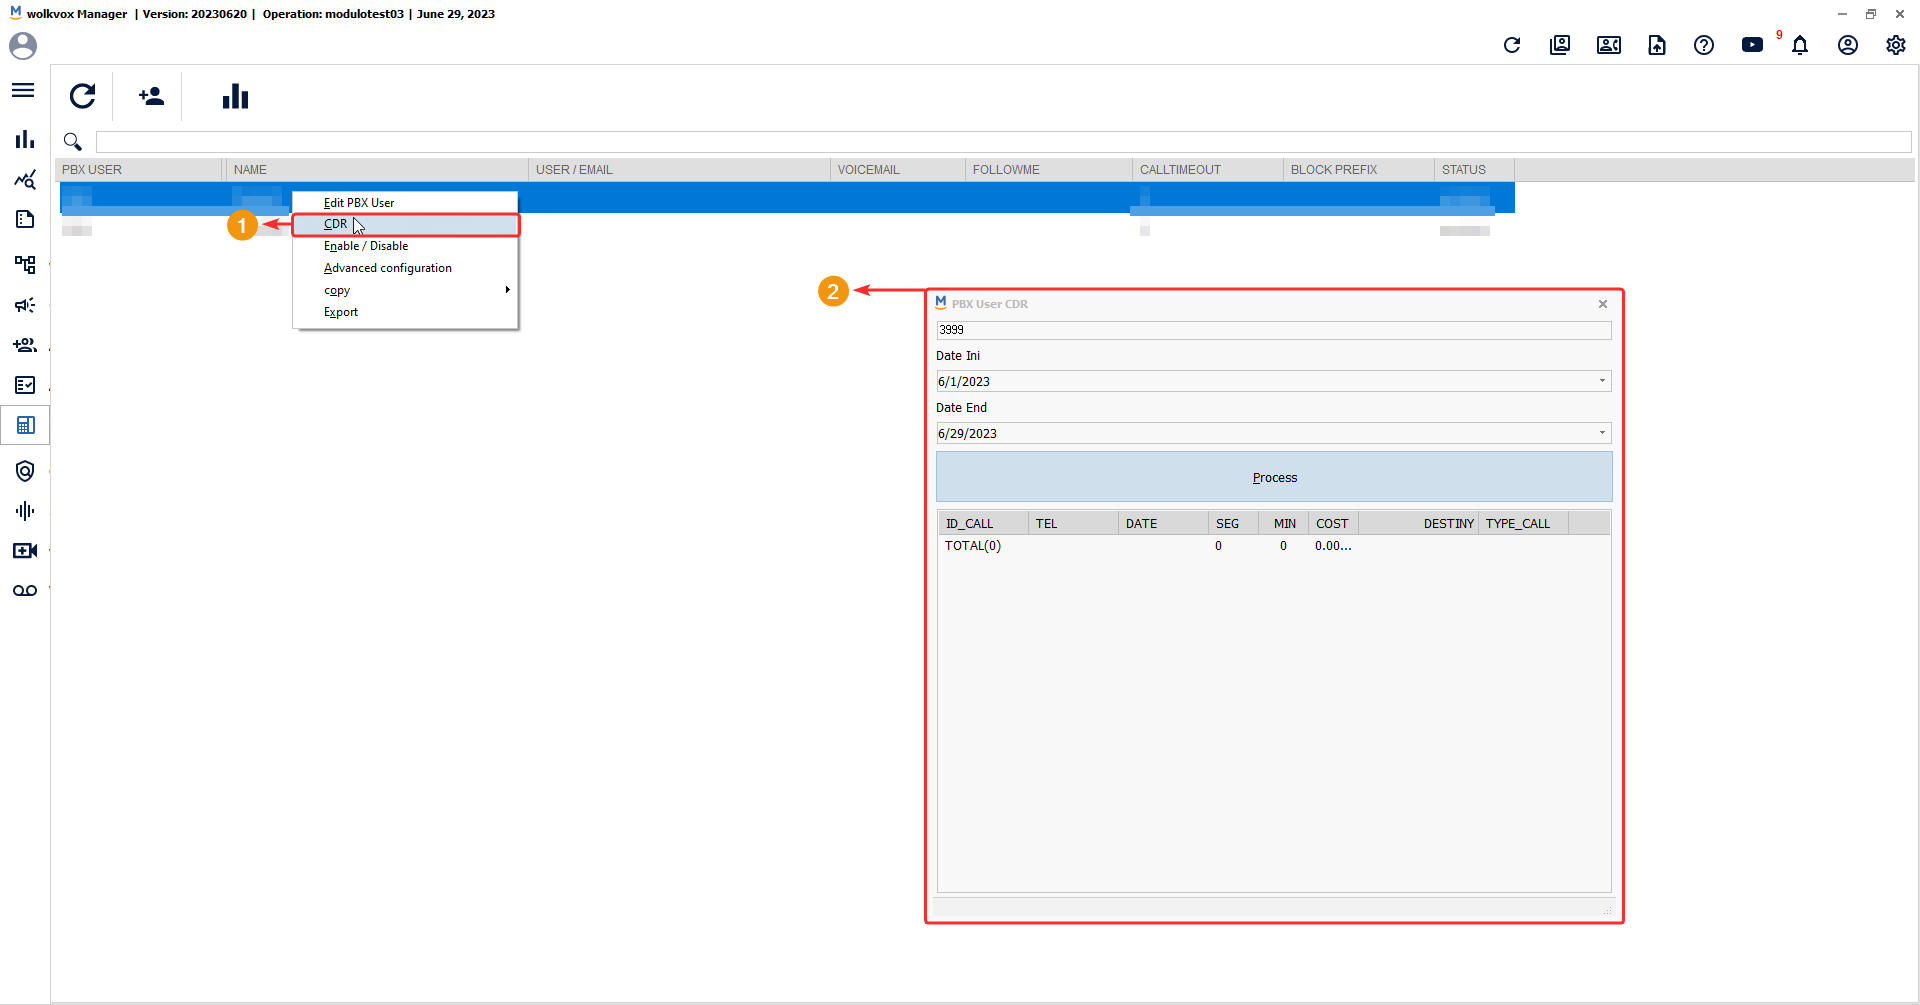
The CDR is a record of call details, and this service allows you to view detailed information about the calls made and received by each PBX user.
Right-click on the PBX user table and select the “CDR” option.
The report will display the following data:
- ID_call: Call identification code.
- Tel: Phone number dialed.
- Date: Date of the call.
- Seg: Call duration in seconds.
- Min: Call duration in minutes.
- Cost: Total cost of the call.
- Destiny: Indicates if the call was made to a mobile or landline phone.
- Type_call: The type of call, which can have values such as conference (conference call), inbound (incoming call), internal call (internal call), internal call_inb (internal incoming call), internal call_que (internal call from a queue), out_pre (outbound call in predictive campaign), outbound_ma (outbound call manually), and transfer (transfer call).
Enable or disable PBX user #
If you need to disable a PBX user, you can right-click on the user and select the “Enable/Disable” option.
![]() Enabled users are identified in gray, while disabled users are displayed in red.
Enabled users are identified in gray, while disabled users are displayed in red.

Set conversation limit #
If you right-click on a PBX user and then select the “Advanced configuration” option, a new window will appear where you can set a time limit (in minutes) that the PBX user can use. This limit resets monthly.

Copy PBX User Data #
Right-click on a PBX user, then you can select three options: “User” to copy the username, “Password” to copy the password, and “Get SIP Password” to copy the SIP password.
SIP, or Session Initiation Protocol, is a communication protocol used for establishing and controlling communication sessions over IP networks. In the context of PBX users, SIP refers to the method or protocol used to handle voice calls over the internet or an IP-based network. It allows users to make and receive calls using their PBX system through IP-based devices such as IP phones, softphones, or SIP-enabled hardware. SIP provides the necessary signaling and control mechanisms to set up, manage, and terminate voice calls between PBX users and other endpoints in the communication network.

Export the Table in HTML Format #
If you right-click on a PBX user in the list, you can select the “Export” option. This exports the entire list of PBX users with their respective information in HTML format.

Generate PBX Reports #
To generate a report regarding the usage of PBX extensions, follow these steps:
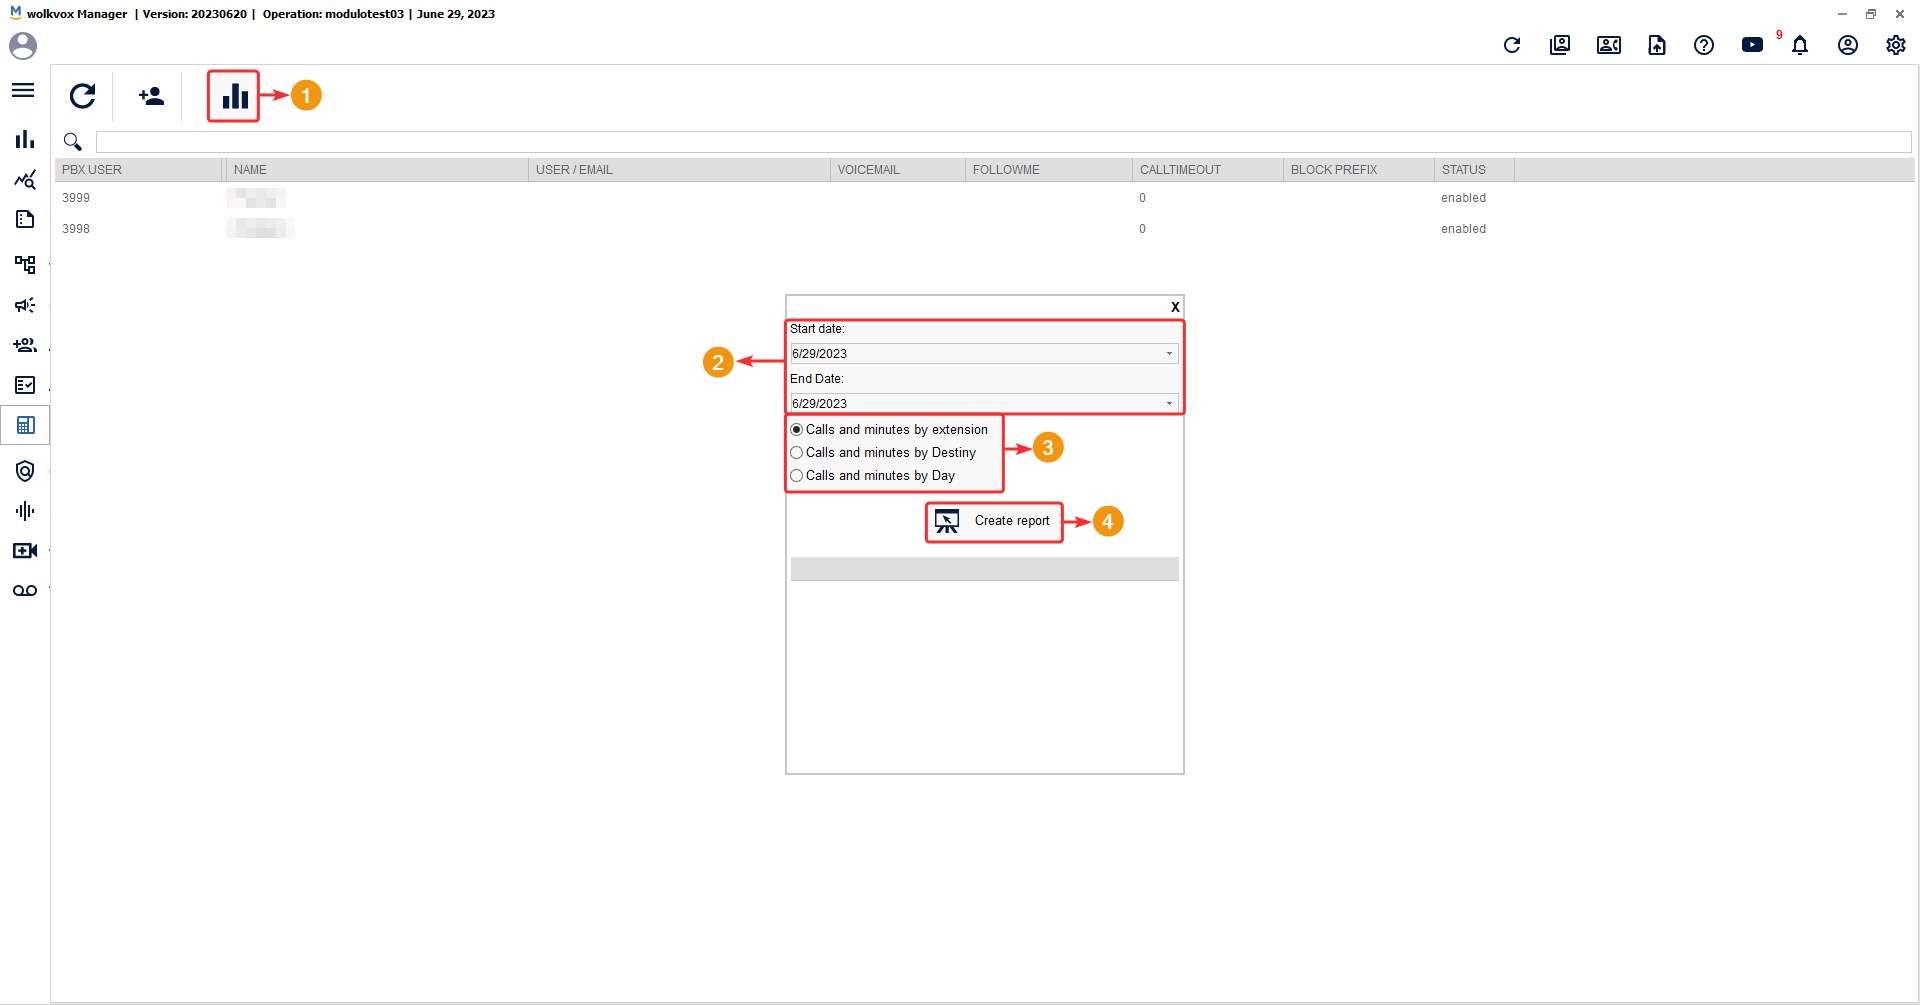
- Click on the “PBX Reports” button.
- Choose a date range that you want to include in the report (within the same month).
- You have three report options: Calls and minutes per extension, destination, or per day.
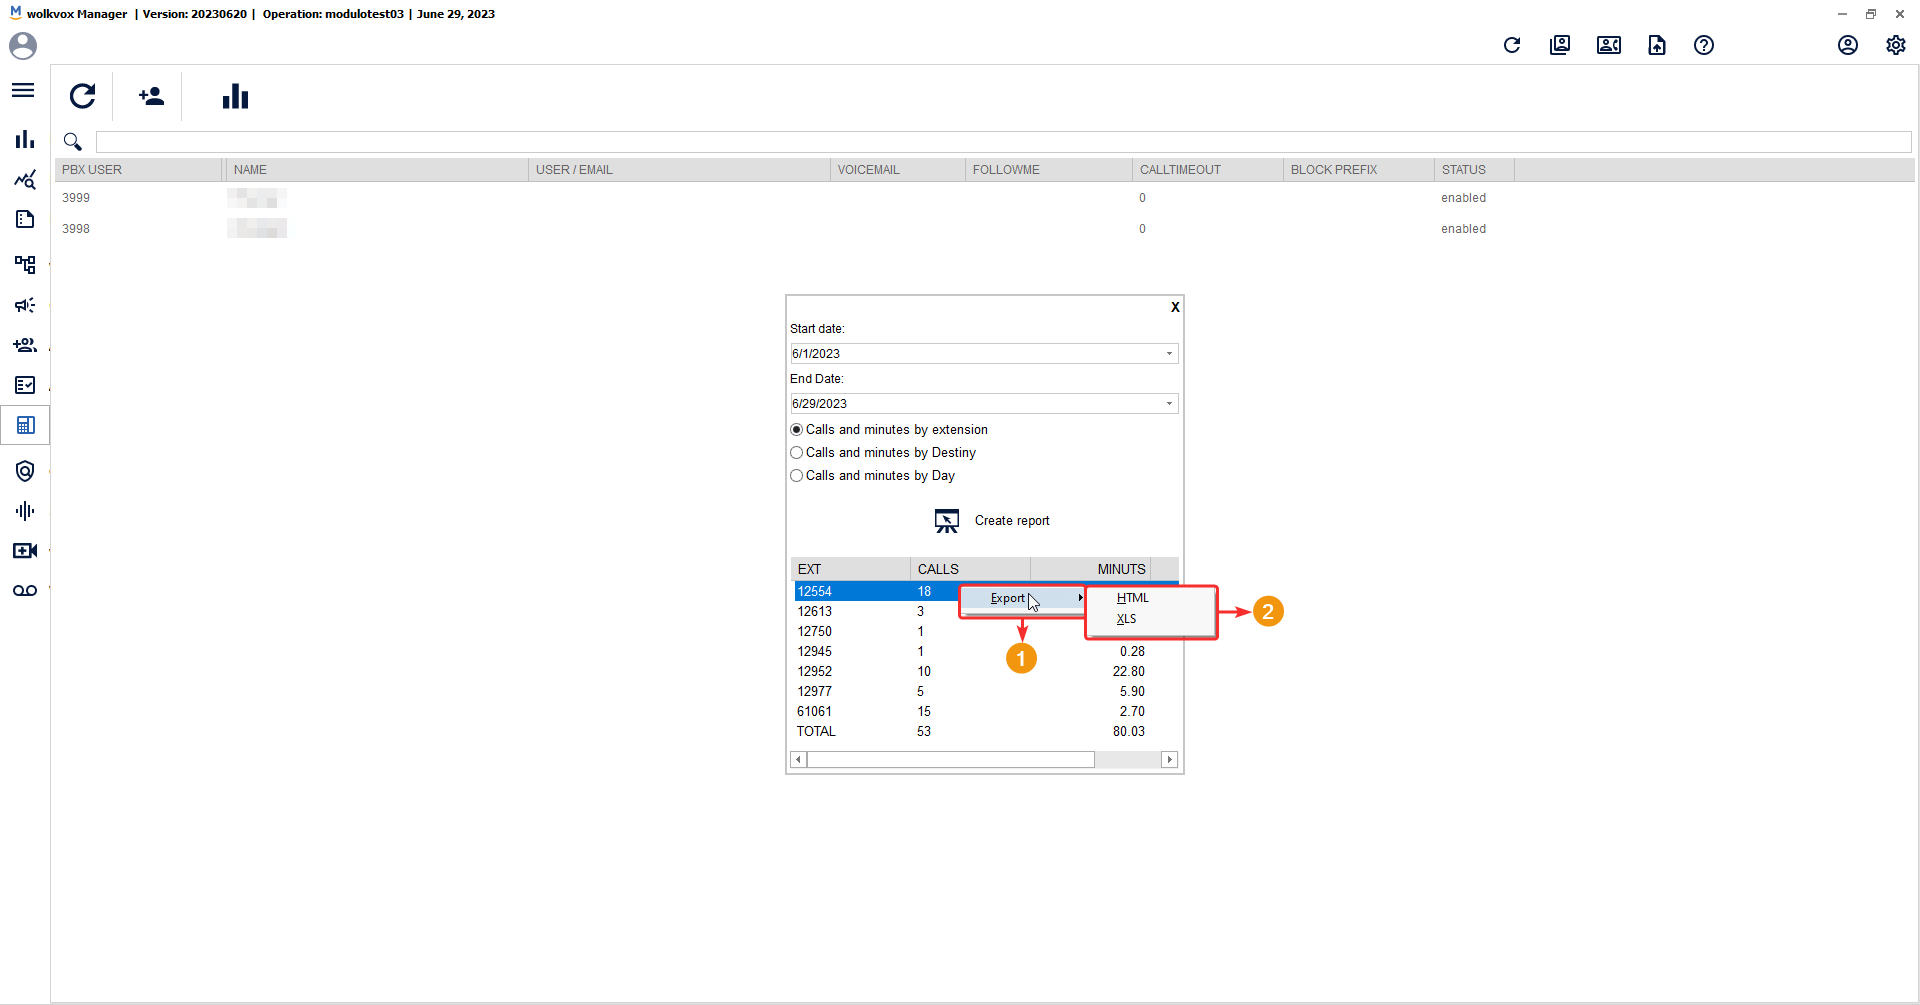
- Click the “Generate Report” button.
If you right-click on the report table, you can download the report in HTML or Excel XLS format.