Support Portal: Optimizing Customer Experience through Efficient Incident and Request Management #
Our support portal empowers our customers by providing them with convenient access, transparent tracking, efficient resolution, and a knowledge source, all in one place. We deliver an exceptional support experience, enabling our customers to maximize productivity and minimize disruptions in their contact and call center operations.
There are two ways to access the support portal, either through the URL https://www.wolkvox.com/en/support-portal/ or by logging in from the Wolkvox Manager application.
Note: From the website, it is only possible to query cases and it is not possible to create new cases.
Accessing the support portal from the wolkvox Manager application #
From the wolkvox Manager application, both in the web version and the desktop version, you can access the web support portal to create incident or request cases and check their current status.
The button labeled as “Support” is the one that allows you to enter the portal, and it is located in the top right menu of the screen.

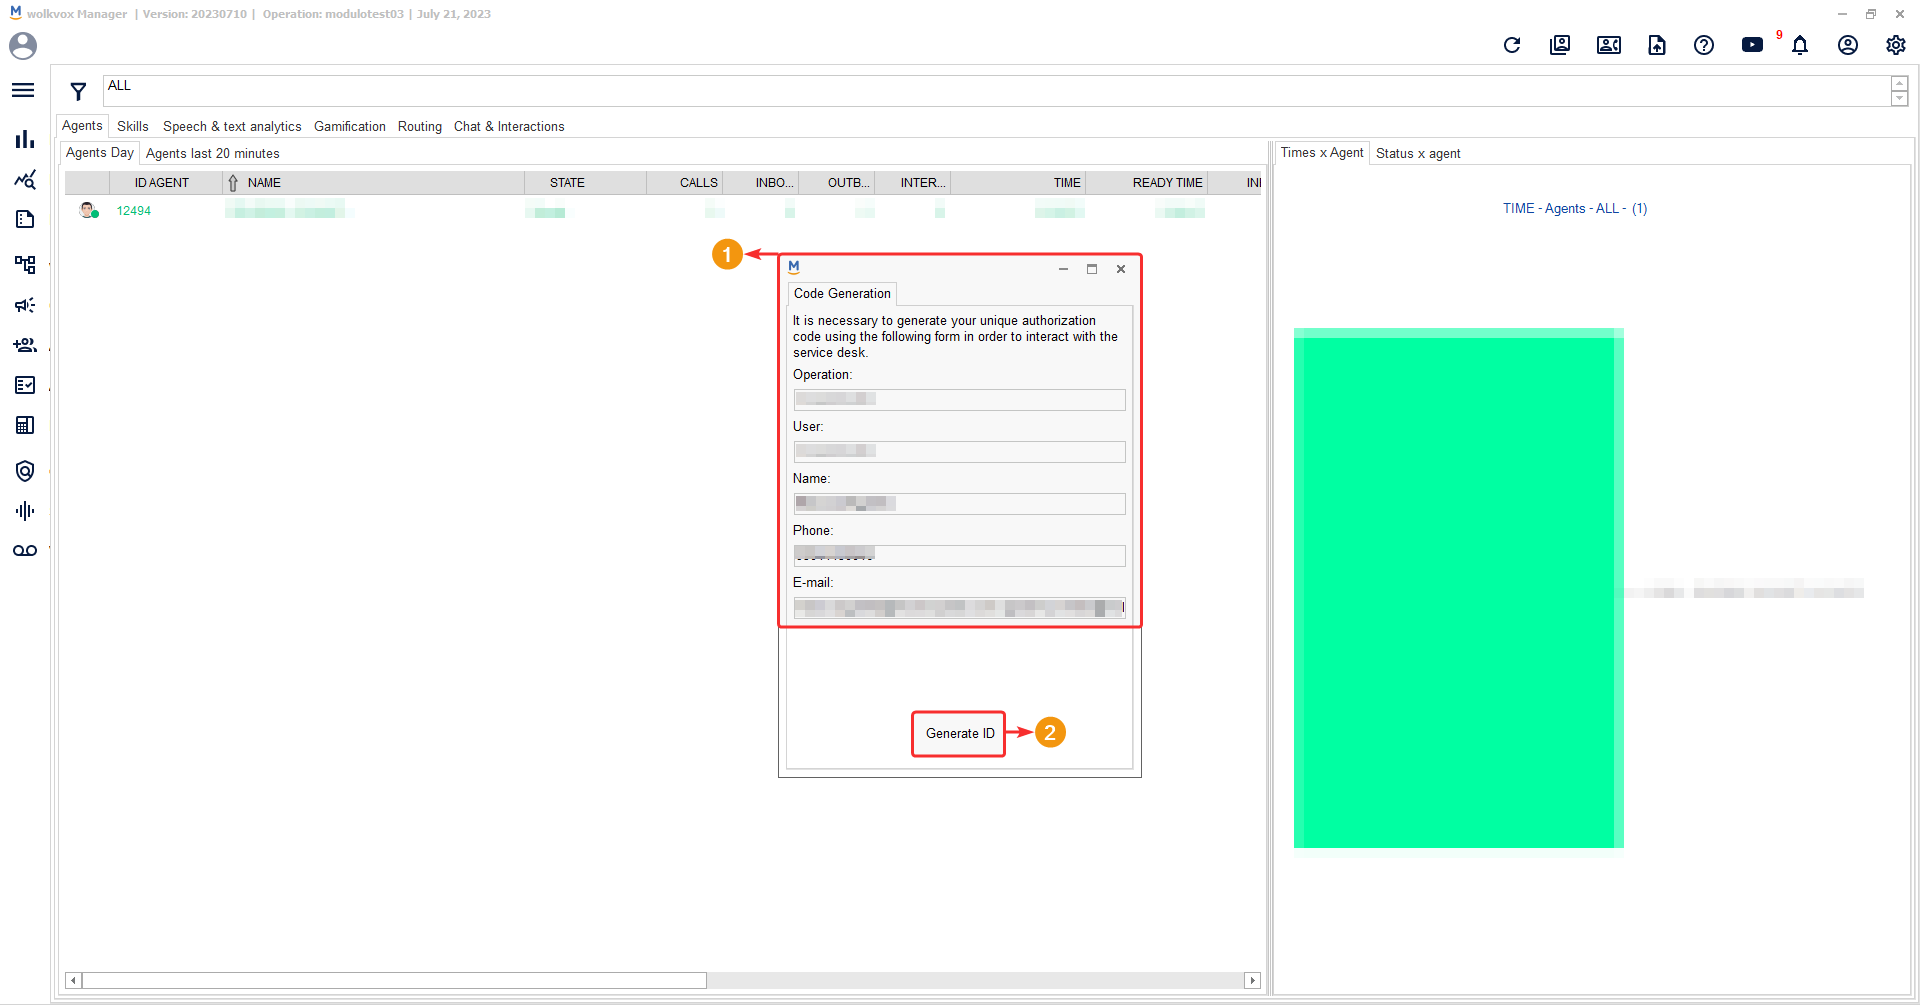
You will need to enter your contact information and generate an ID code before being able to access the web portal.
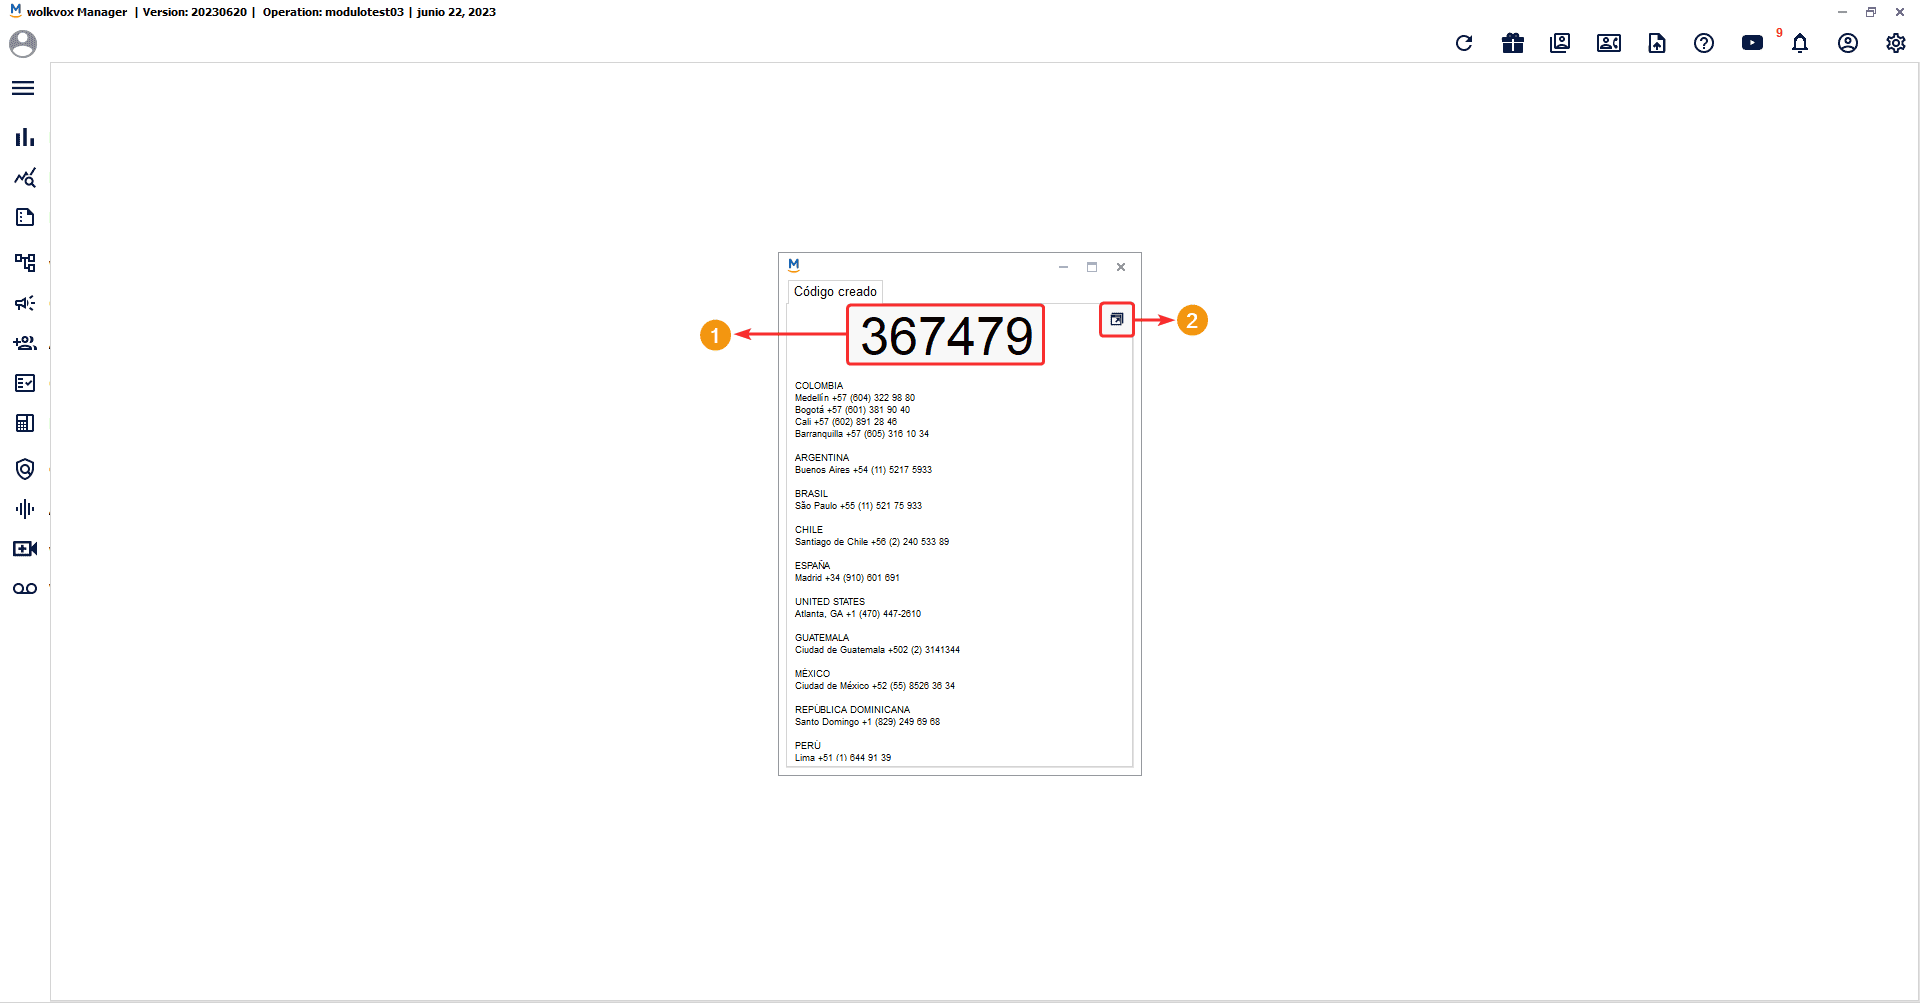
Note: Please be aware that the generated code will expire after 4 hours from the moment you generated the ID code.
The generated ID code will appear alongside a button that allows you to copy the code to the clipboard.
Note: Please wait a moment for the web portal to load before closing this window.
It is important to read the information about the matrix of attention levels and case escalation to understand the process in wolkvox for case handling.
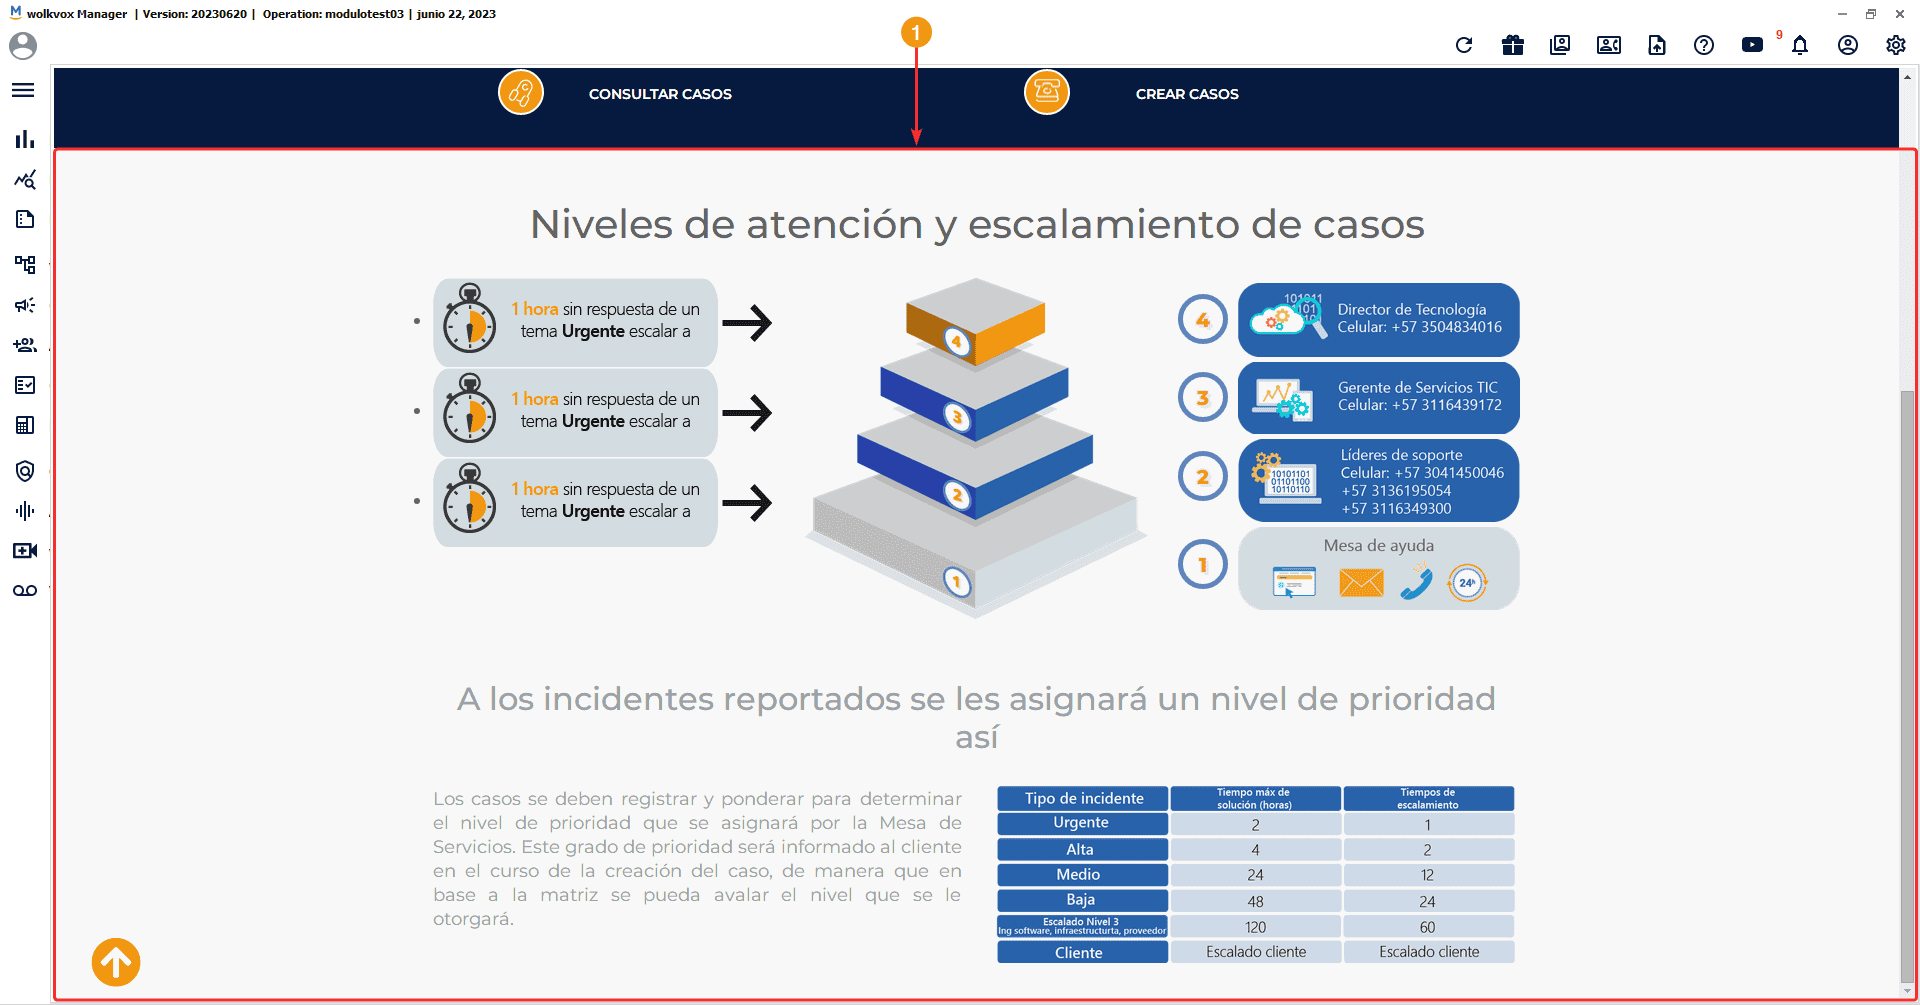
At the top, you can clearly identify the buttons for case consultation and creation.

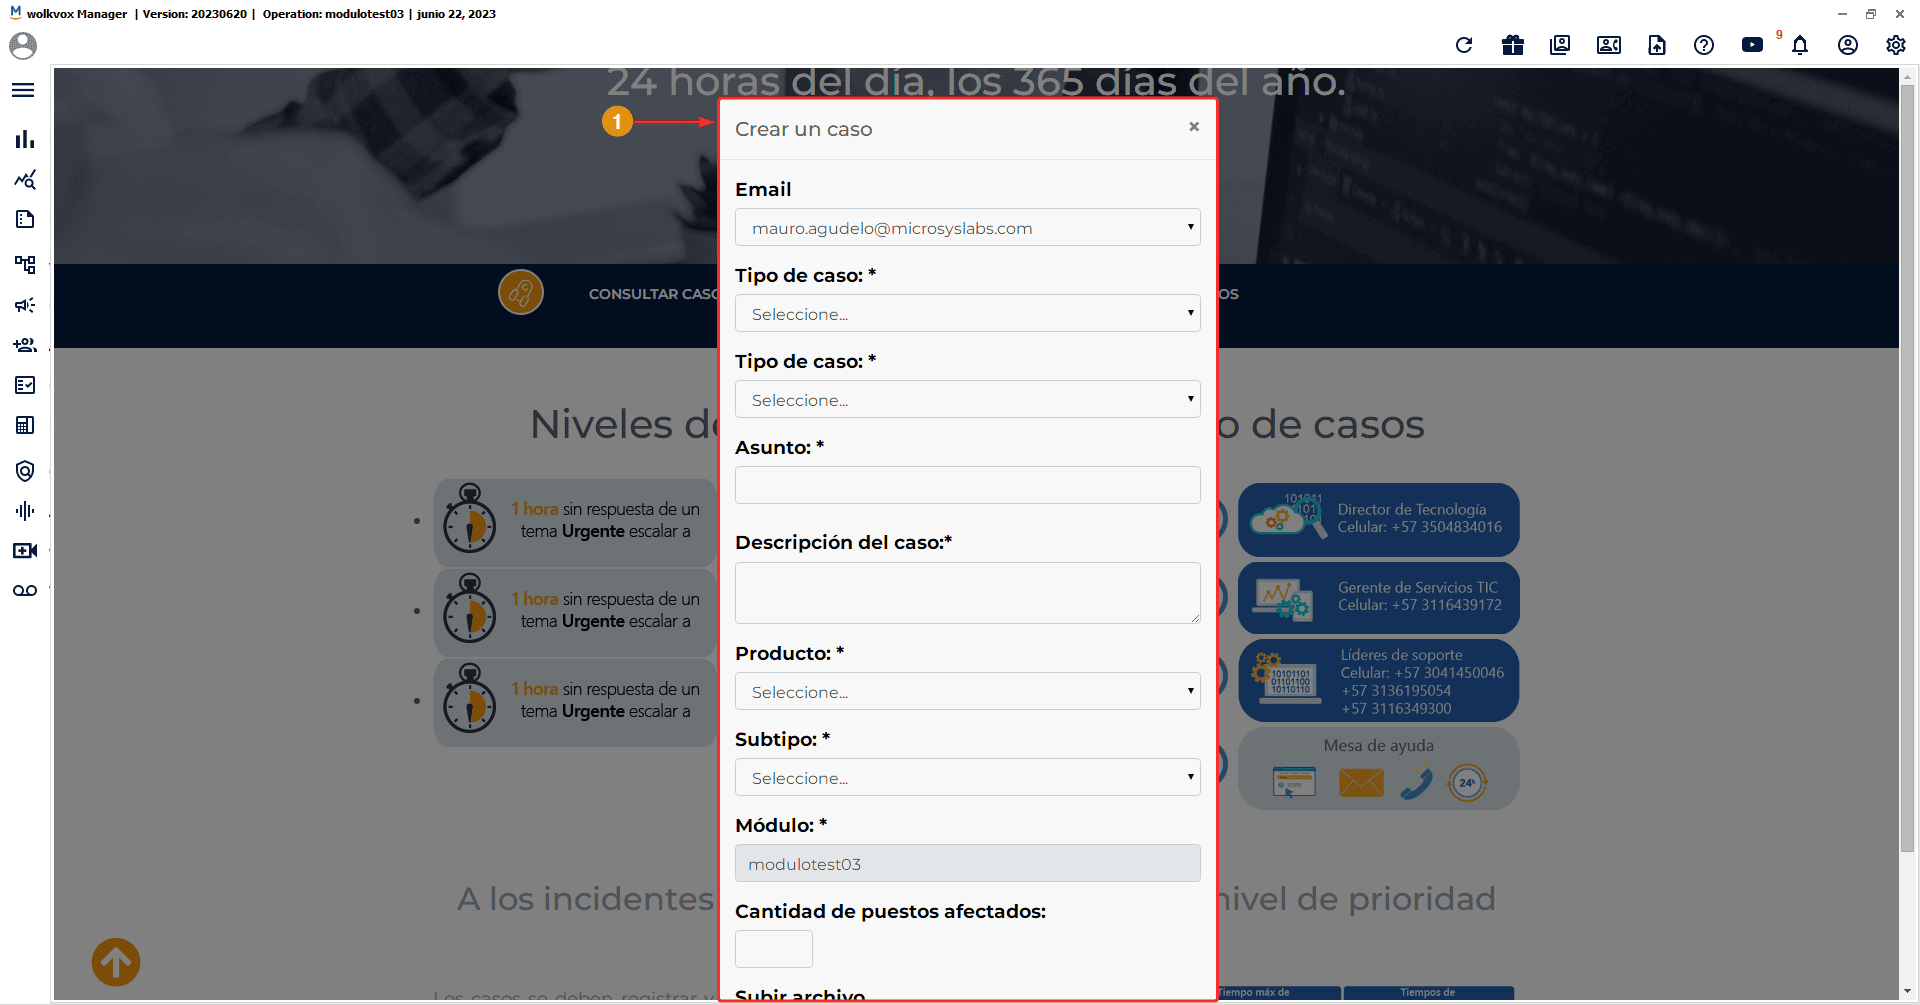
When selecting “Create case,” a pop-up window will open where you need to specify all the important information related to the case.
- Select the email to which you want the notifications to be sent.
- Specify the case type.
- In the “Subject” field, provide a short title for your case.
- In the “Case Description” field, write a more detailed description of your case. There is no character limit for this text box.
- In the “Product” field, select the service related to your case.
- In the “Subtype” field, select the type of issue that best fits your case.
- The “Module” field will automatically list the current module you are in.
- Specify the number of affected positions in your case. This field is optional but helps the help desk understand its priority.
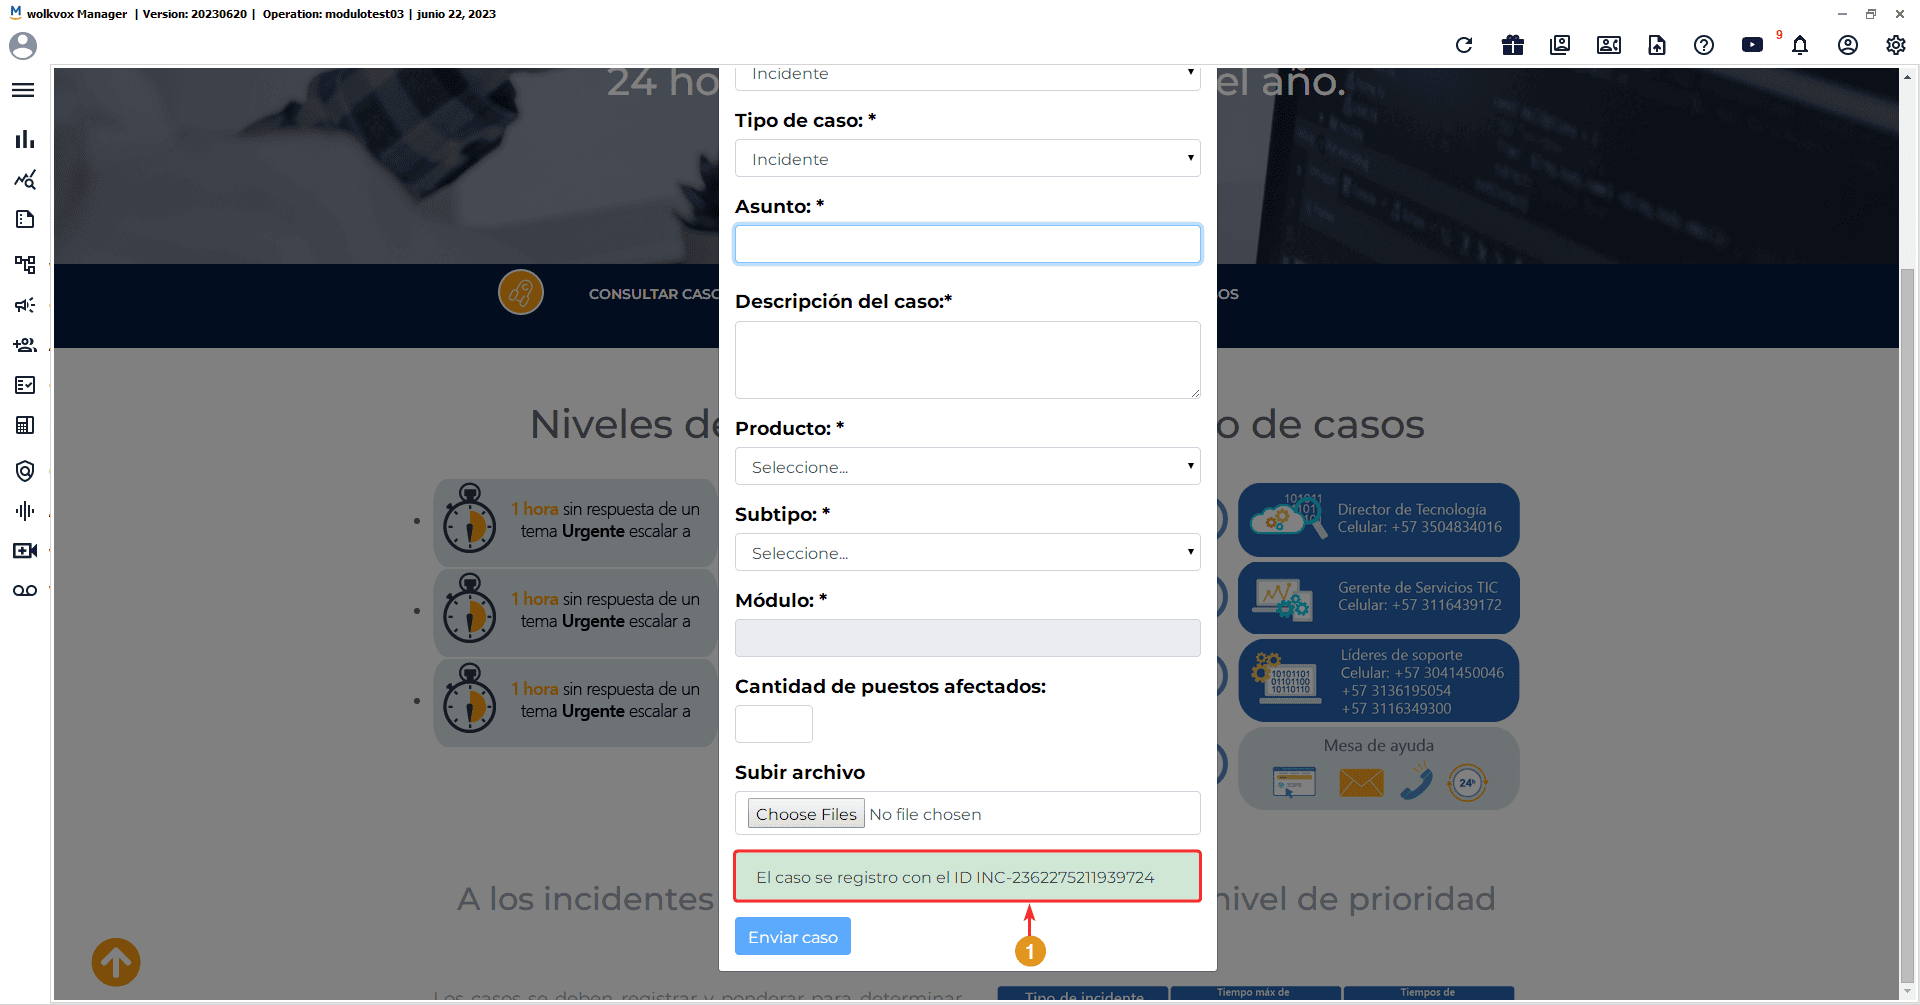
- You can upload up to one attachment file to provide more specific details about the issue you are experiencing, helping the support team optimize their assistance for your case.
- Before clicking “Submit Case,” make sure you have filled in all the mandatory fields, which are indicated by the asterisk symbol (*).
Upon submitting your case, an identification code for the case will be generated. Copy the code and keep it to search for it individually in the case query section.
Note: The priority is automatically defined and will be classified by our help desk based on the information you provided about your case.
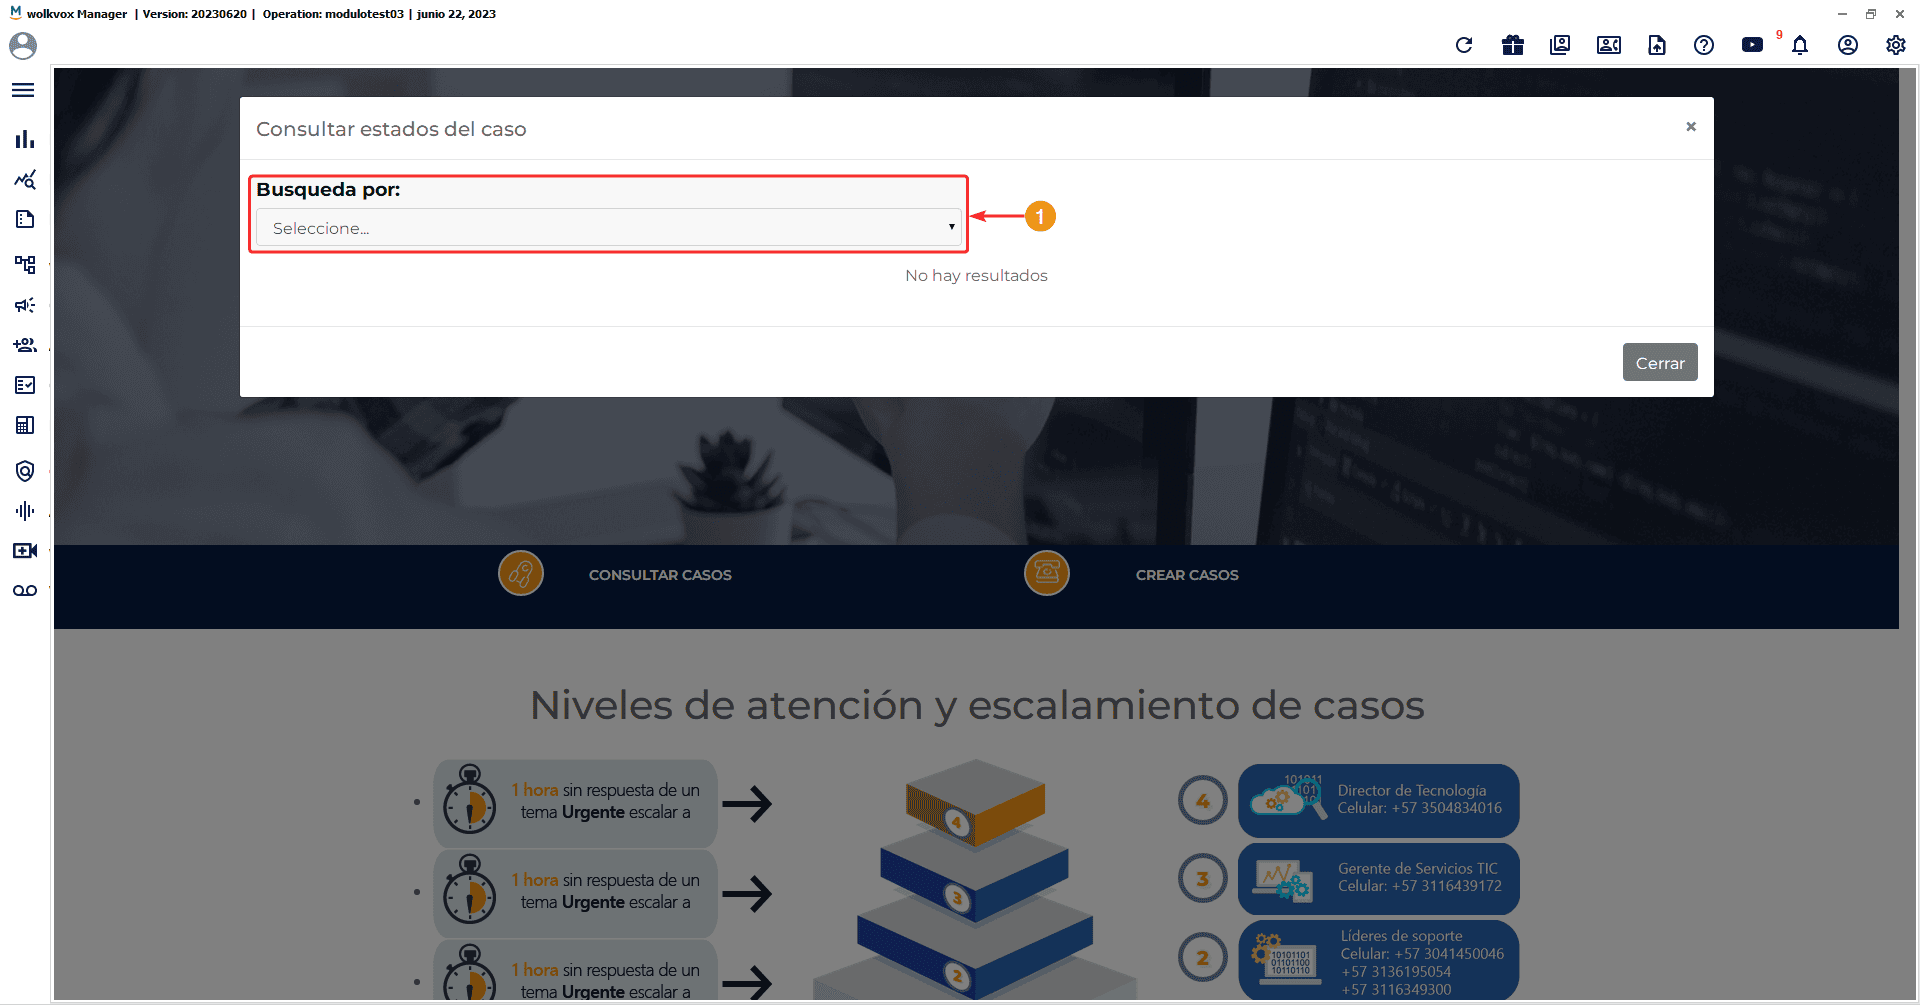
To check the status of your case and view the entire message history, click on “Consult Cases”.
A pop-up window will appear where you can search for your cases based on a date range or case ID number.
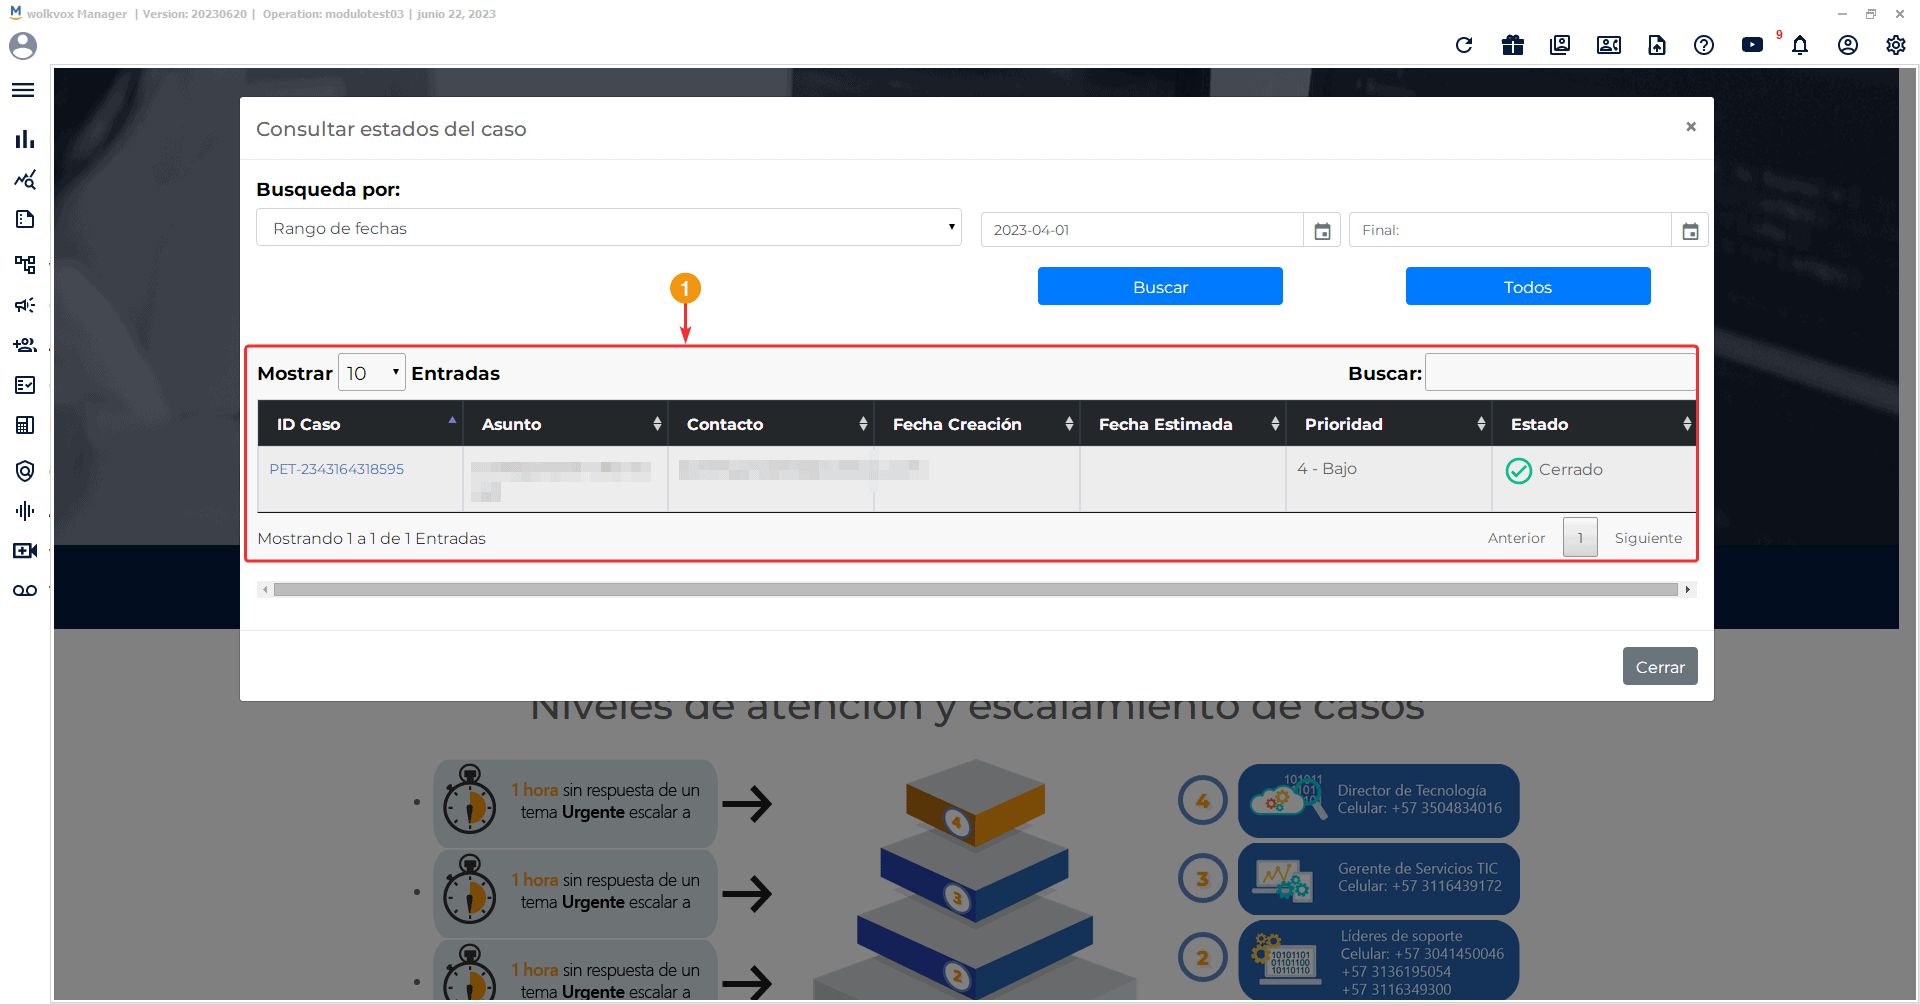
Based on your search criteria, all related cases will be listed.
The table of found cases will provide details such as the subject, contact, creation date, a possible estimated date, the priority set by the help desk, and the case status.
Note: Here, you will be able to view all cases created by individuals from your company.
You can click on the desired case ID number to enter the general view mode of the case and view all the information related to the case, including the history of all messages recorded during the case management.
Note: Clearly identify whether it is an incident or a request based on the initial characters. Requests start with “PET-” and incidents start with “INC-“.

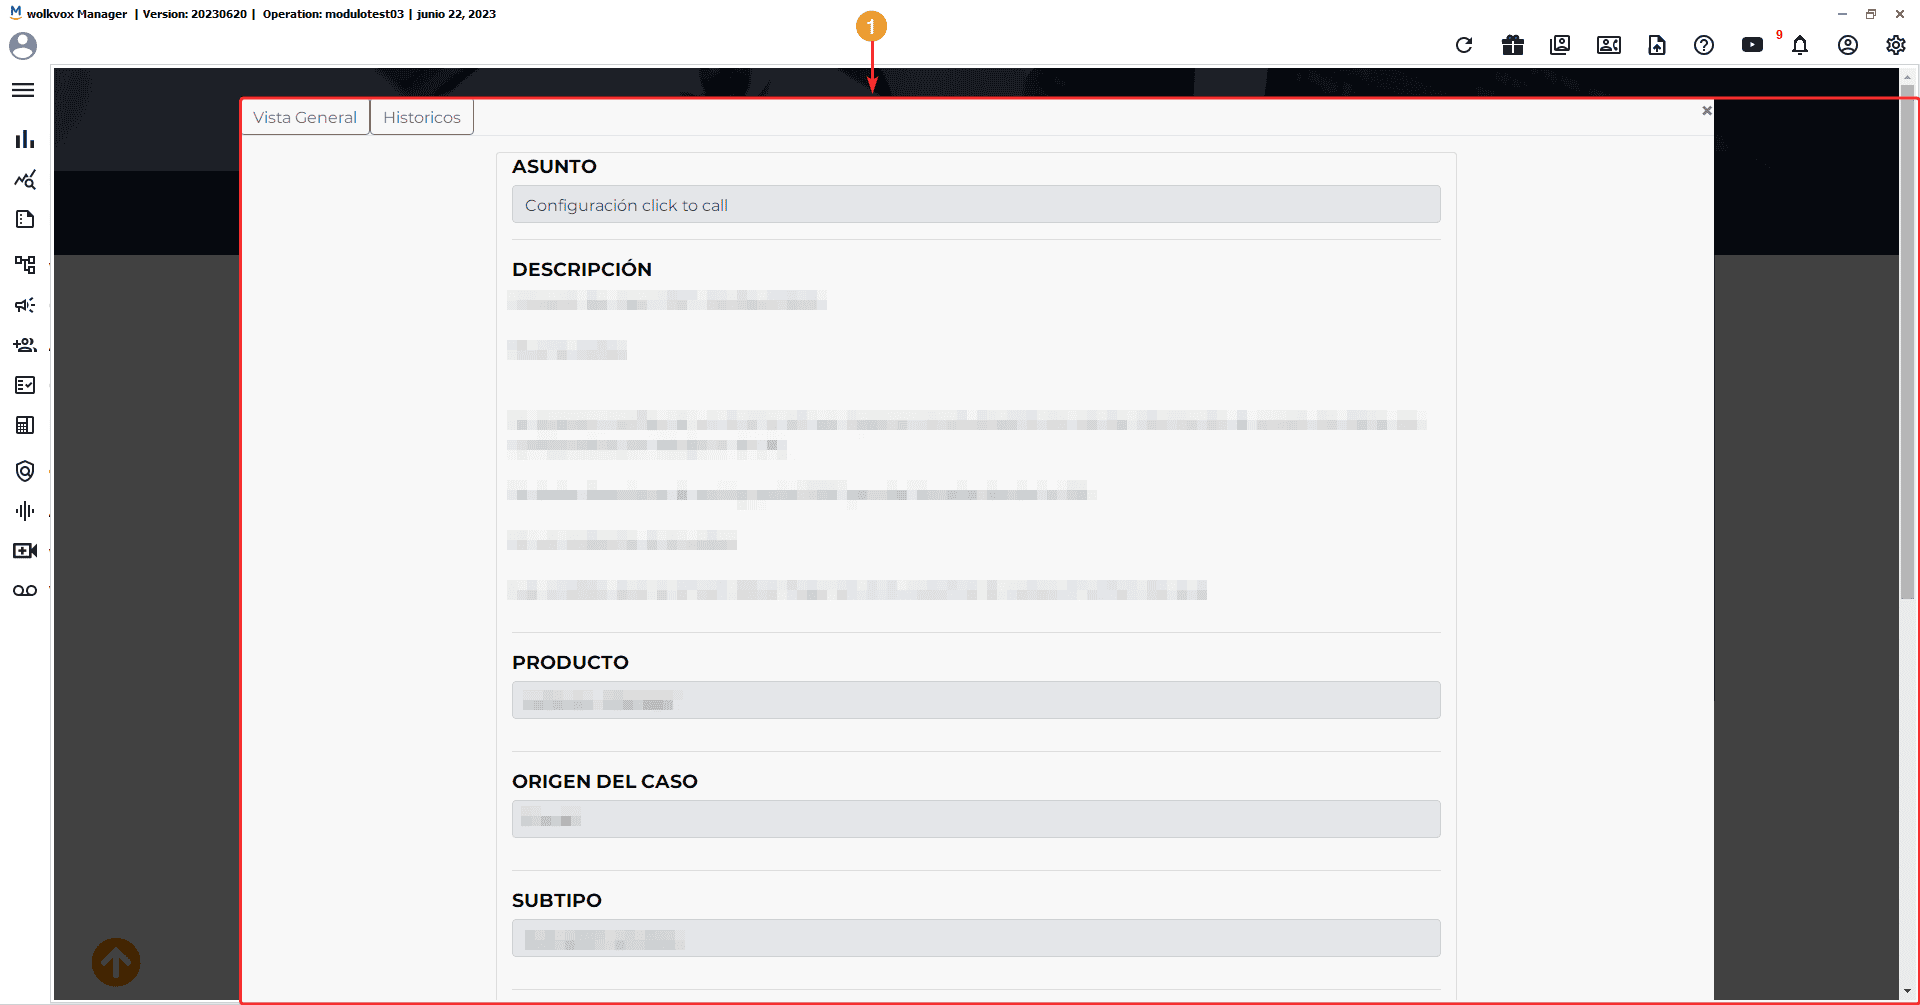
Upon entering a case, the window expands to provide detailed information and case history.
Note: Easily navigate through the interface using the buttons located in the top left corner of the popup window. In “Overview,” you can view the case information, and in “History,” you can return to the case search table.