

- Conn ID: Call identification number.
- Agent ID: Agent’s extension number.
- Duration (Sec): Duration of the call in seconds.
- Date: Date of the call.
- Doc Act: Activity code used by the agent to classify the call.
- Greeting: Indicates if the agent greeted and the words or phrases used.
- Slow to greet: Indicates if the agent was slow to greet.
- Greeting with agent name: Indicates if the agent introduced themselves to the customer.
- The next 10 columns represent the categories configured in “Speech Analytics” settings.
- Audio text: Conversion of voice dialogue to text.
- Telephone: Customer’s phone number.
- Percent Silence: Percentage of silence in the conversation.
- Customer ID: Customer identification number.
- Summary: Provides a summary of the conversation.
- Customer Feeling: Sentiment identified in the customer. This value ranges from “Very negative” to “Very positive.”
- Channel: Type of channel used in the analyzed interaction.
This result can be exported in HTML and Excel formats. Right-click on the table to see these options.
View conversation details #
To view the details or history of each call and chat, right-click on the call and select the “Play” option.
Identify these three options:
- At the top of the window, there is an audio spectrum that is differentiated by the color blue for the agent and orange for the customer.
- In the middle, there are 3 tabs: “Info,” “Summary,” and “Complete conversation.” In the “Info” tab, you can see the text of the conversation as the player progresses, along with a waveform display and a guide line that shows which part of the audio is being played.
- At the bottom of the window, there are player controls. There, you can move the dial to fast forward or rewind the audio, change the playback speed using the “Speed” field, start, pause, stop, and resume playback, and finally, the button with a folder icon that allows you to open the file explorer to locate the file on your computer.

In the “Summary” tab, you can view the conversation summary in text format.
In the “Complete conversation” tab, you have the conversation summary in a more detailed manner, separating each sentence by each speaker in a table. Here is an explanation of each column:
- Seg ini: Second when the speech started.
- Seg end: Second when the speech ended.
- Who talk: Indicates who spoke in that audio fragment.
- Speech to Text: Voice from the voice fragment converted to text.

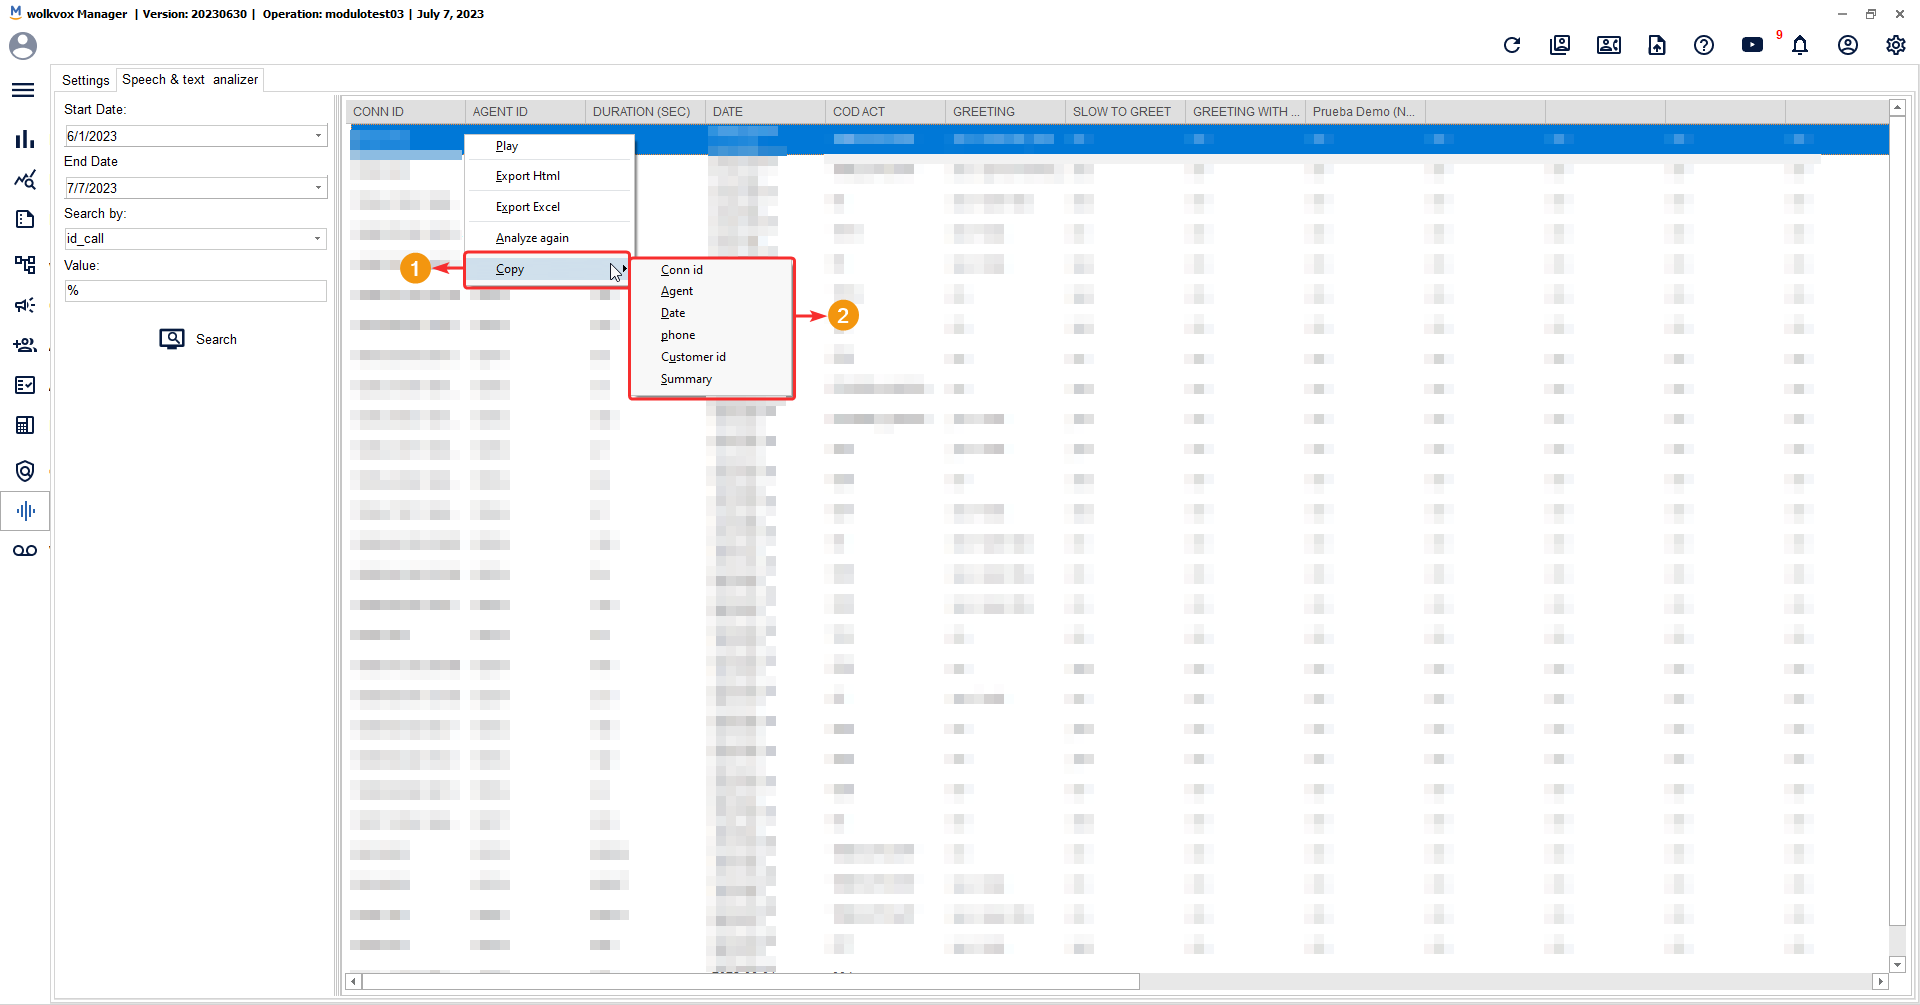
If you have noticed any issues in the conversation analysis, you can go to the results table, right-click, and select the “Analyze again” option. This will restart the analysis to obtain a completely new one.

You will also be able to copy the five most important data points from each call:
- Conn ID: It is the identification number of the call or interaction connection.
- Agent: Name of the agent.
- Date: Date of the call or interaction.
- Phone: Customer’s telephone number.
- Customer ID: Customer’s identification number.
- Summary: Conversation Summary.
If you need to view a detailed report in Excel format (XLS), you can go to the “Reports” section, enter the “Speech Analytics” tab, select the desired report, and generate the report based on the selected date range.

![]() This option will be displayed as long as you have the service activated in the wolkvox Manager settings.
This option will be displayed as long as you have the service activated in the wolkvox Manager settings.
In the “Speech Analytics” tab, you can access the service that allows you to extract information by analyzing the conversations stored in call recordings and detect patterns related to the words or phrases spoken by the customer or agent during their interaction.
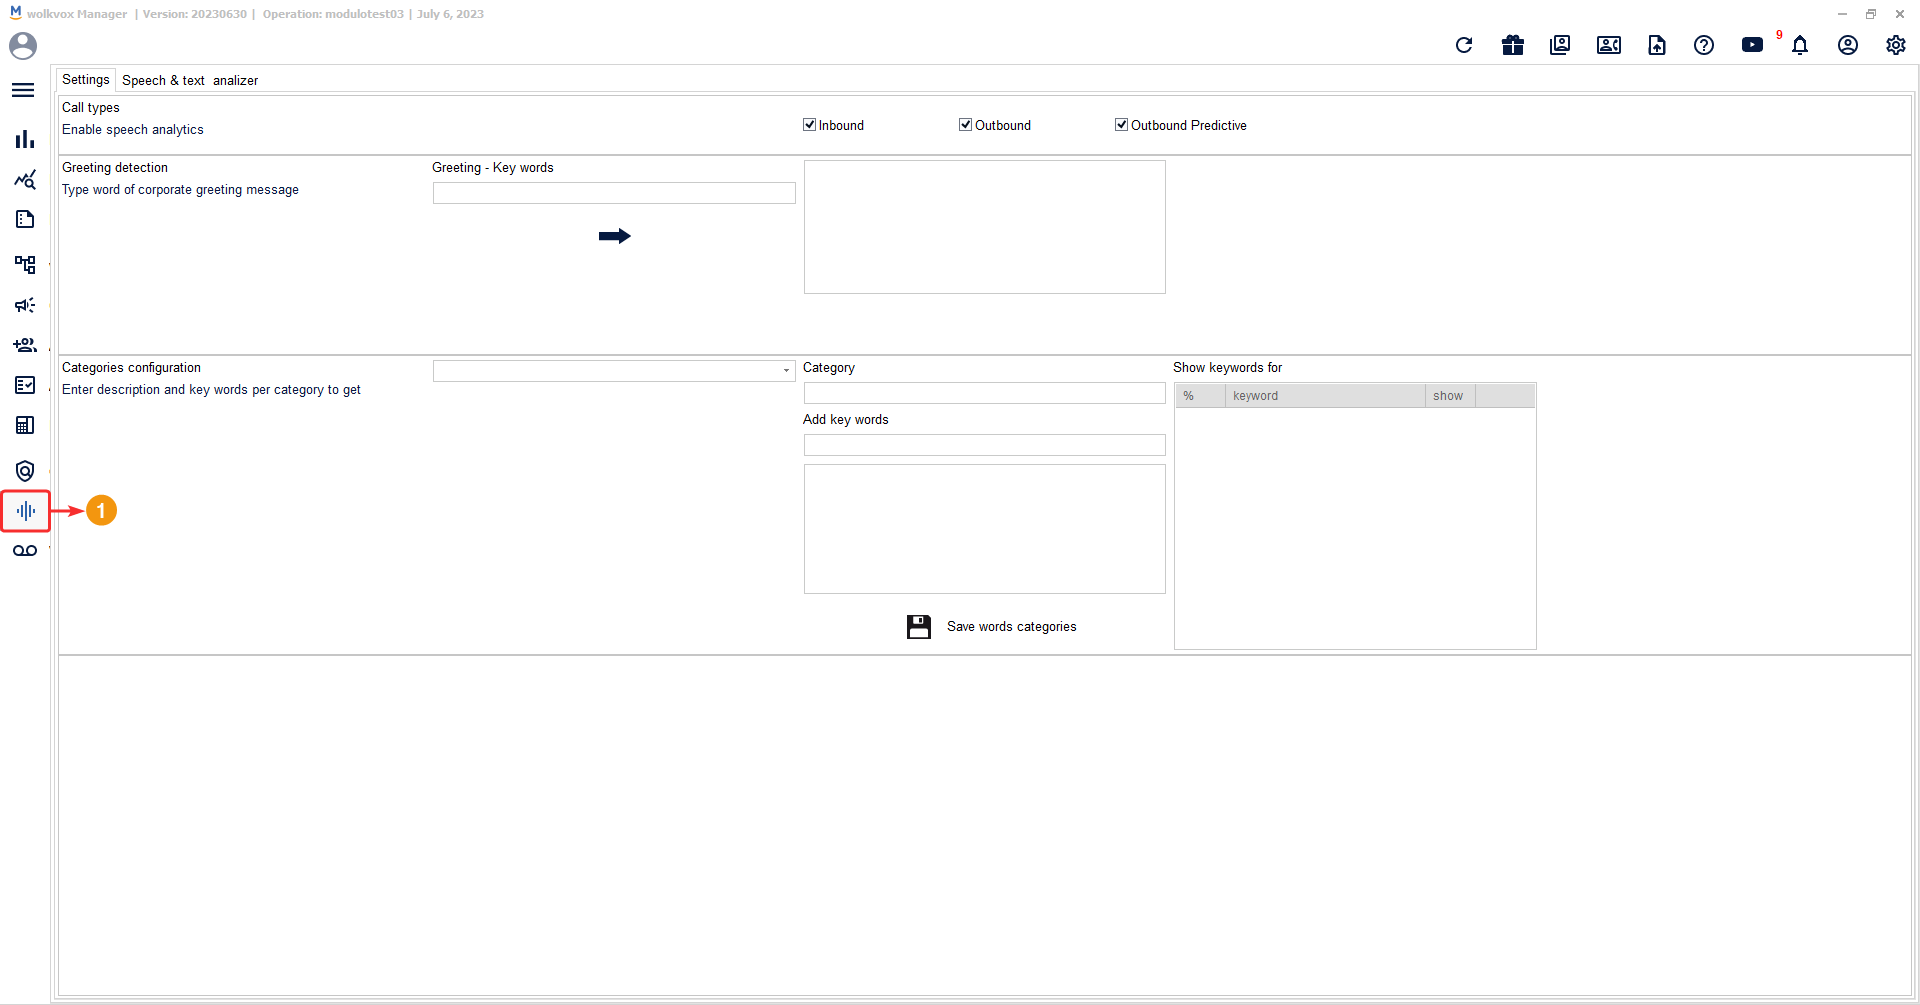
Speech Analytics Configuration #
In the “Configuration” tab, all the necessary options are parameterized for the proper functioning of the tool according to your needs and to enable the system to detect words correctly.
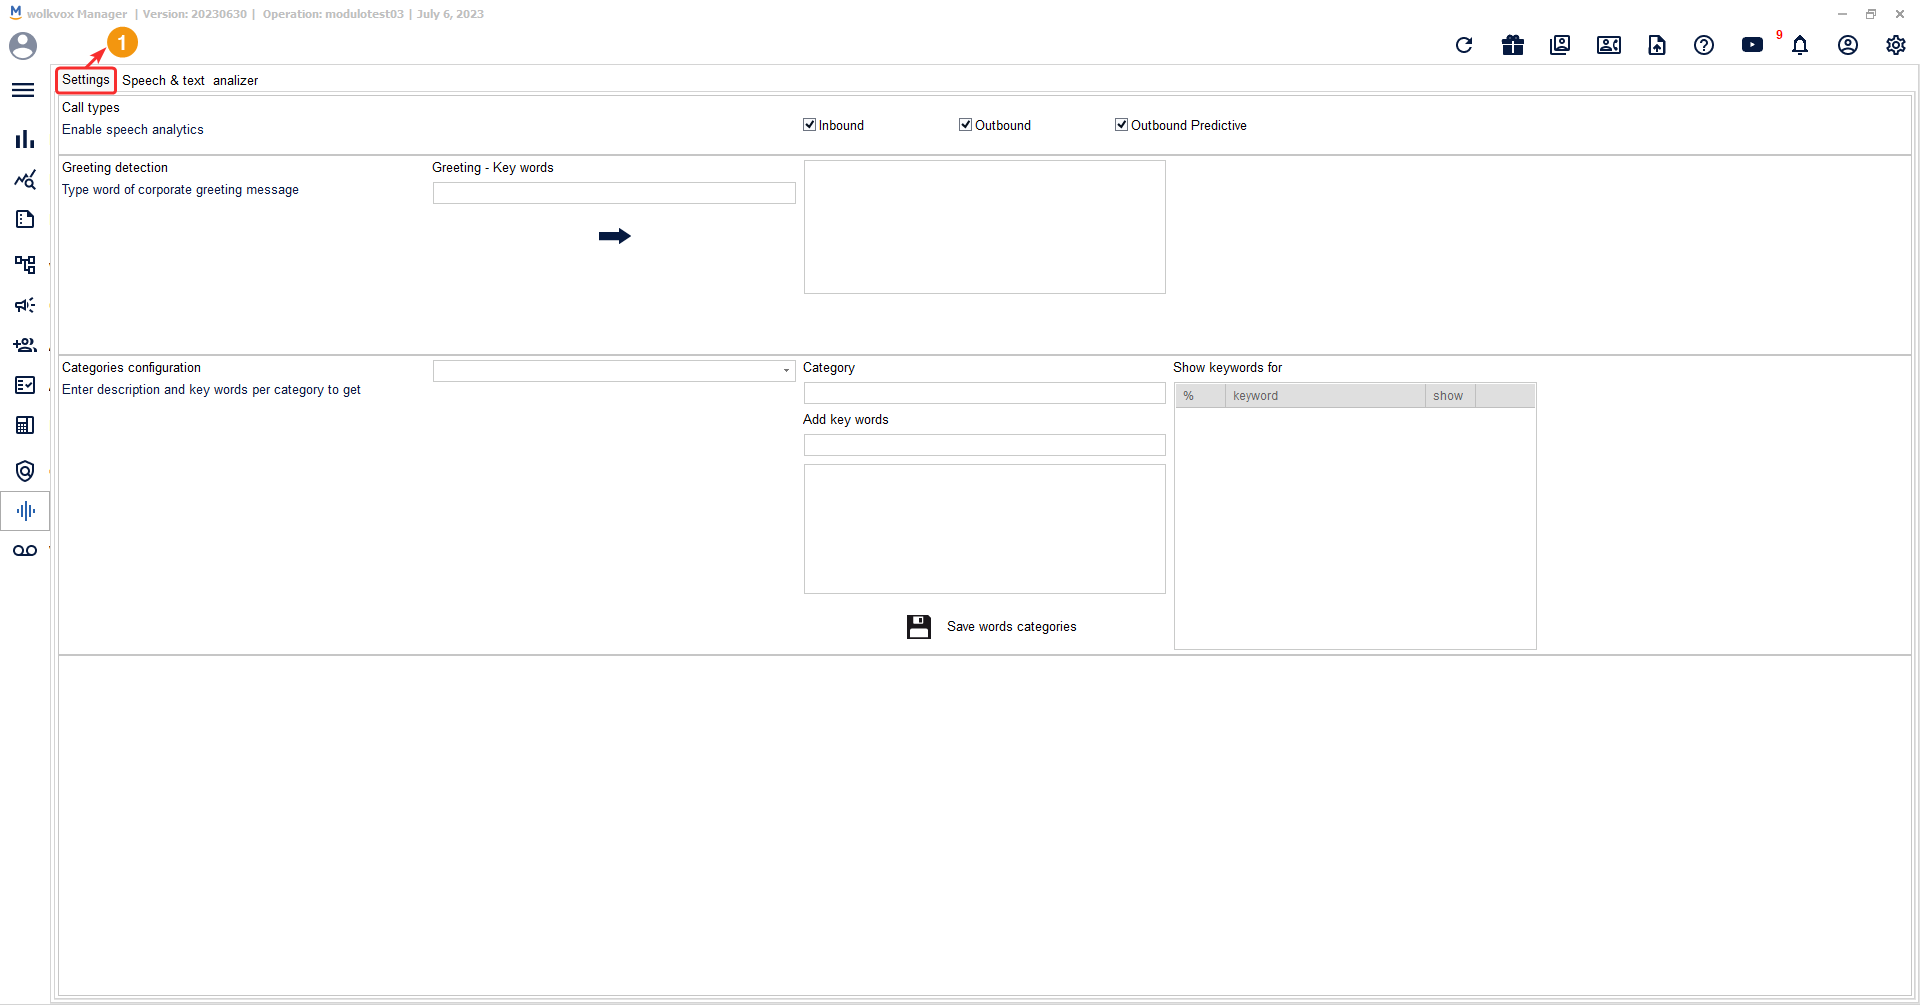
Call Types #
In this section, you need to activate the desired call types where you want the Speech Analytics service to be present. You can enable the service for Inbound, Outbound, and Outbound Predictive call types. Inbound calls refer to incoming calls, Outbound calls refer to outgoing calls, and Outbound Predictive calls refer to outgoing calls made using predictive dialing.

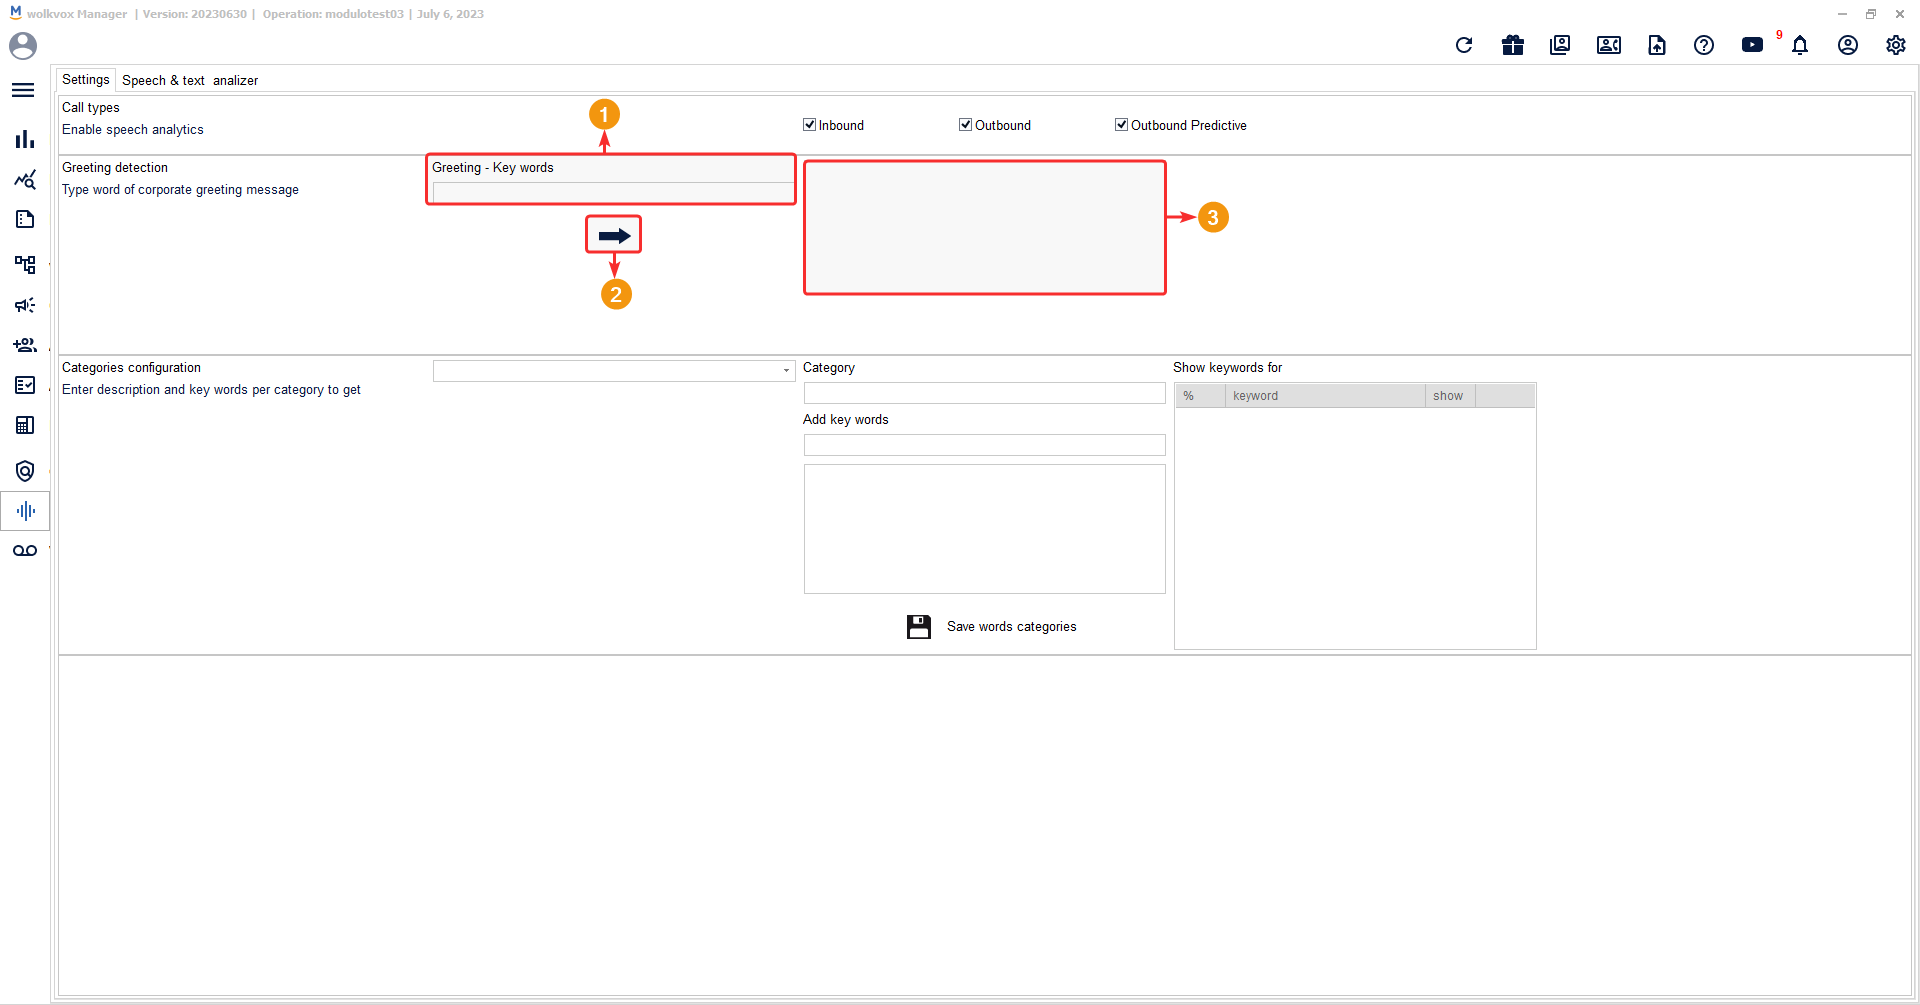
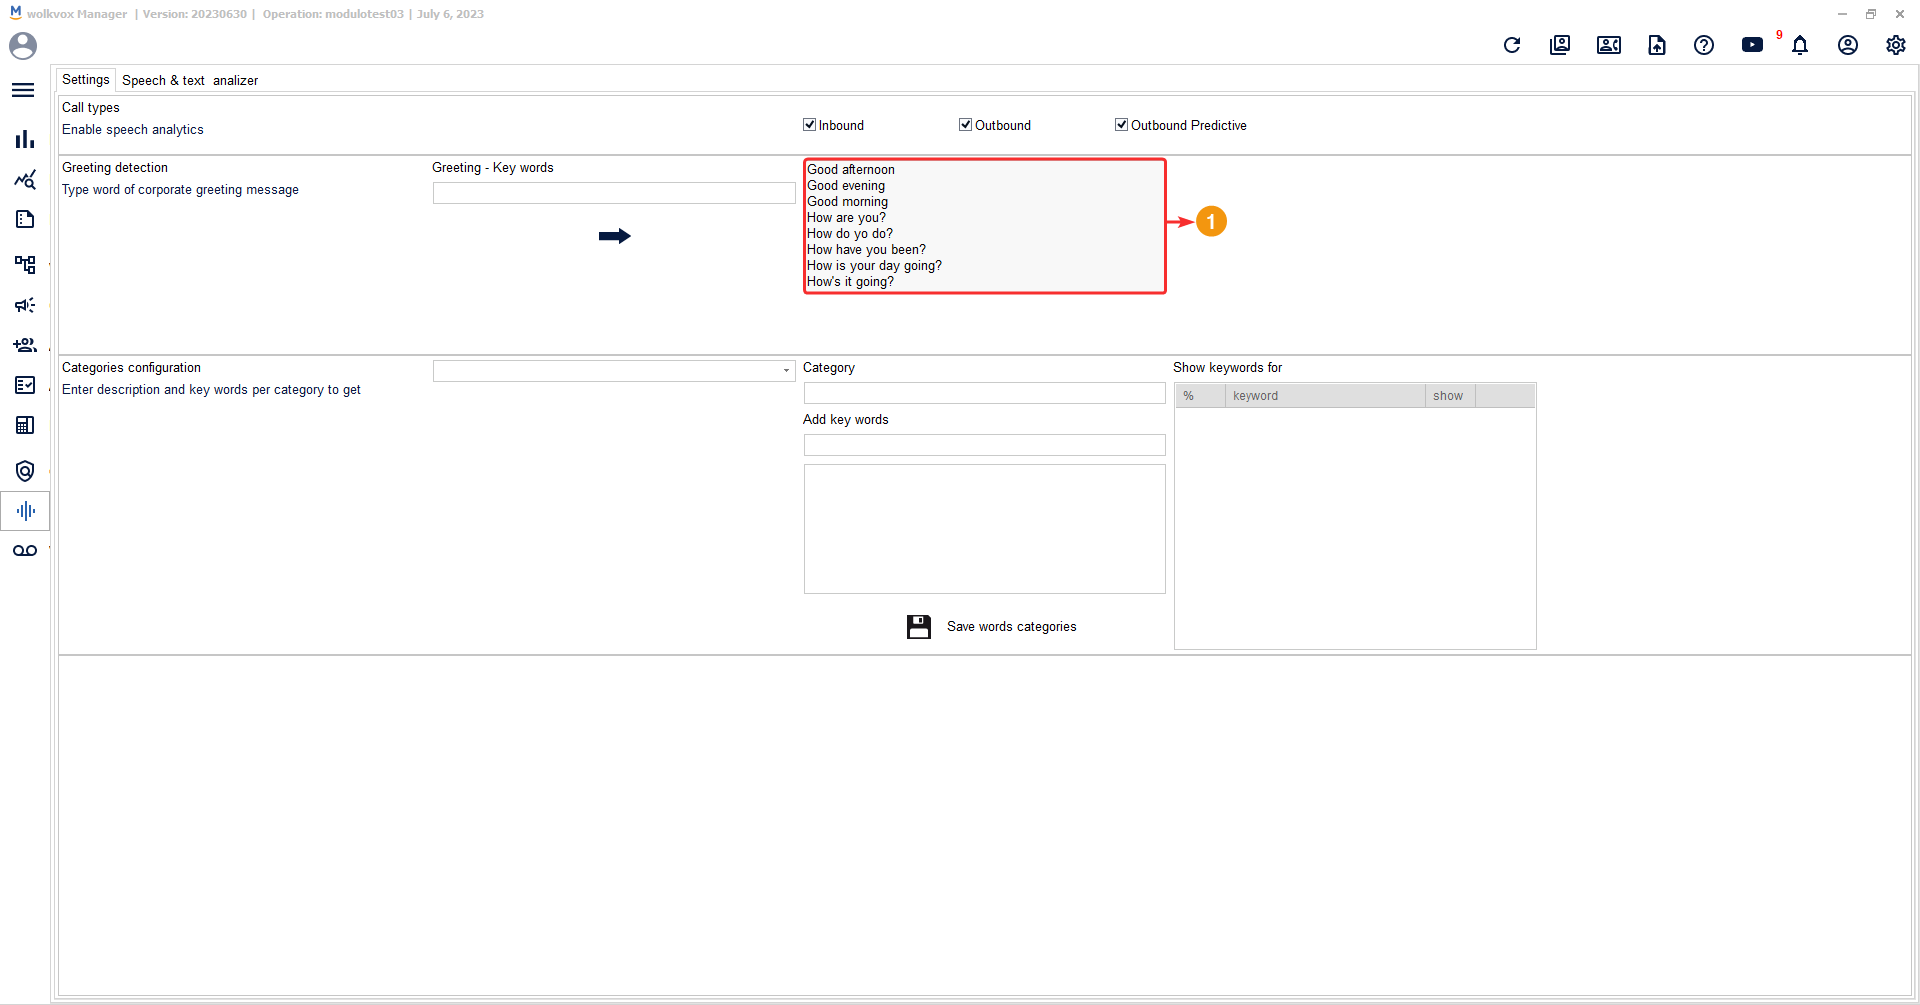
Greeting Words Definition #
In the “Greeting Detection” section, you add all the common phrases related to greetings used by agents and customers.
- Write each phrase in the “Greeting – Keywords” field.
- Click the right-pointing arrow to add what you wrote.
- The highlighted box lists all the words and phrases you have added.
If you want to remove an item from the list, right-click on it and select the “Remove greeting keyword” option.
Note: If you try to enter a single word, the system will display a message indicating that you need to add a minimum of a two-word phrase.
Below you can see an example of phrases used in an operations center. Note: If you right-click on each phrase, you will have the option to delete it.
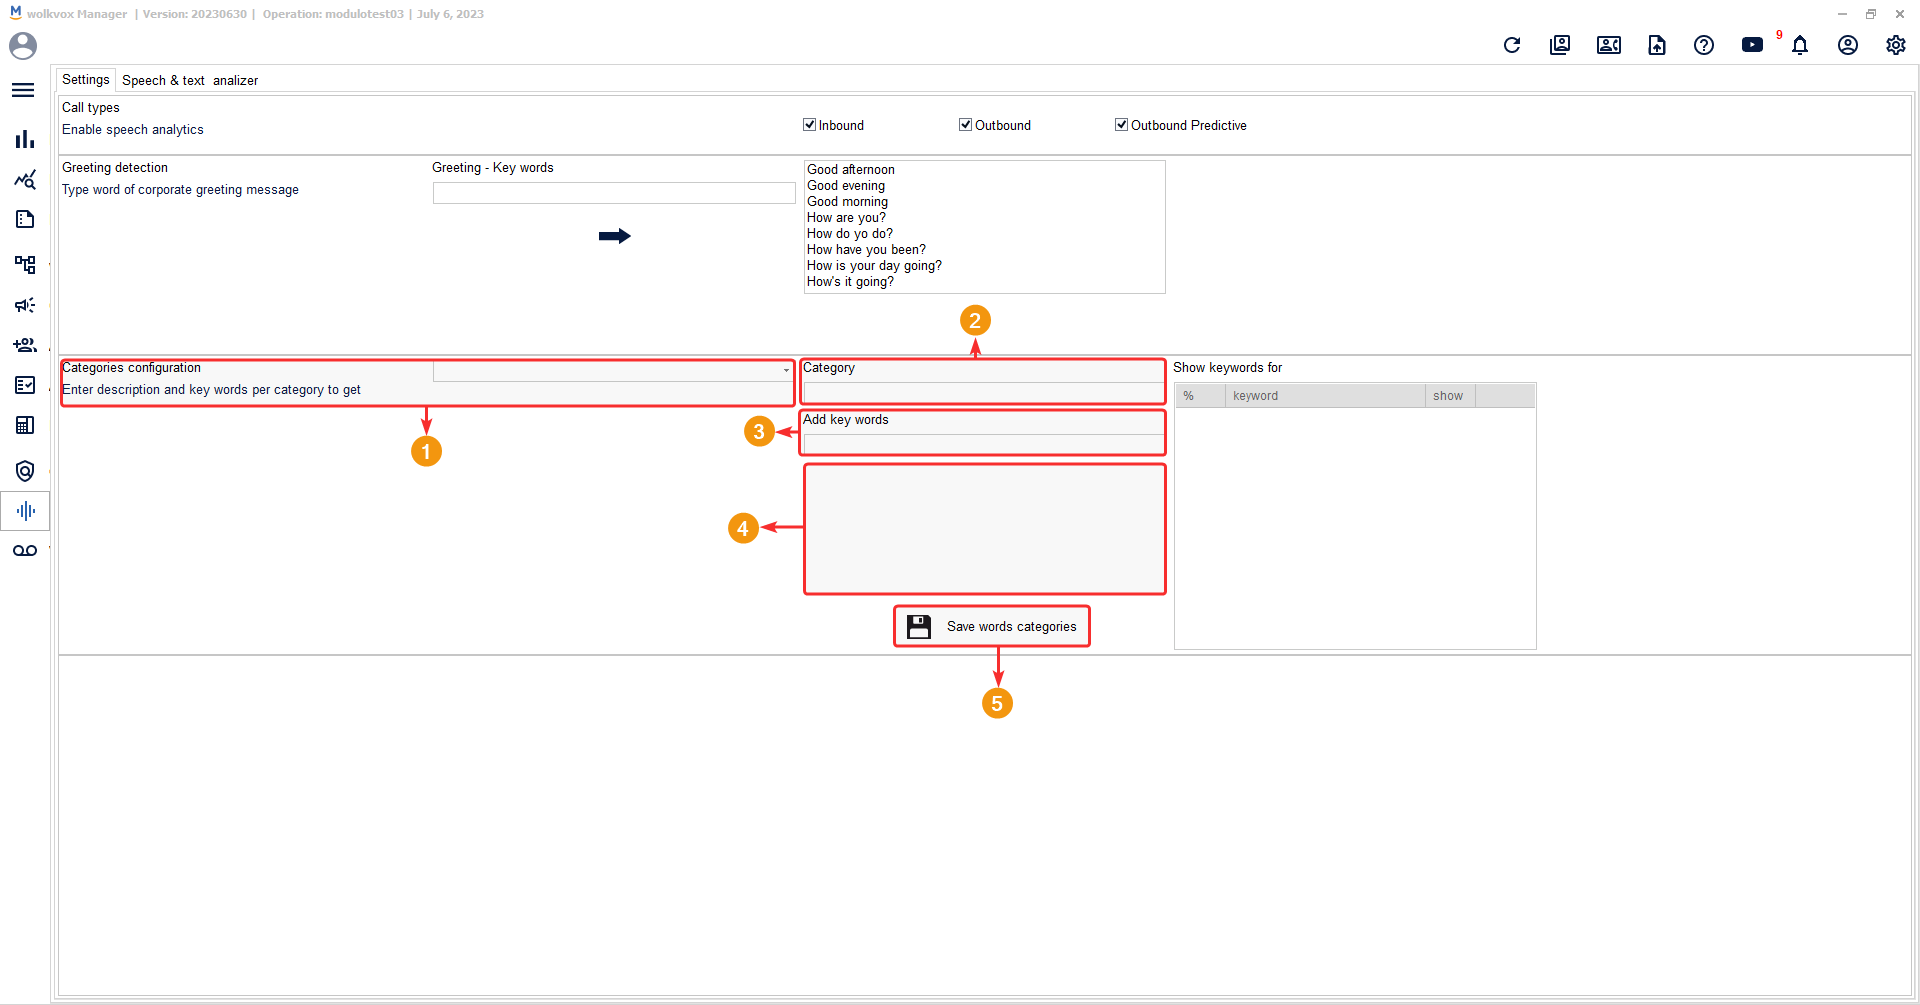
Category Creation #
It is possible to create categories to separate phrases and/or words based on their function or to label phrases in different groups according to their functionality. This is done through the “Category Configuration” section, and you can separate phrases into up to 10 different categories.
- You should click on the designated field to open the dropdown menu and select the category number you want to edit. The menu allows for a maximum of 10 categories.
- In the “Category” field, enter the name of the selected category.
- In the “Add keywords” field, you can enter words or phrases related to the category that you want the system to detect. The system requires a minimum of two words to be entered.
- The added words and phrases will be listed in the highlighted box.
- Click “Save words categories” to apply the changes.
Perform Conversation Analysis #
After configuring the service, follow these steps:
- Go to the “Speech Analyzer” tab.
- Select a date range.
- You can customize the search by selecting a search criterion in the “Search by” field. You can search by call identification number (id_call), agent extension number (id_agent), activity code (cod_act), or speech-to-text. Enter the corresponding value in the “Value” field based on the selected search criterion.
- Click the “Search speech analytics calls” button.

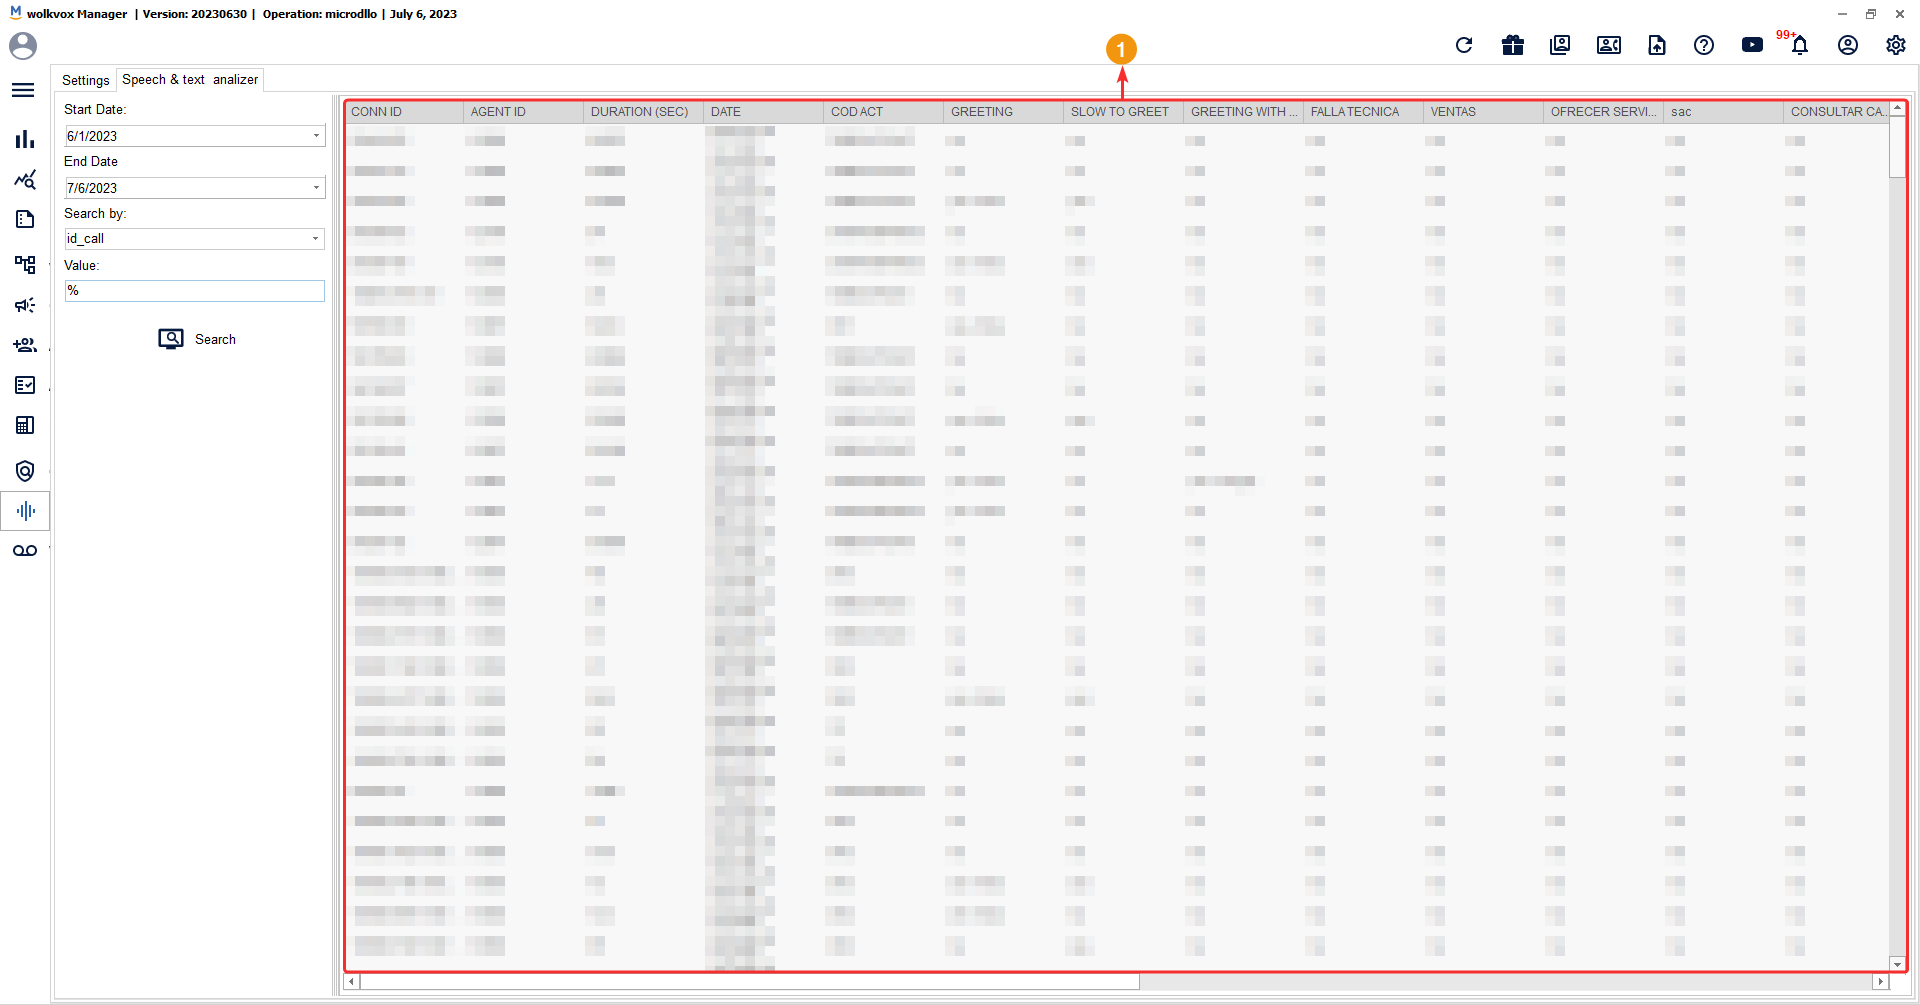
In the result columns, the following information is provided:
- Conn ID: Call identification number.
- Agent ID: Agent’s extension number.
- Duration (Sec): Duration of the call in seconds.
- Date: Date of the call.
- Doc Act: Activity code used by the agent to classify the call.
- Greeting: Indicates if the agent greeted and the words or phrases used.
- Slow to greet: Indicates if the agent was slow to greet.
- Greeting with agent name: Indicates if the agent introduced themselves to the customer.
- The next 10 columns represent the categories configured in “Speech Analytics” settings.
- Audio text: Conversion of voice dialogue to text.
- Telephone: Customer’s phone number.
- Percent Silence: Percentage of silence in the conversation.
- Customer ID: Customer identification number.
- Summary: Provides a summary of the conversation.
- Customer Feeling: Sentiment identified in the customer. This value ranges from “Very negative” to “Very positive.”
- Channel: Type of channel used in the analyzed interaction.
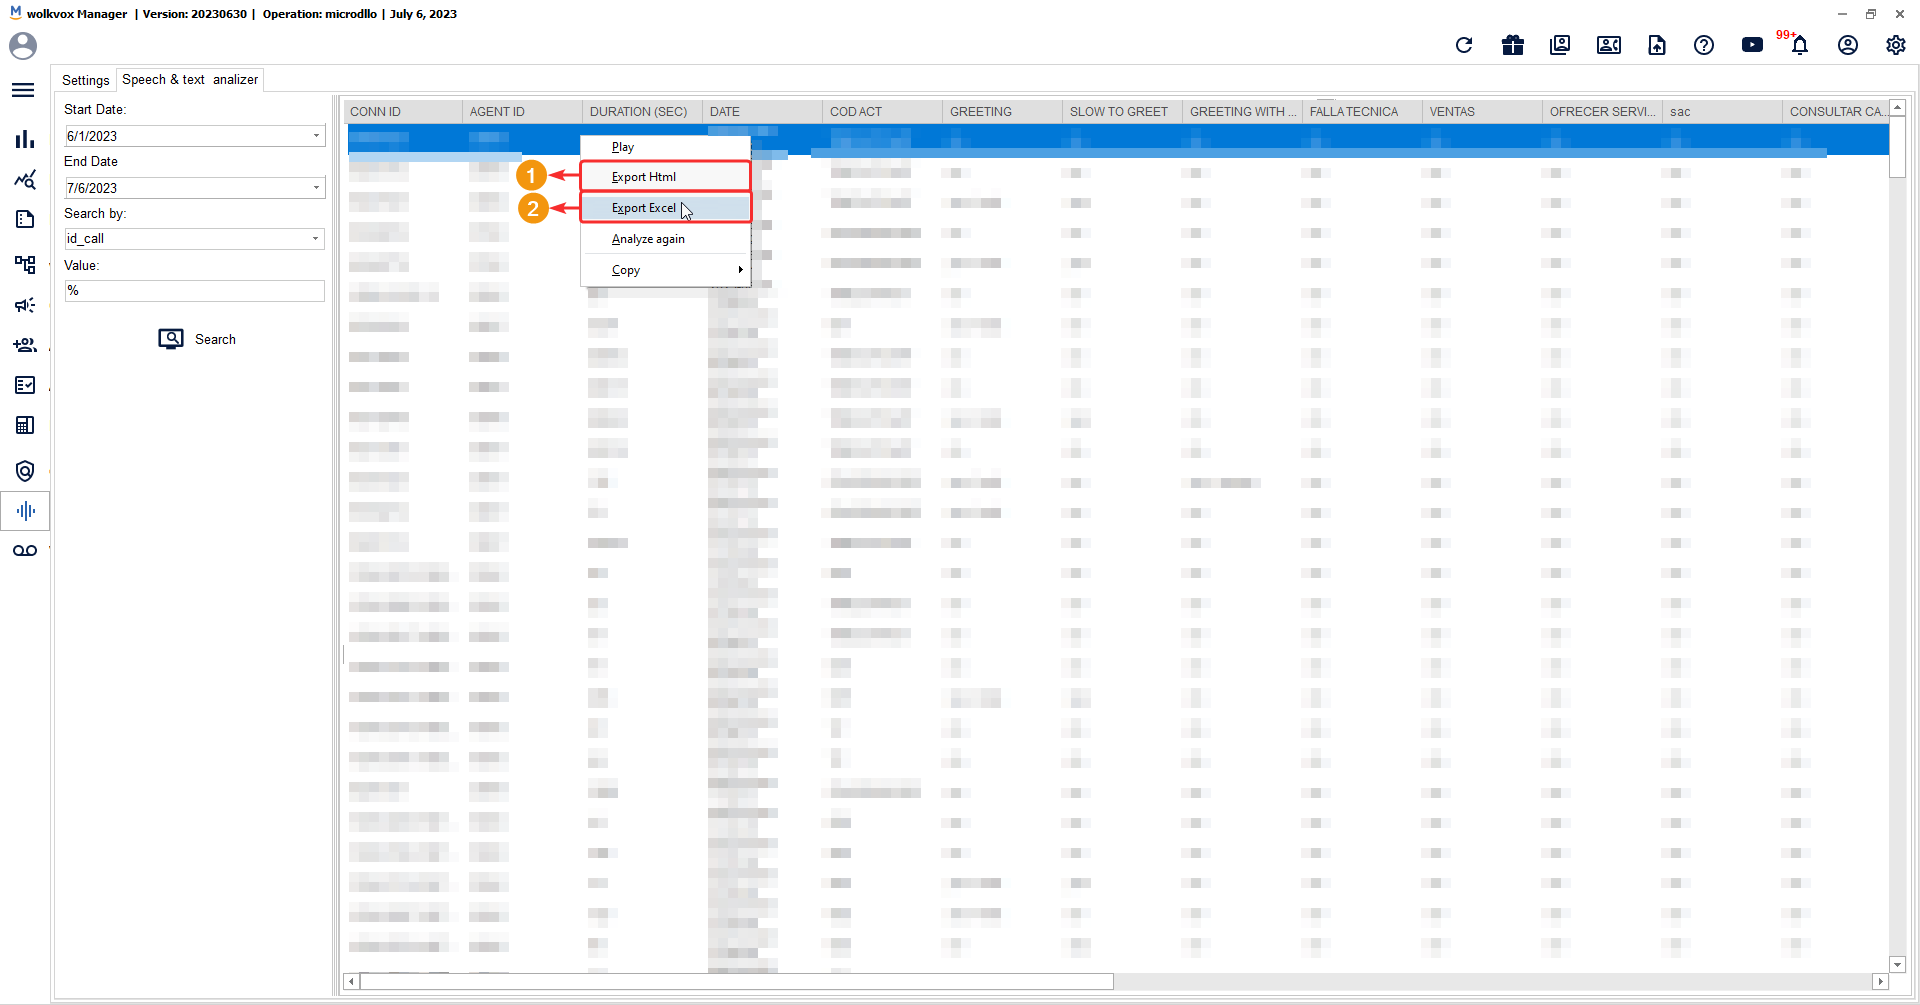
This result can be exported in HTML and Excel formats. Right-click on the table to see these options.
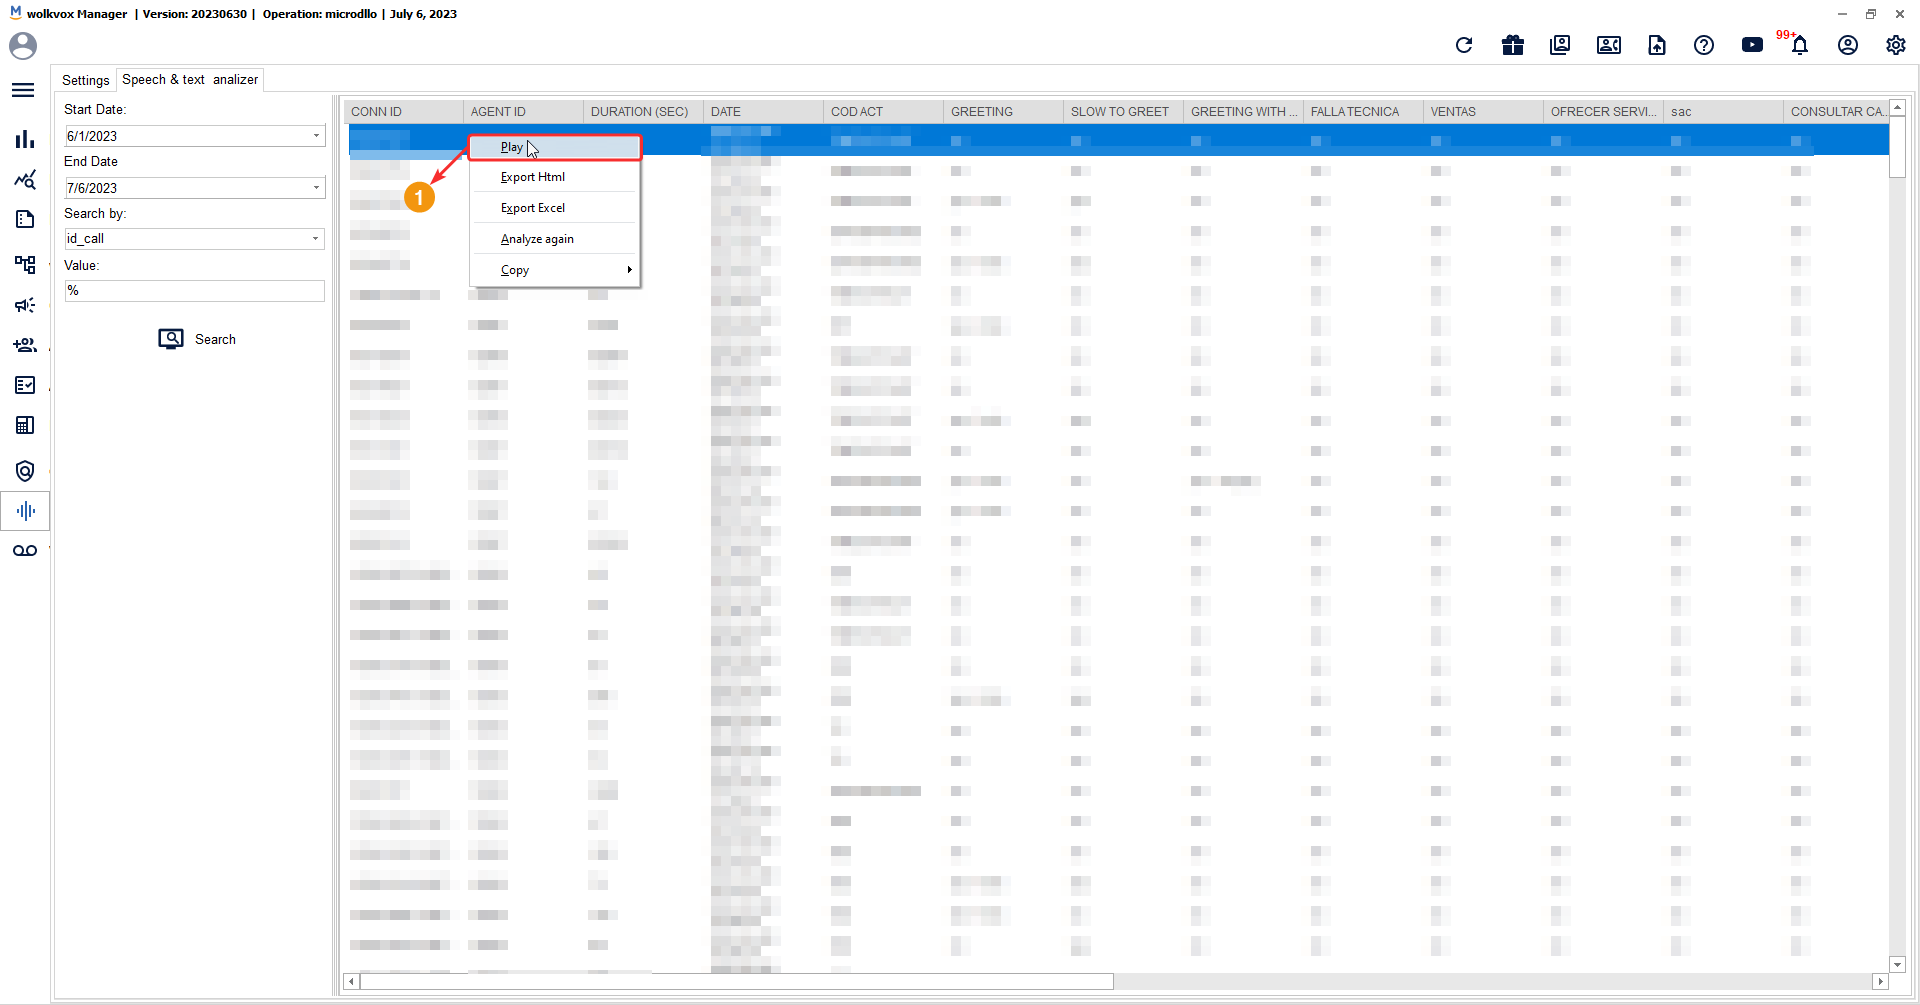
View conversation details #
To view the details or history of each call and chat, right-click on the call and select the “Play” option.
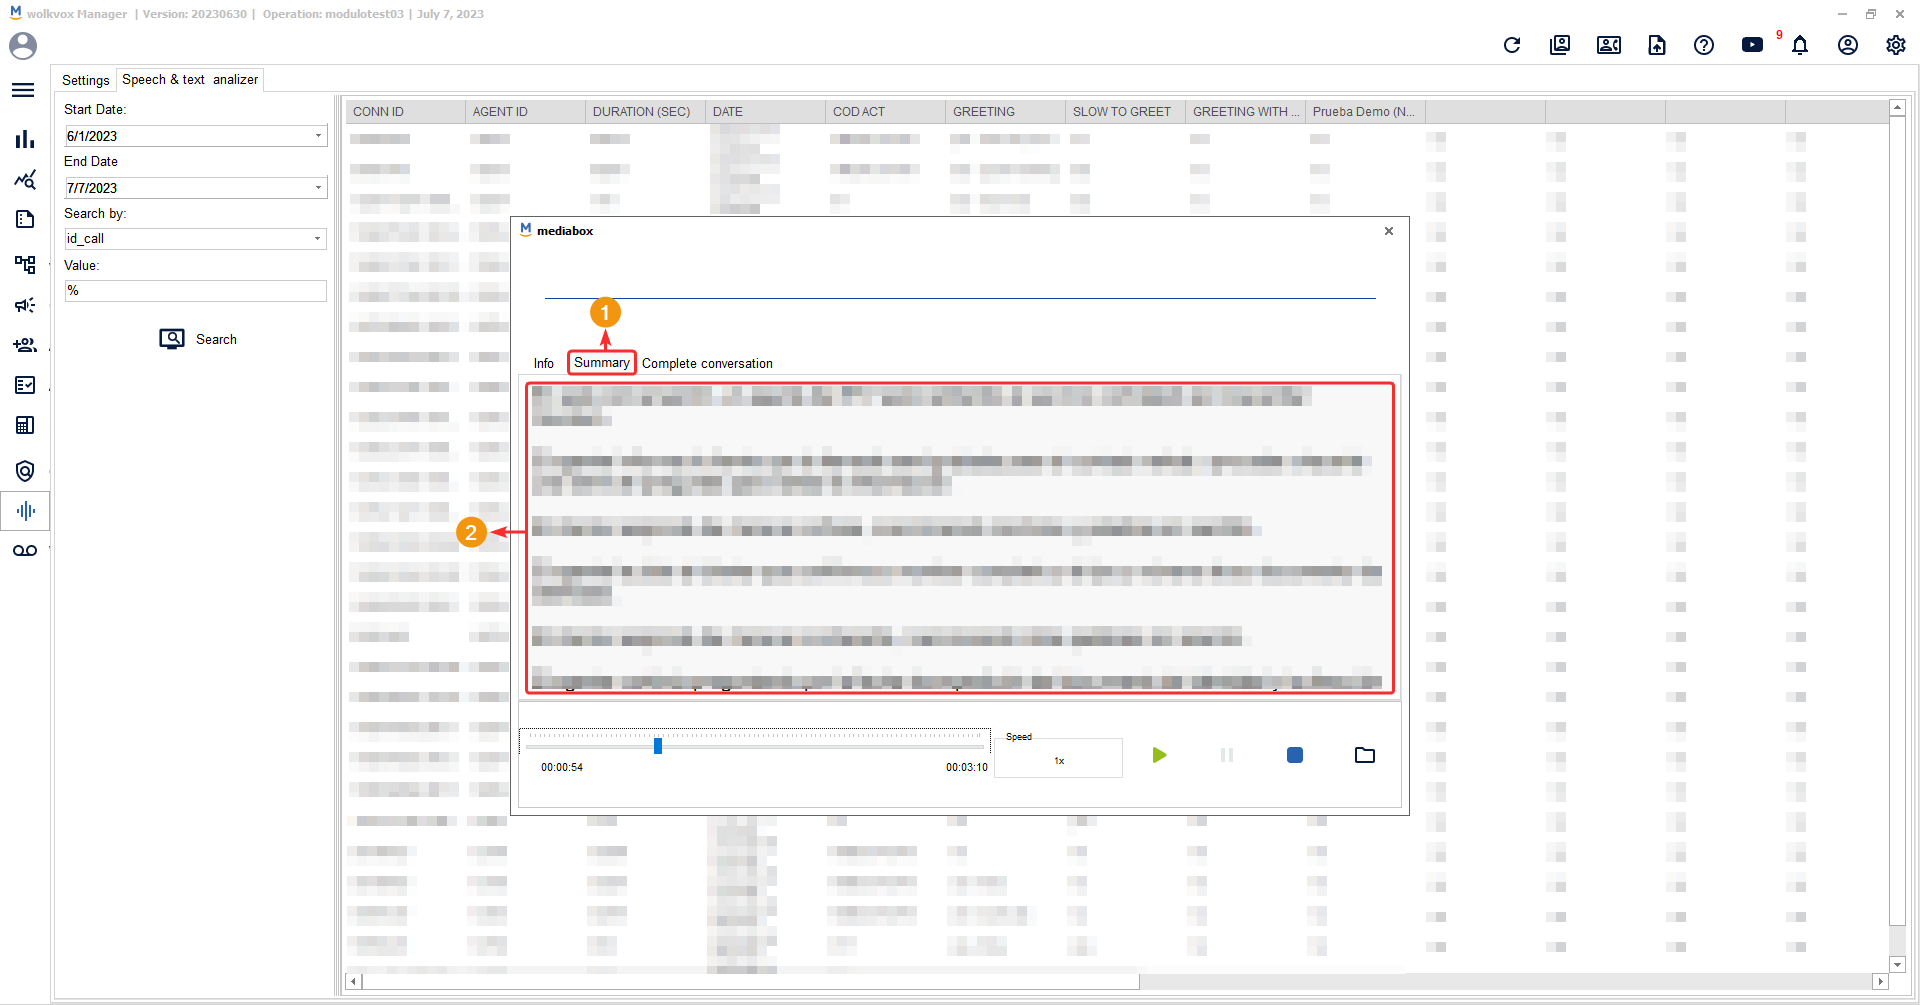
Identify these three options:
- At the top of the window, there is an audio spectrum that is differentiated by the color blue for the agent and orange for the customer.
- In the middle, there are 3 tabs: “Info,” “Summary,” and “Complete conversation.” In the “Info” tab, you can see the text of the conversation as the player progresses, along with a waveform display and a guide line that shows which part of the audio is being played.
- At the bottom of the window, there are player controls. There, you can move the dial to fast forward or rewind the audio, change the playback speed using the “Speed” field, start, pause, stop, and resume playback, and finally, the button with a folder icon that allows you to open the file explorer to locate the file on your computer.
In the “Summary” tab, you can view the conversation summary in text format.
In the “Complete conversation” tab, you have the conversation summary in a more detailed manner, separating each sentence by each speaker in a table. Here is an explanation of each column:
- Seg ini: Second when the speech started.
- Seg end: Second when the speech ended.
- Who talk: Indicates who spoke in that audio fragment.
- Speech to Text: Voice from the voice fragment converted to text.
If you have noticed any issues in the conversation analysis, you can go to the results table, right-click, and select the “Analyze again” option. This will restart the analysis to obtain a completely new one.
You will also be able to copy the five most important data points from each call:
- Conn ID: It is the identification number of the call or interaction connection.
- Agent: Name of the agent.
- Date: Date of the call or interaction.
- Phone: Customer’s telephone number.
- Customer ID: Customer’s identification number.
- Summary: Conversation Summary.
If you need to view a detailed report in Excel format (XLS), you can go to the “Reports” section, enter the “Speech Analytics” tab, select the desired report, and generate the report based on the selected date range.
