

 New additional SSO authentication method using Azure Active Directory (SAML protocol) #

Learn what SAML is #
SAML (Security Assertion Markup Language) is an open standard used for securely exchanging authentication and authorization data between different systems. The core concept of SAML is to enable individuals to log in to multiple applications or services using a single set of credentials, commonly known as Single Sign-On (SSO).
Benefits of SAML #
- Identity unification.
- Authentication centralization.
- Fewer passwords, more security.
- Enhanced user experience.
- Easy for administrators to manage.
- Scalability of operations.
Access the Azure portal #
The first thing you will need to do to perform the integration is to log in to the Azure portal as an administrator. To go to the Azure portal, click here.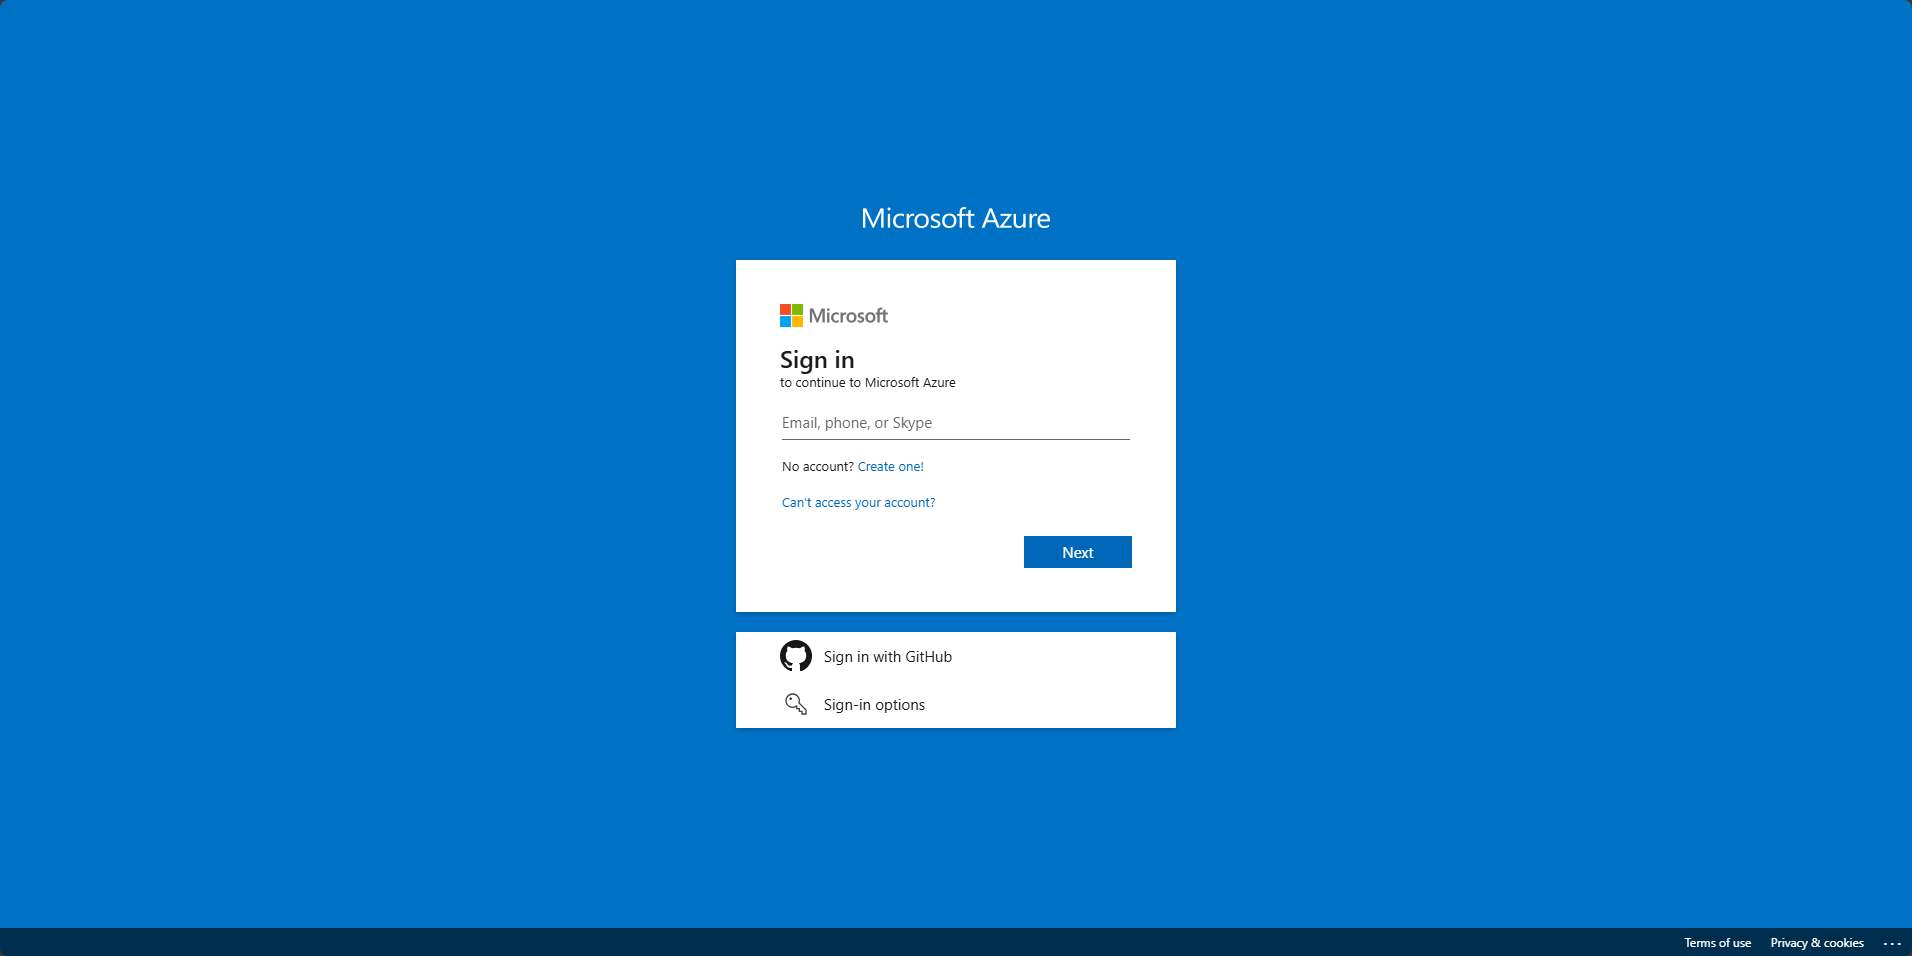
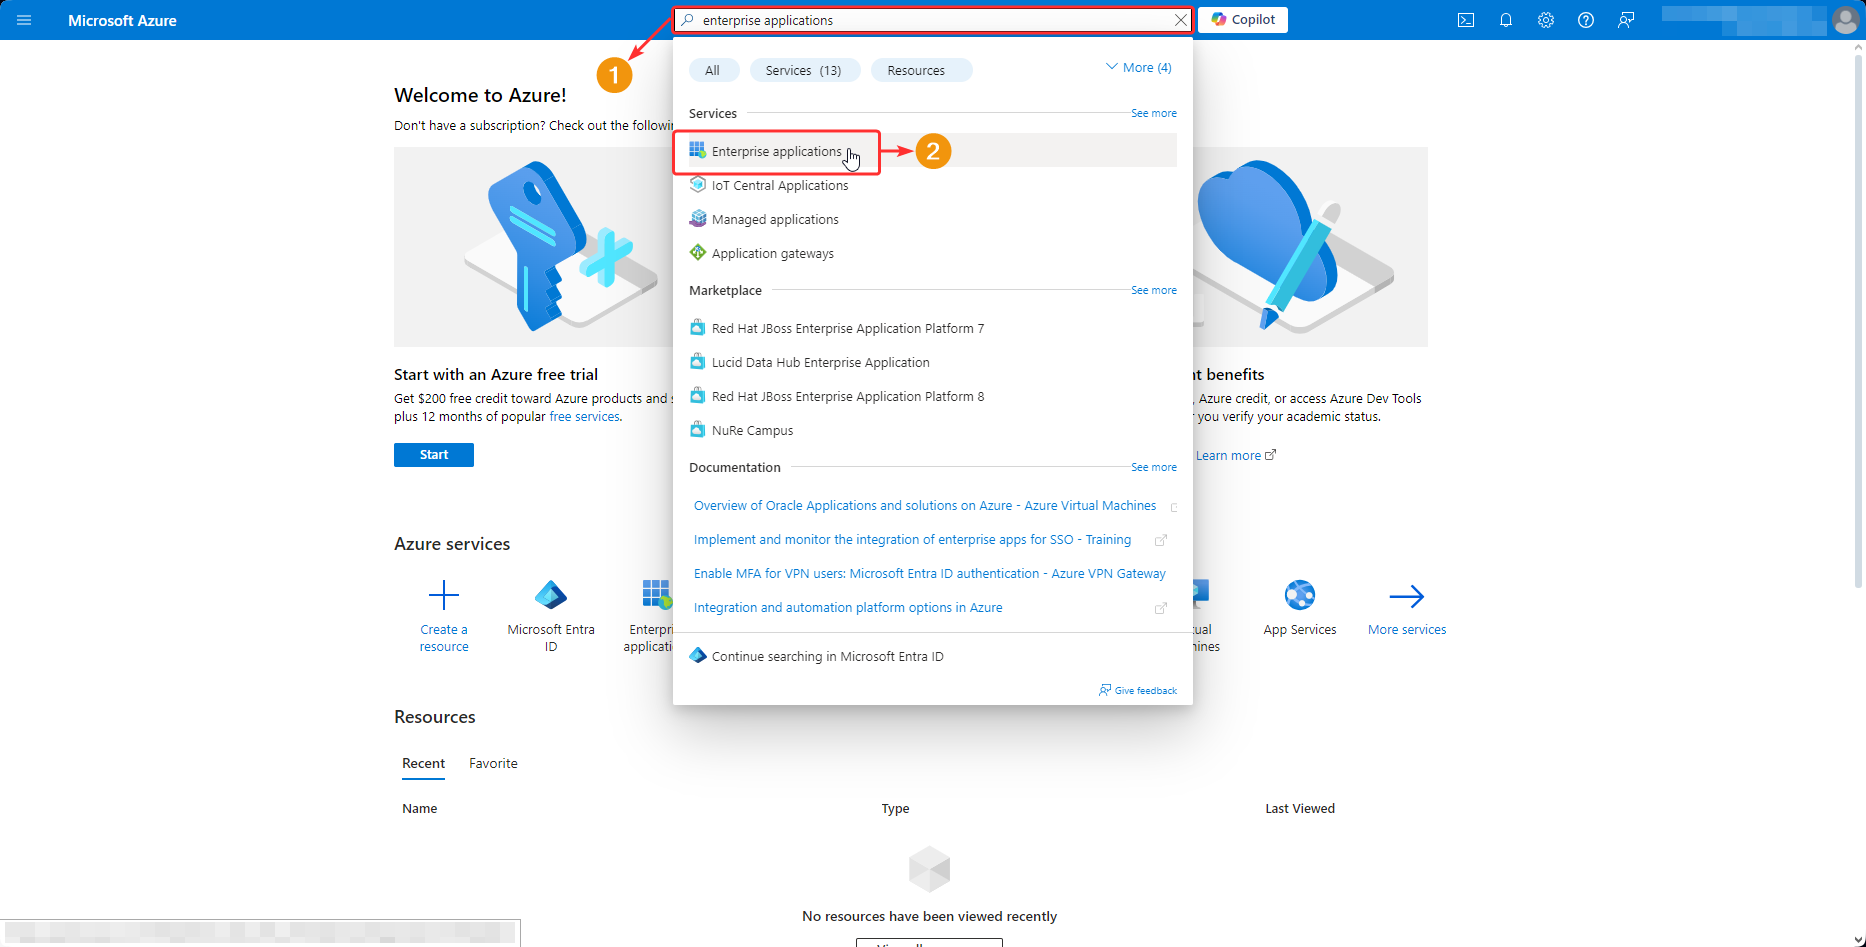
Once you have logged in, we will proceed to the business applications section.
- In the portal search bar, you should enter the words “Enterprise applications”.
- From the drop-down list, select “Business Applications”.
Another way to access the Enterprise Applications section is by following these steps:
- Click on the main menu button located in the upper left corner of the screen.
- Select the option “Microsoft Entra ID”.
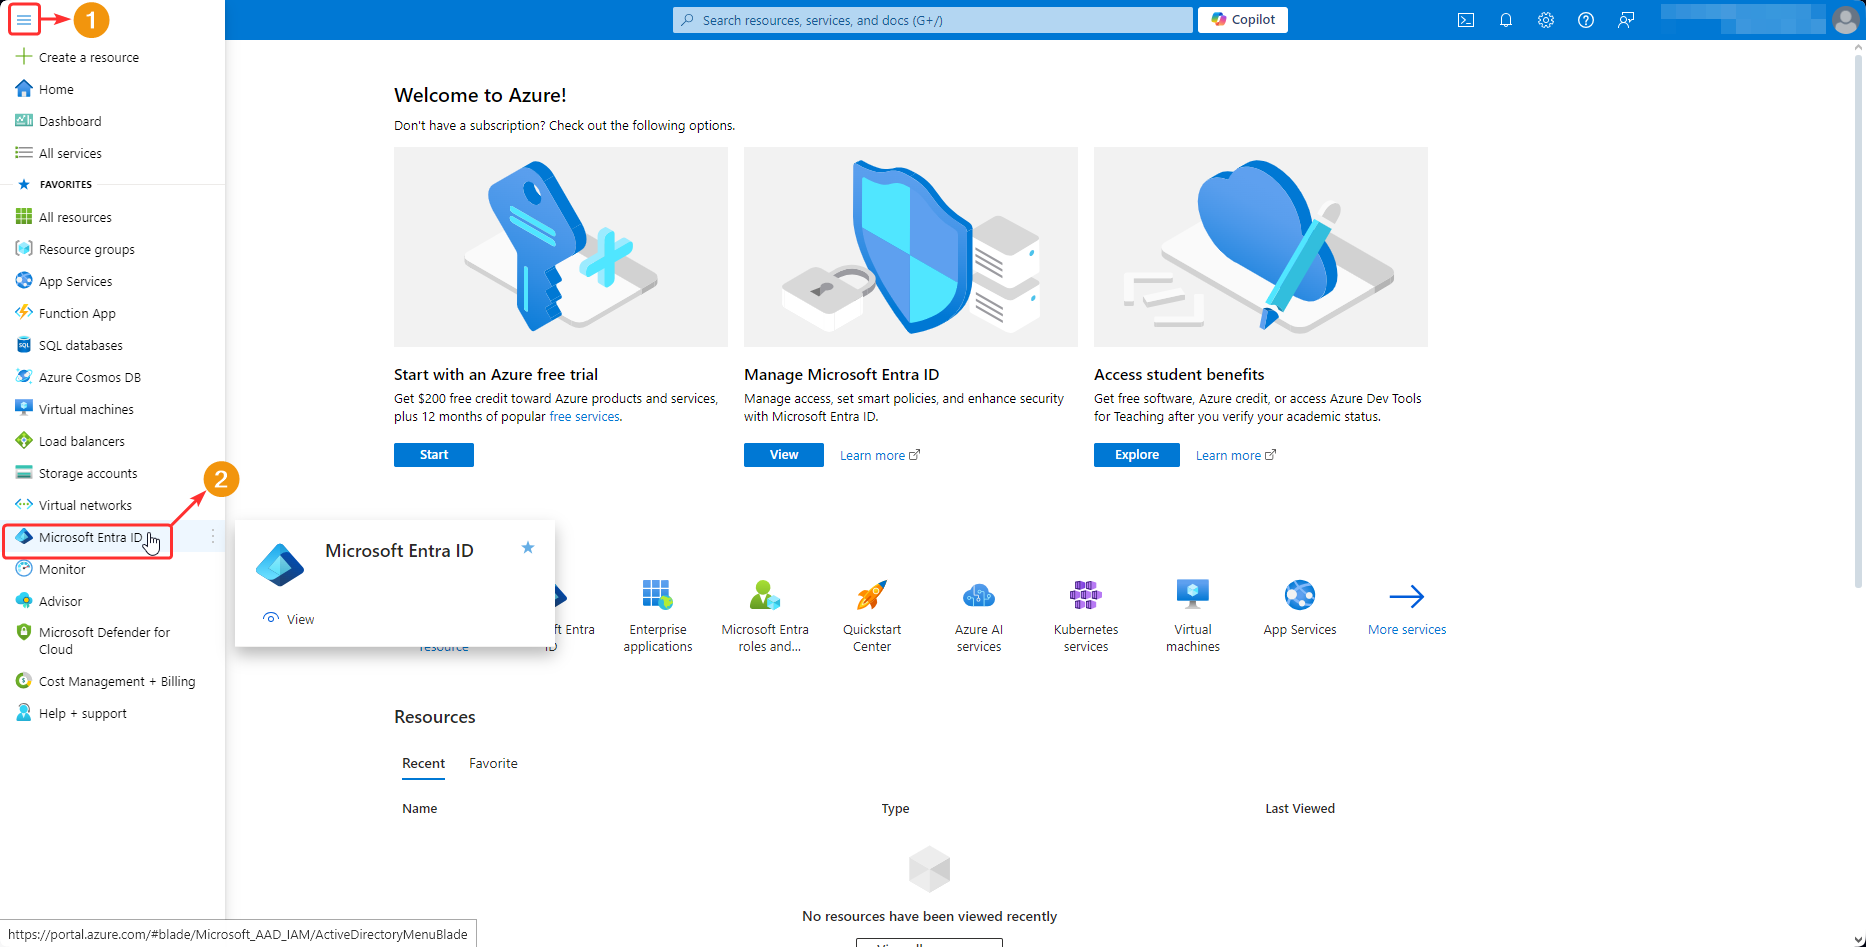
- Open the “Manage” options group.
- Select “Business Applications.”

After accessing the “Business Applications” section, you must click on the “New Application” button. Create an empty application with a custom name to later set its configuration.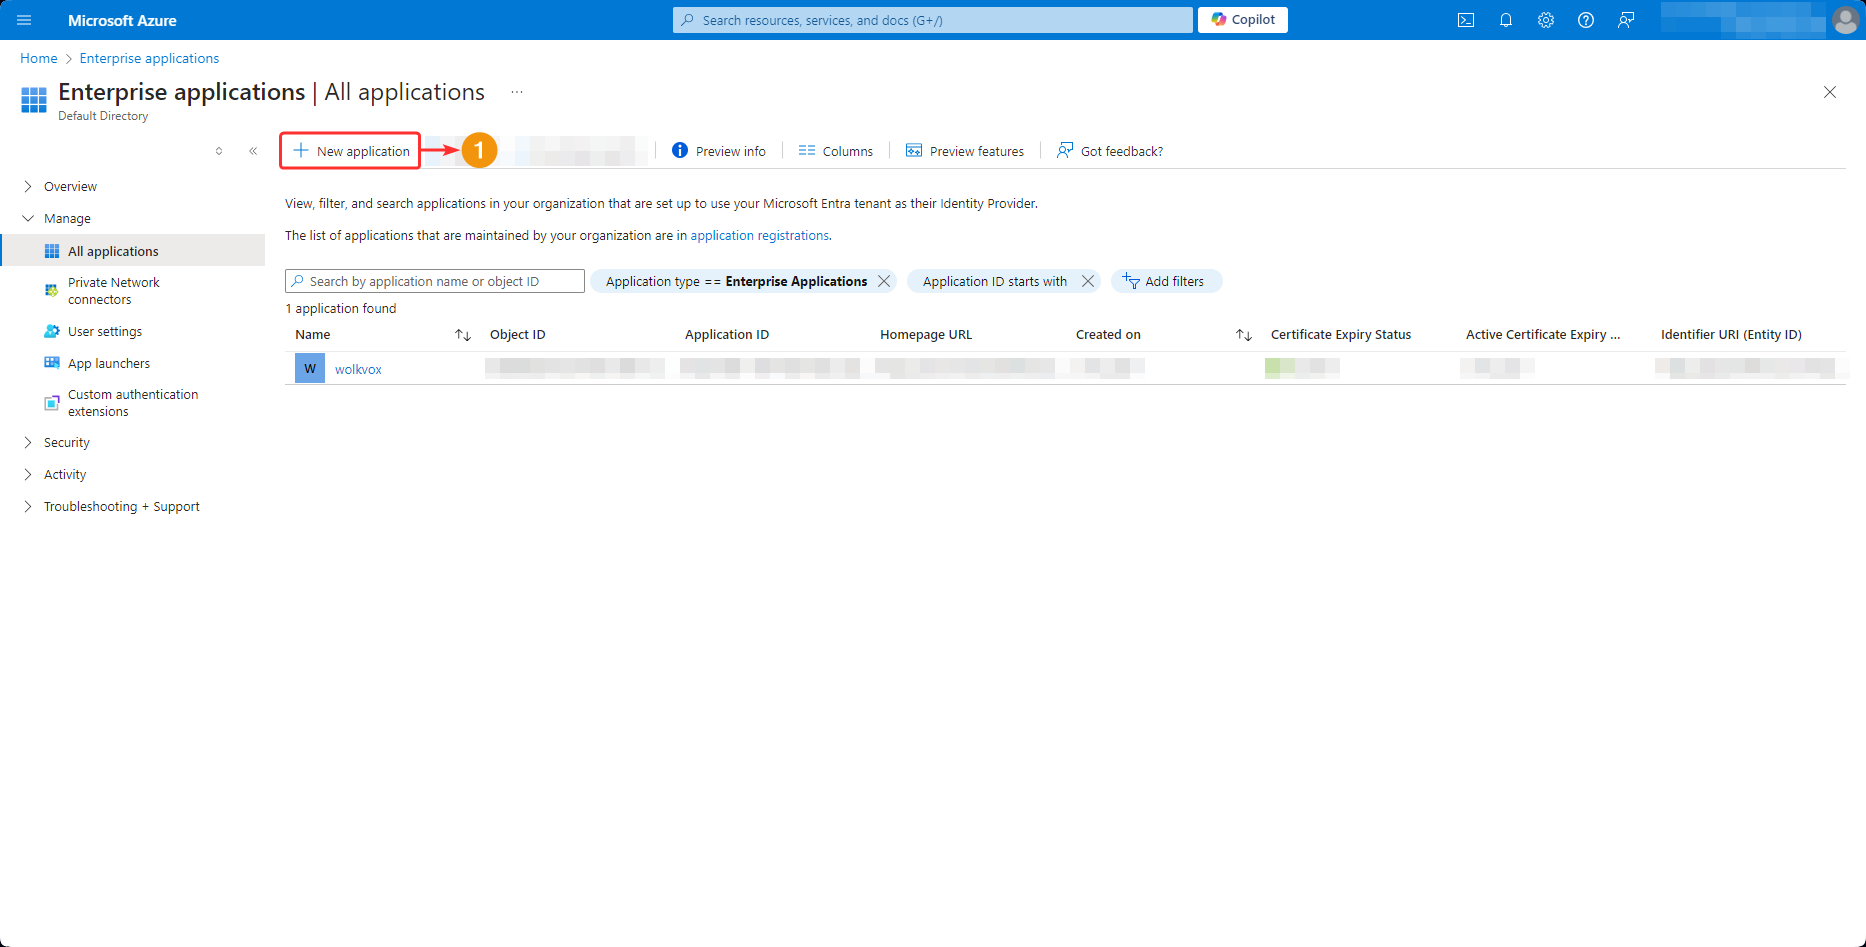
Access the new application by clicking on its name.

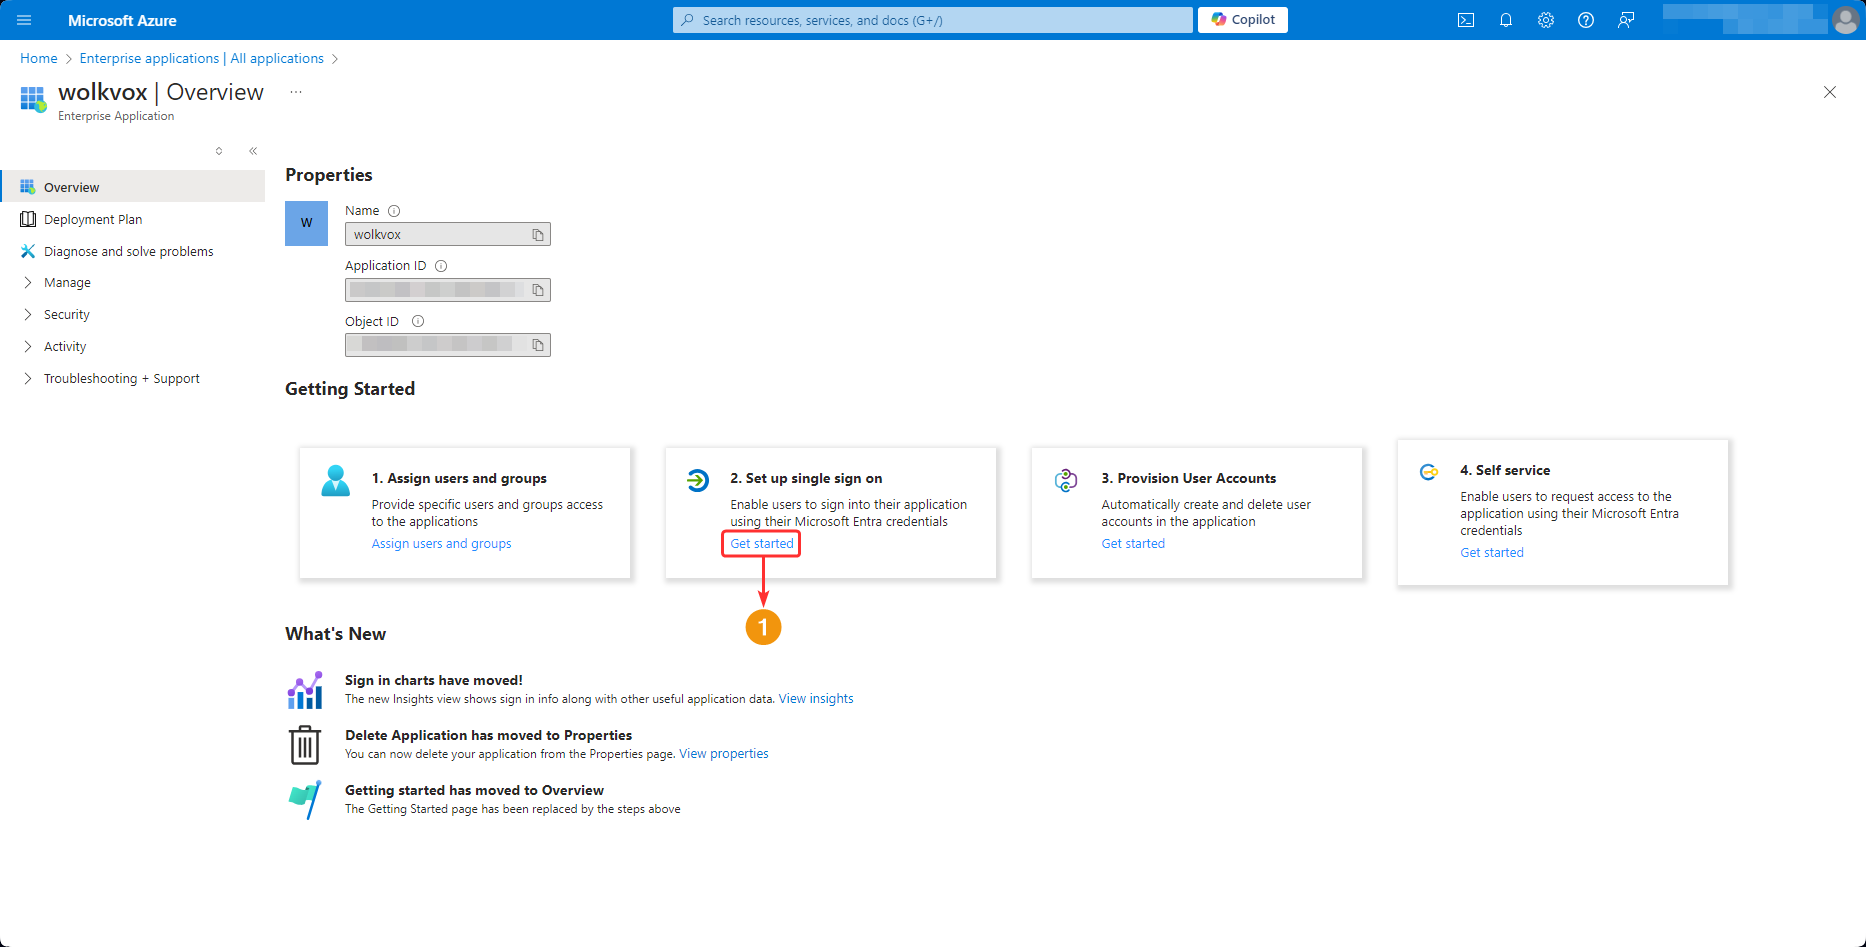
Access the settings by clicking the “Introduction” button located on the “Set up single sign-on” card.
To access the configuration of this authentication method, follow these steps:
- Access the wolkvox Manager settings.
- Go to the “Users and Profiles” tab.
- Go to the “SSO” tab.
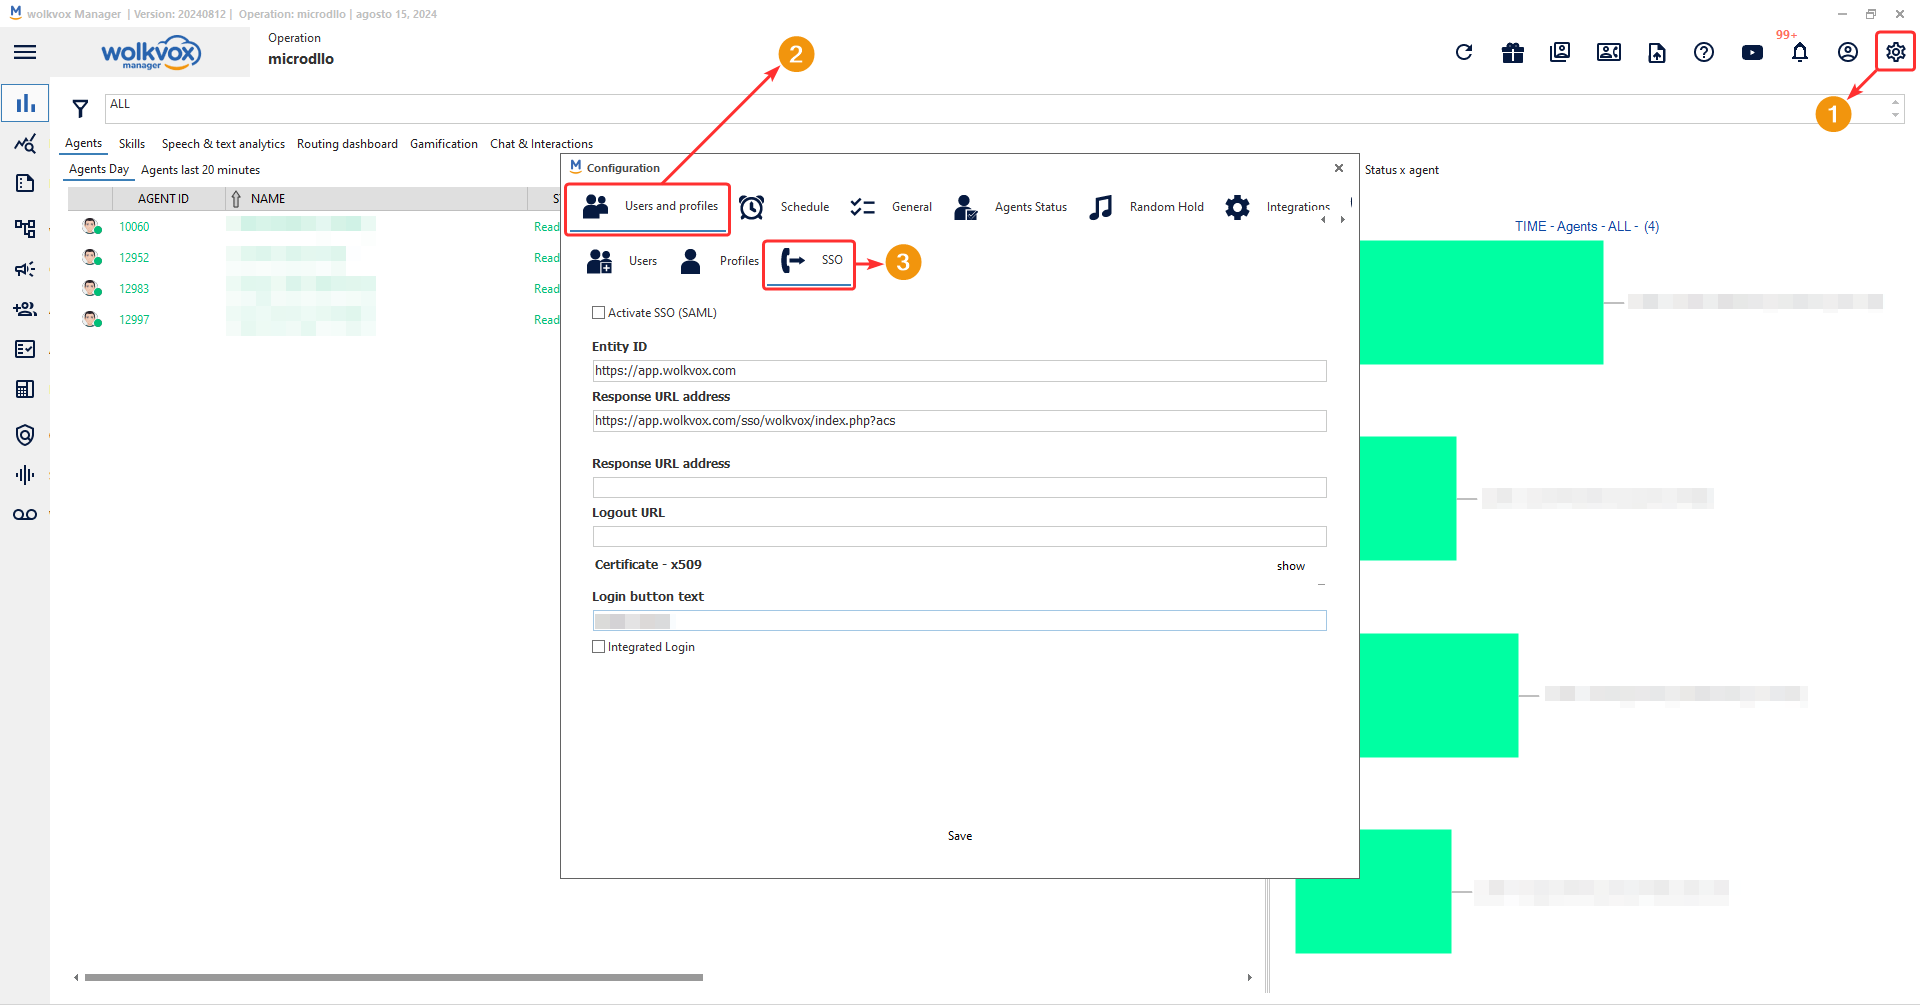
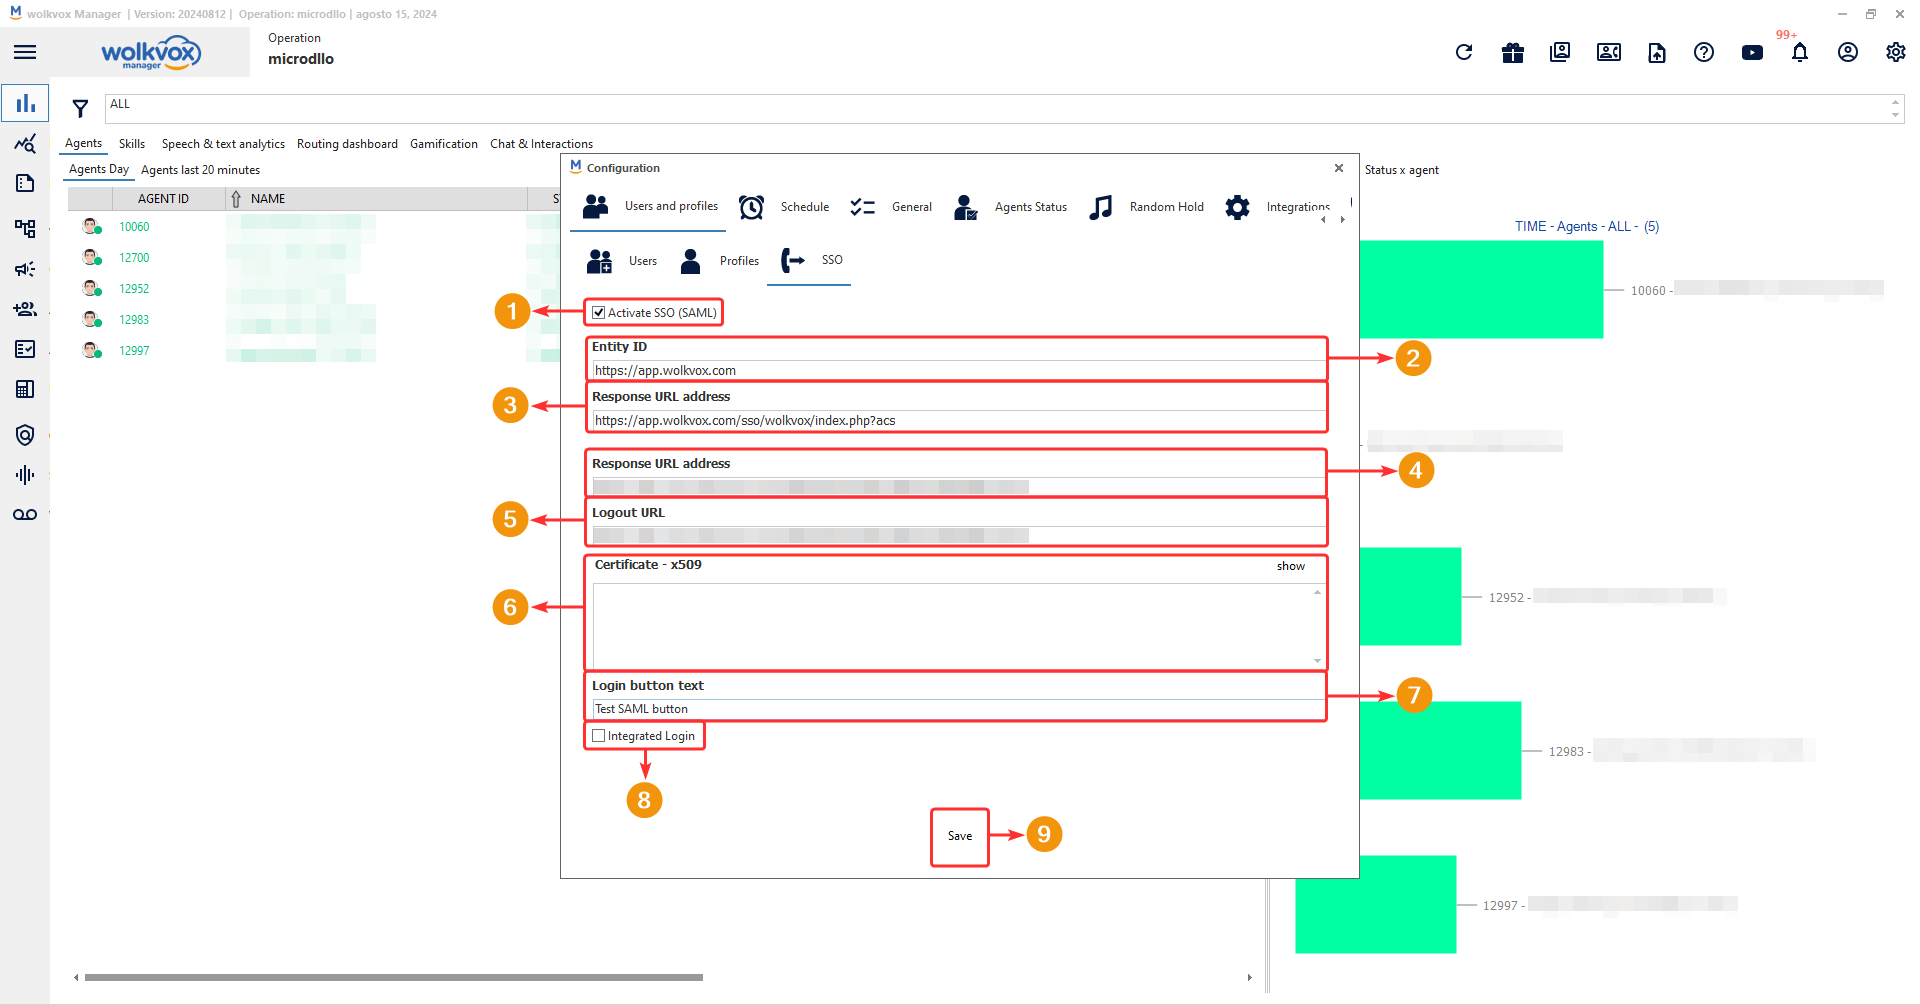
- Enable or disable SAML authentication.
- Entity ID that you must enter in the application configuration in Azure (in the “Identifier (Entity ID)” field).
- Reply URL that you must enter in the application configuration in Azure (in the “Reply URL (Assertion Consumer Service URL)” field).
- Reply URL that you must bring from the Azure application configuration panel (it is the “Sign-in URL” field).
- Sign-out URL that you must bring from the Azure application configuration panel (it is the “Sign-out URL” field).
- Certificate that you must download from the application configuration panel in Azure. This is downloaded from the “Download” button in the “Certificate (Base64)” option.
- In the “Login button text” field, you must specify the name that will be displayed on the login button in wolkvox Manager and Agent.
- The “Integrated login” checkbox allows you to open a browser specific to the wolkvox tool if it is active. Otherwise, a window will open in the browser that has the user as the default system user.
- Don’t forget to click “Save” to apply the changes.
The following two fields are obtained from Wolkvox Manager as observed in the previous image.
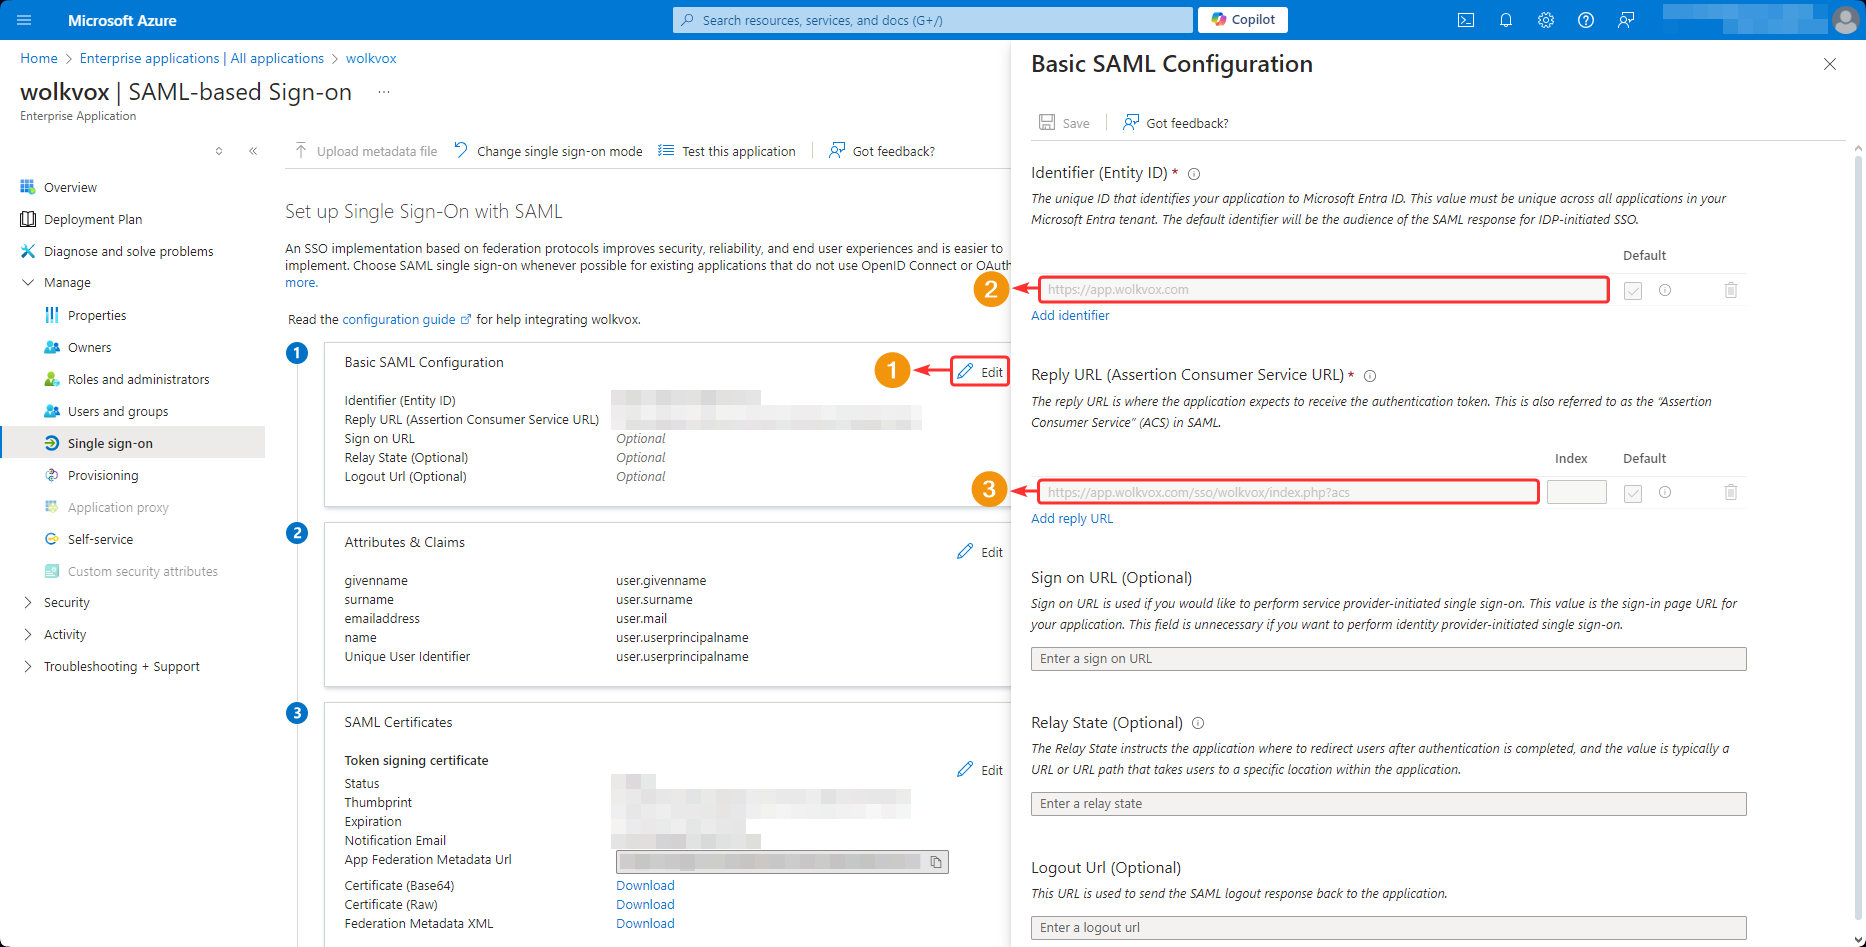
- Click on “Edit” in the basic SAML configuration section.
- Enter the Identity ID.
- Enter the Response URL.
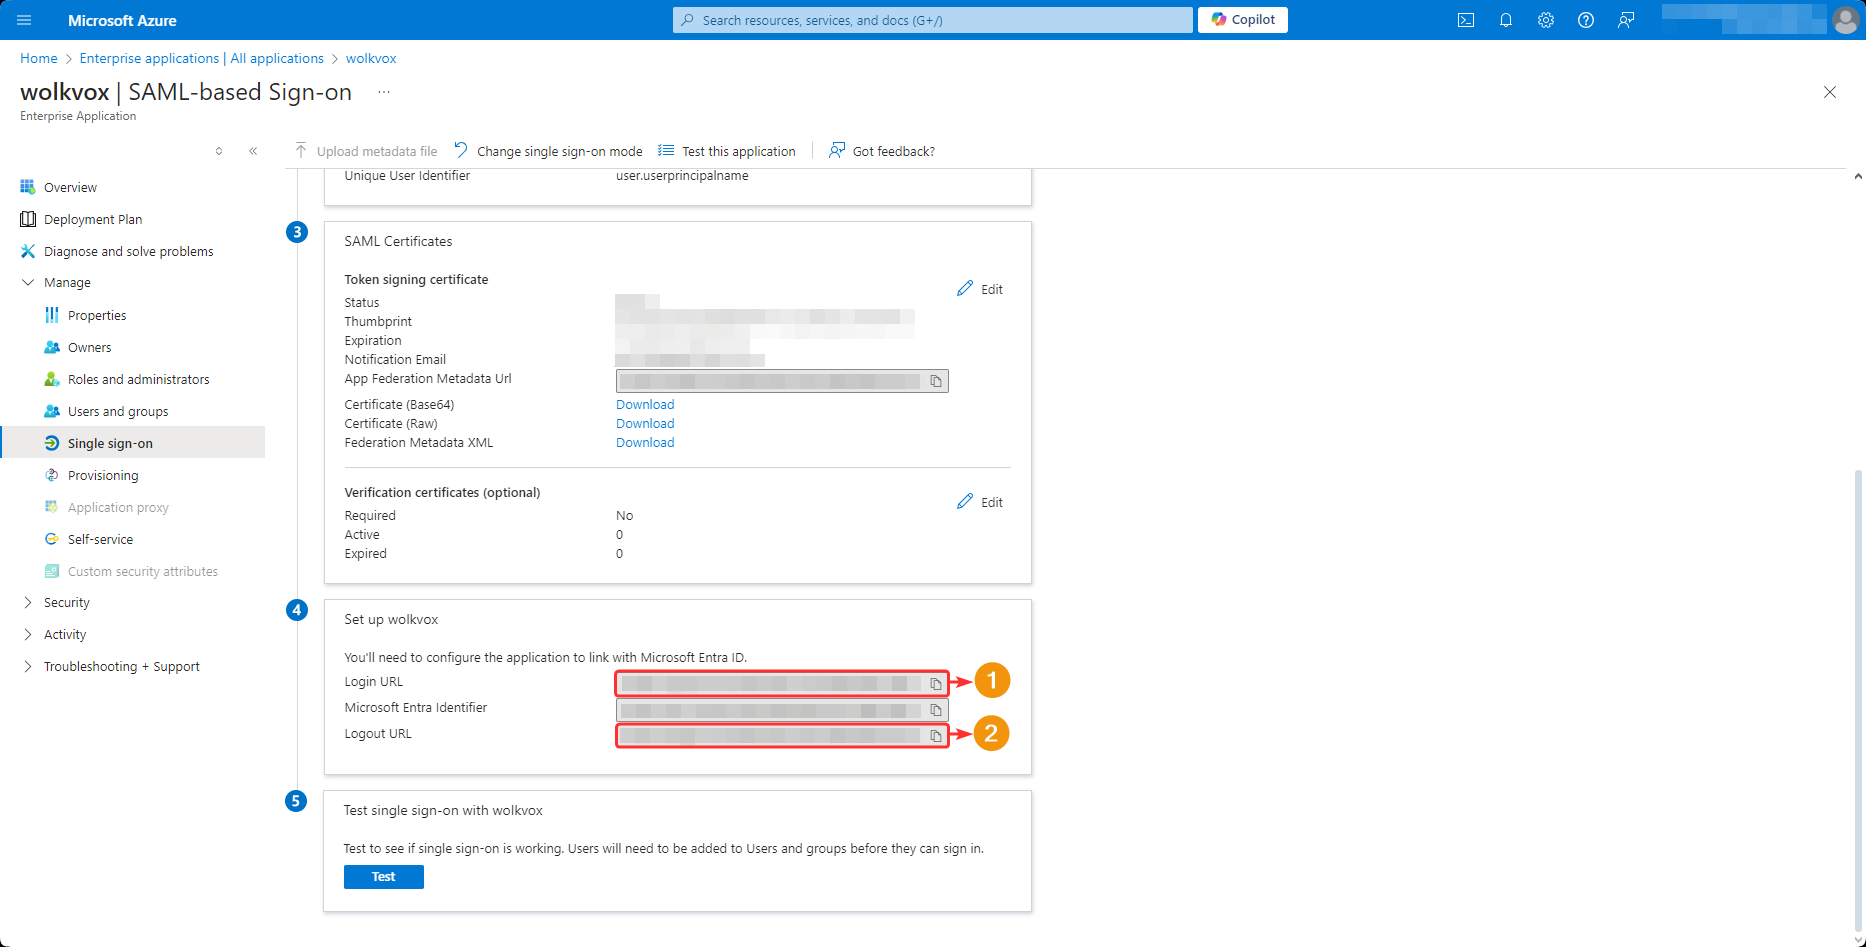
The following fields are the ones you will need to take to Wolkvox Manager:
- The value of the “Login URL” field should be copied and taken to the “Response URL” field in Wolkvox Manager.
- The value of the “Logout URL” field should be copied and taken to the “Logout URL” field in Wolkvox Manager.
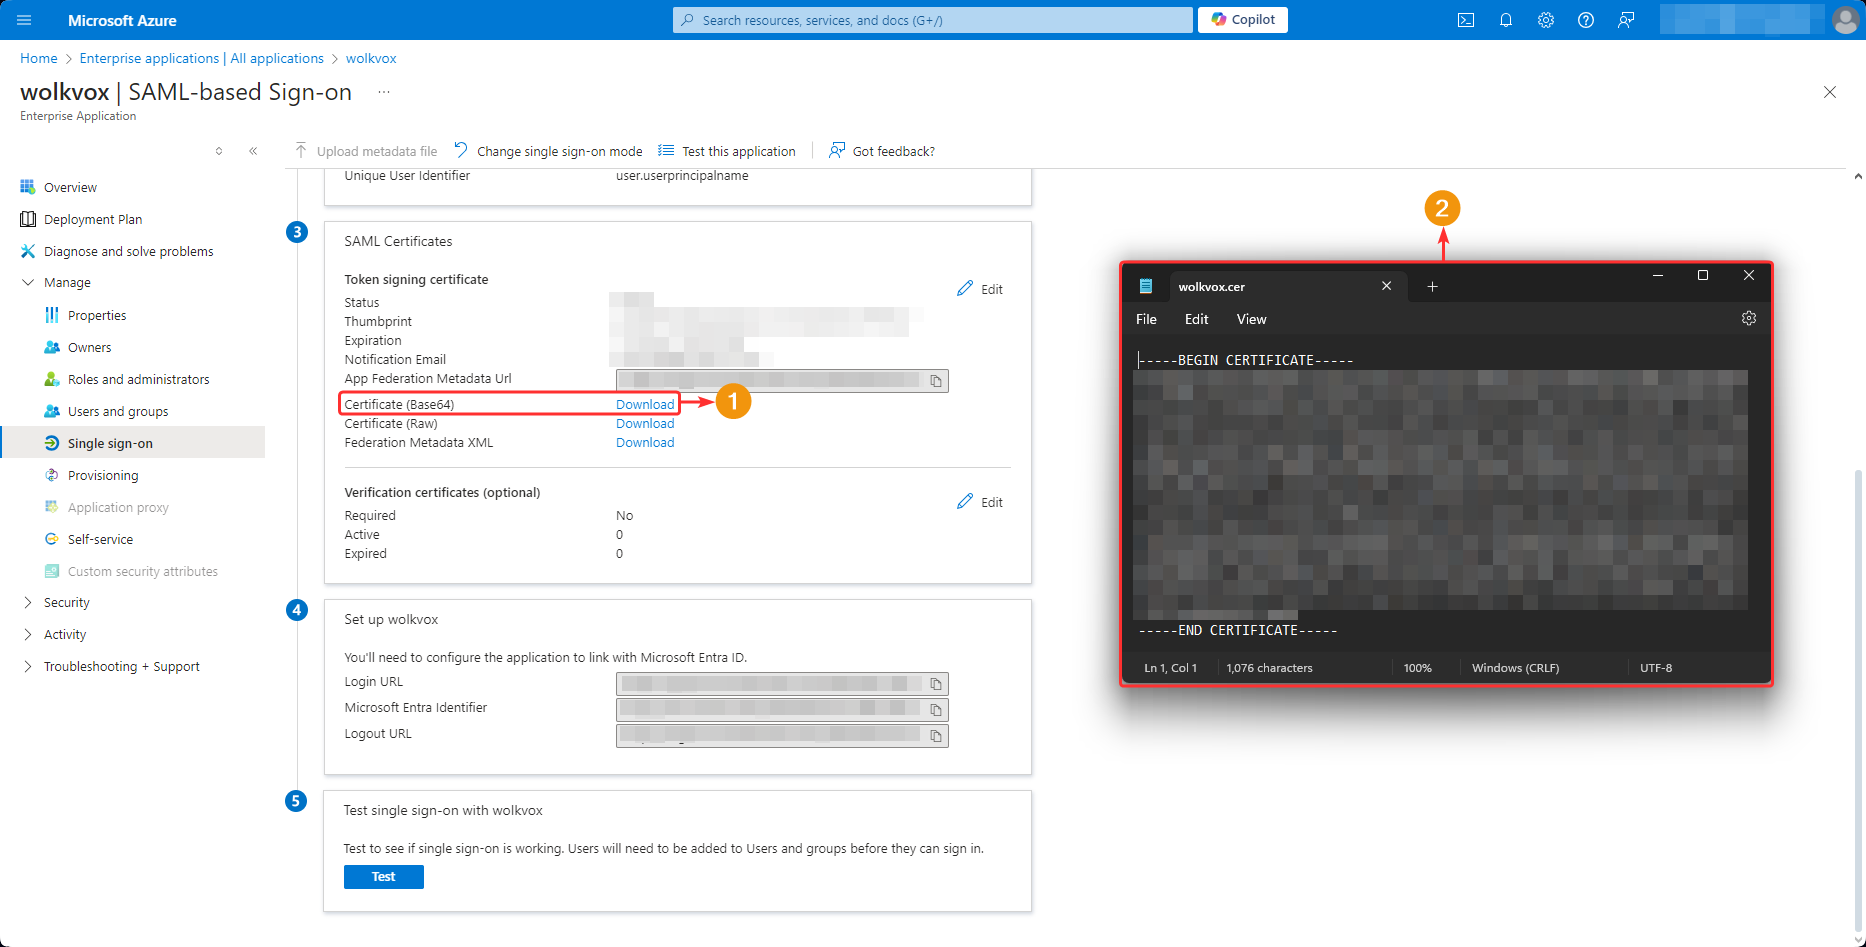
- You can download the certificate from the “Download” option under “Certificate (Base64)” in the information panel of your Azure application.
- A file will be downloaded, which you can open with Notepad and copy all the content. Then, paste it into the “Certificate – x509” field in Wolkvox Manager.
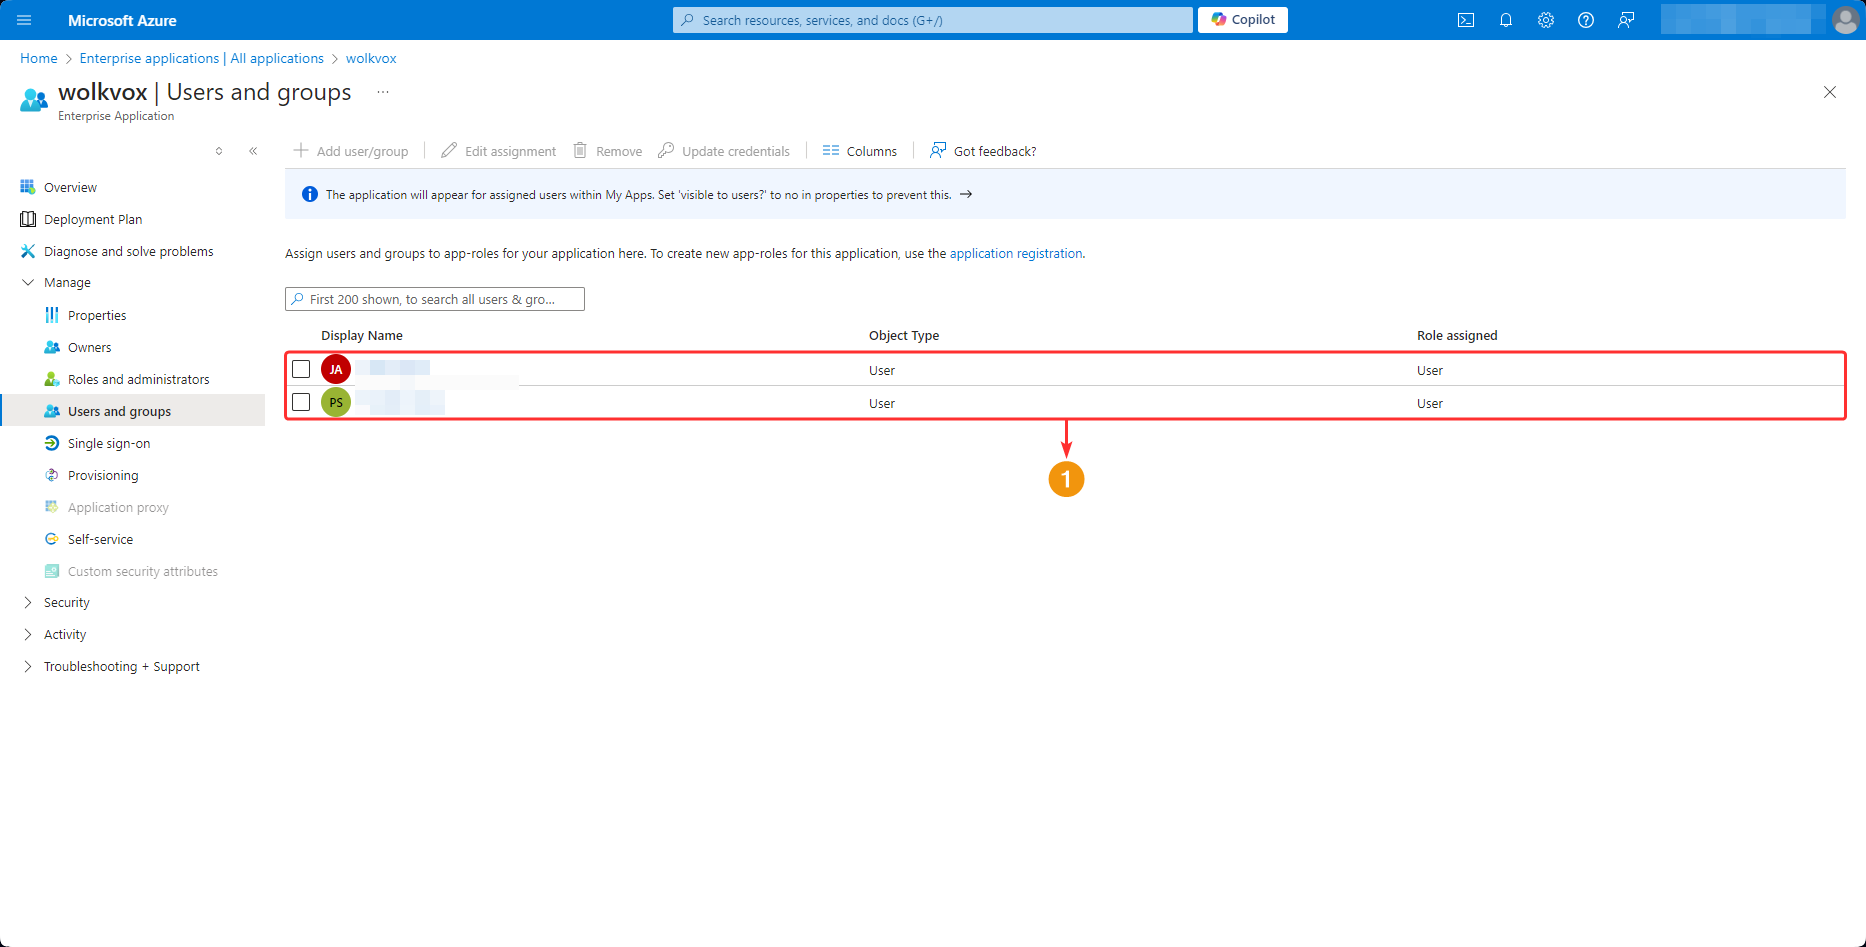
Now you need to create and assign users who will have access to the Wolkvox Manager and Agent applications.
- Go to the “Manage” menu.
- Go to the “Users and Groups” option.
- Add the desired users.

Now you have all your agents in one place, easily manageable.
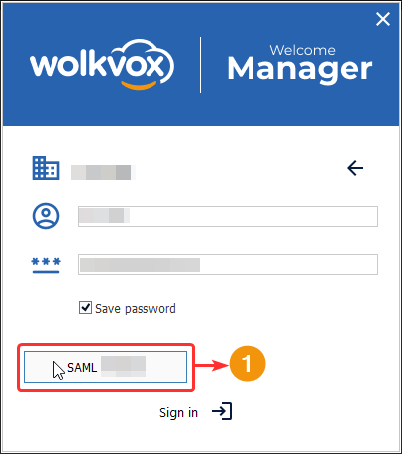
The SAML login button will appear in the wolkvox Manager, using the name assigned by the administrator.
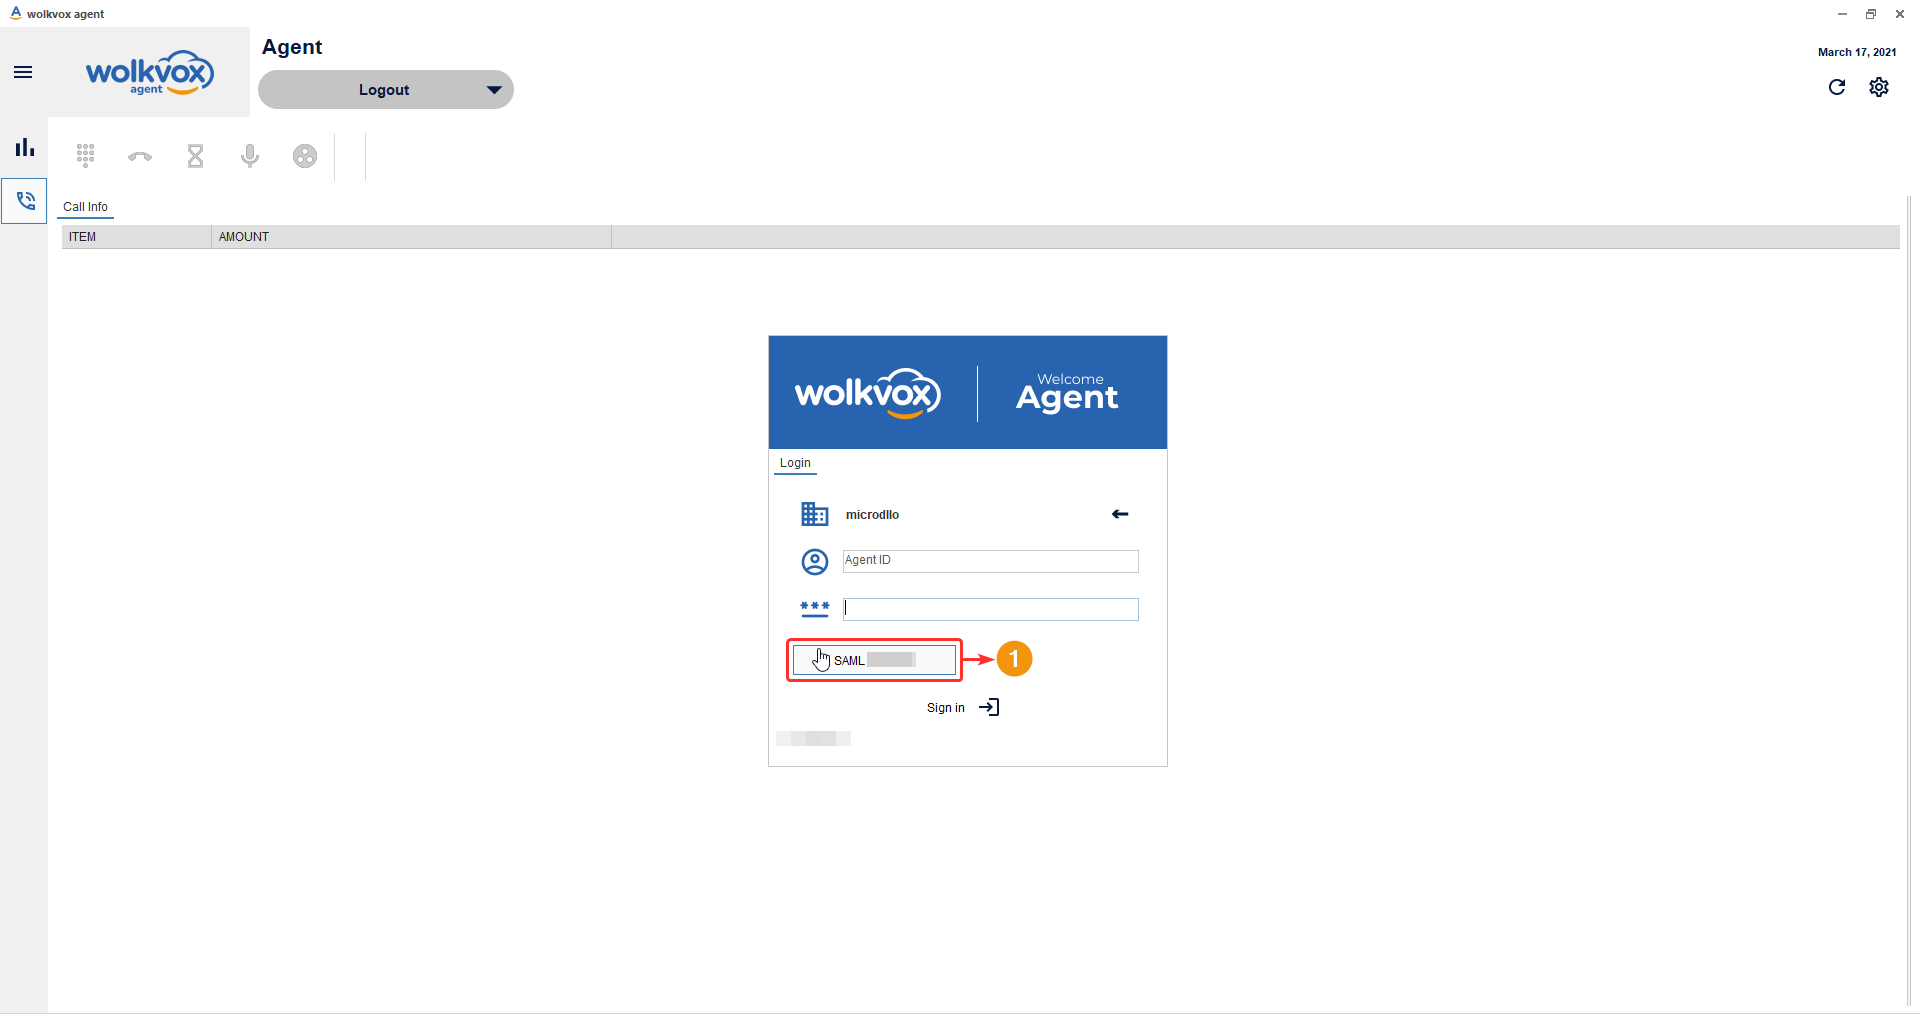
A wolkvox Agent will display the SAML login button according to the name assigned by the administrator.
If you enable the checkbox that activates the integrated browser in the SSO SAML configuration in Wolkvox Manager, it will be displayed like this: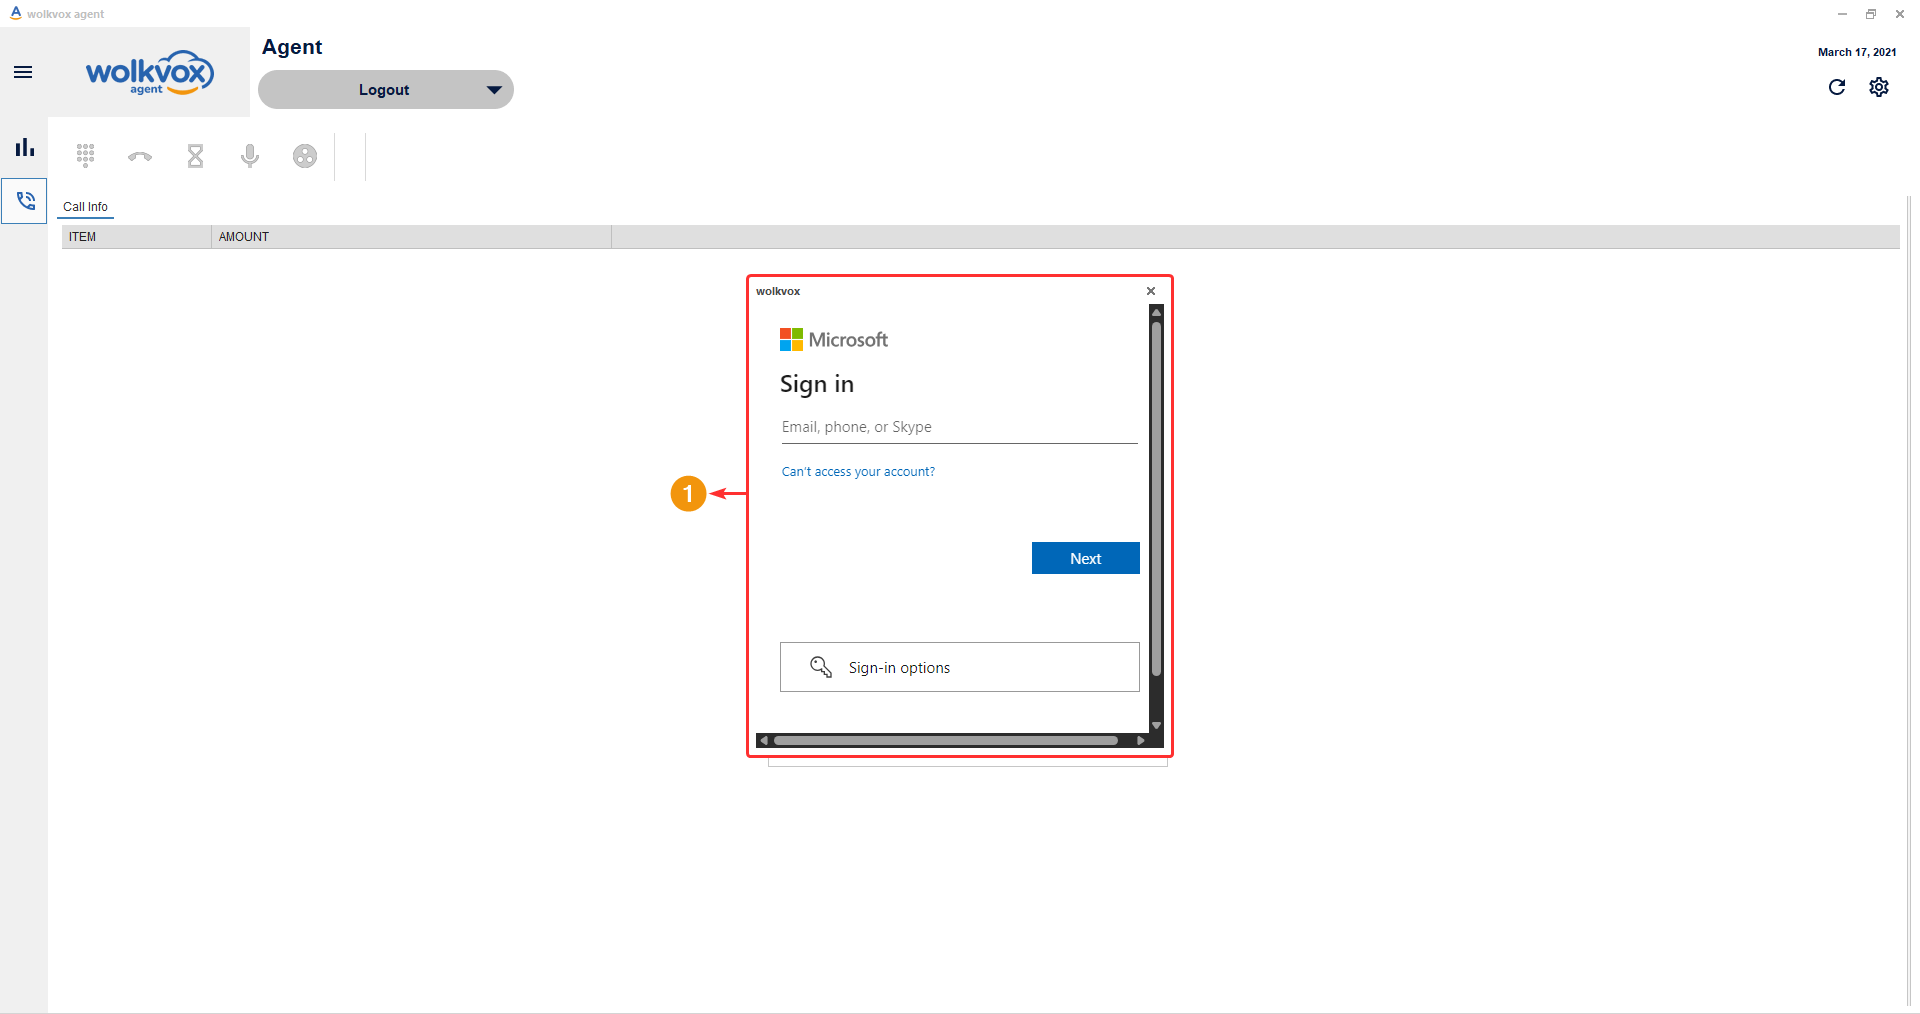
However, if the built-in browser checkbox is unchecked, the system’s default browser will open: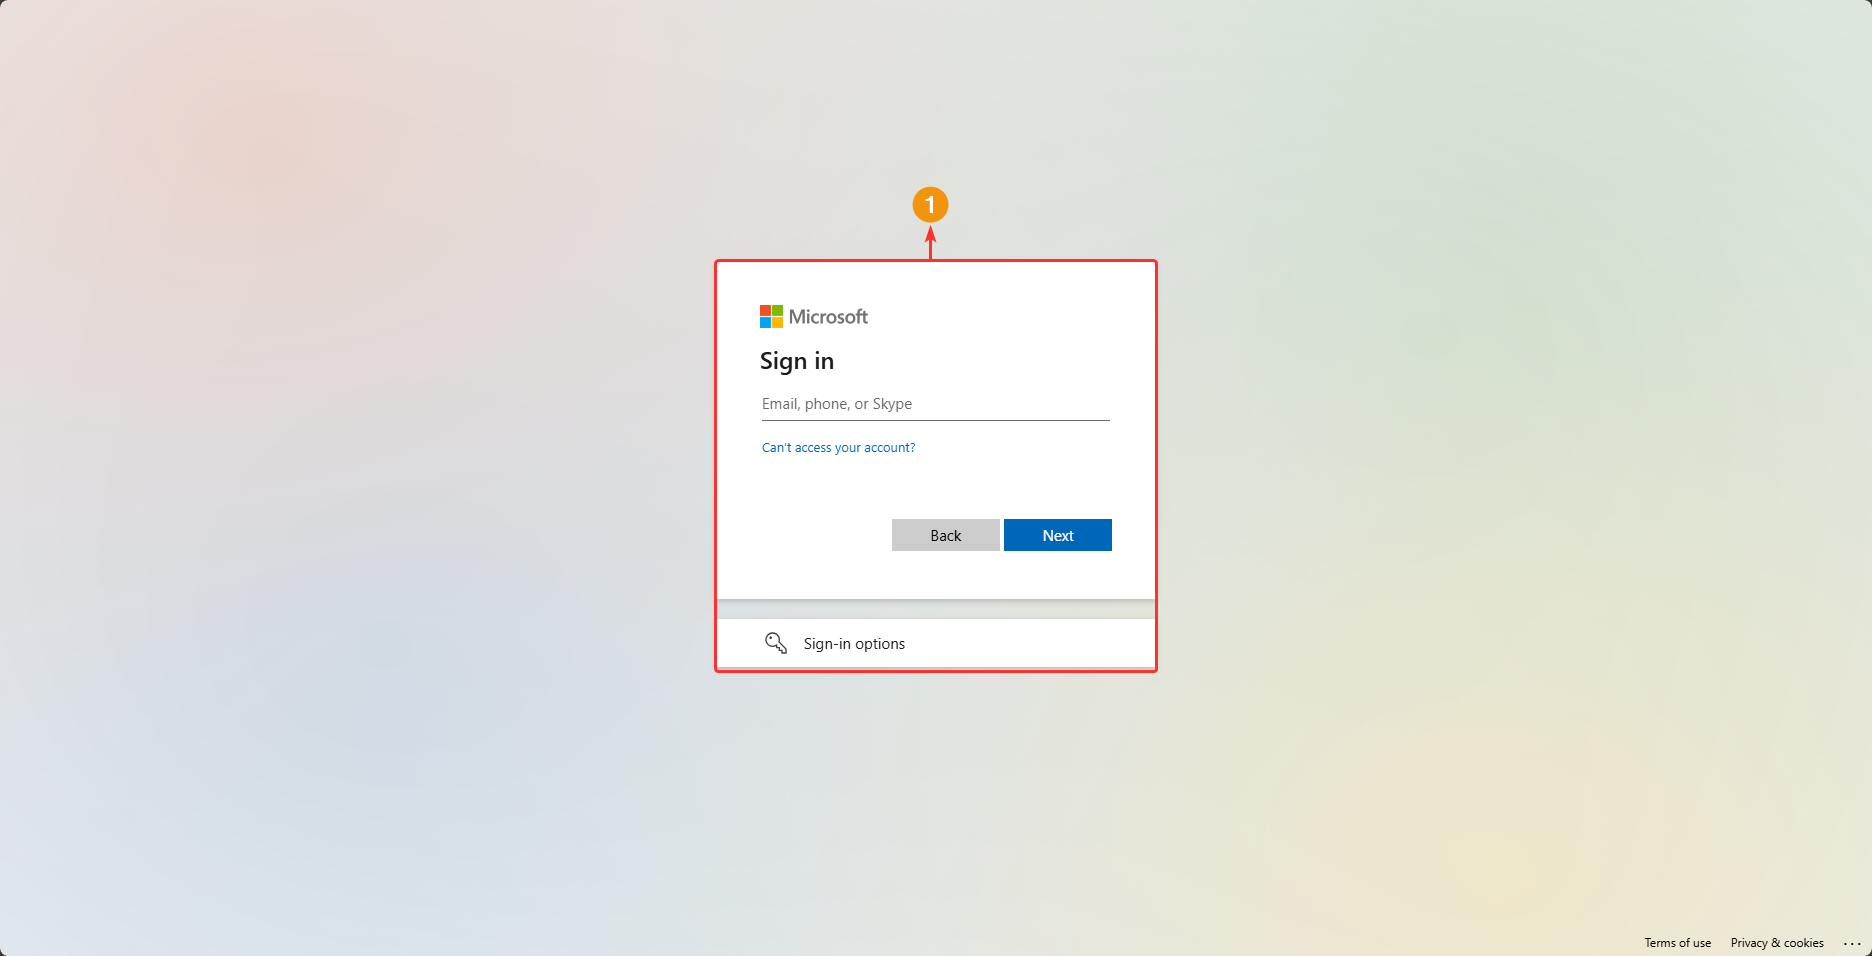
New Real-time Chat Reporting API #
- This report provides complete and real-time information of all chats that are active in your operation at the time of the query.
- It allows administrators to monitor and manage interactions in real time, ensuring that agents are responding promptly and effectively, which improves operational efficiency and customer satisfaction.
- To access the official API documentation, click here.
- You can also access the public collection of Postman Collections and then access the “Real time” reporting group. Click here to go.
New Real-Time Interaction Reporting API #
- This report provides complete and real-time information on all interactions that are active in your operation at the time of the query.
- It allows administrators to monitor and manage interactions in real time, ensuring that agents are responding promptly and effectively, which improves operational efficiency and customer satisfaction.
- To access the official API documentation, click here.
- You can also access the public collection of Postman Collections and then access the “Real time” reporting group. Click here to go.
